Ribs are a BBQ staple. Even Fat Bastard can't help but sing, "I want my baby back baby back baby back…" Here at MMB, we make some pretty darn good ones too. And now we want to share with you how we make them. Please note that this is a guideline recipe on how we make ours. Copy it exactly or put your own twist on it. We are here to share information, and we hope you can learn something from it.
Things that you will need:
- Pork Ribs (Spare or Baby Backs)
- Olive Oil
- Kosher salt
- Black Pepper
- Smoked paprika
- Garlic Powder
- Onion Powder
- Red pepper powder
- Brown sugar
- Squeeze butter
- One bag of Cowboy Brand Lump Charcoal
- Apple, Cherry and Oak wood chucks
The rub you mix for our ribs will depend on how many racks you plan on making, which is why there is not a measured amount for the spices. You will want to make sure the ribs are evenly coated and the rub is applied liberally. Too little will leave the meat under seasoned, too much will burn up on the cooker and leave a weird tasting crust. Let's start out by making a mix of black pepper and kosher salt, 50/50 should be the ratio used. Once you have this down, add some smoked paprika till your rub starts to get a nice red color. The paprika will not add any flavor to your ribs, it's more to achieve that nice red color. Add a touch of red pepper powder and a dash of a 50/50 mix of garlic and onion powder. Try our rub to make sure it fits your taste buds, add things to it as needed. We won't be mad if you take your own spin on things to create your own famous rib rub.
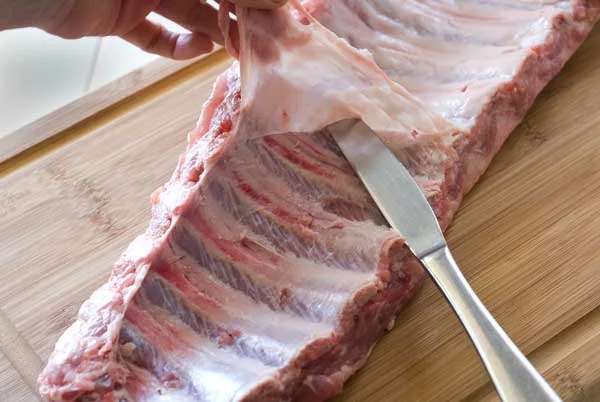
Next let's move on to getting the ribs clean and ready for the rub. Flip the ribs so that the meat part is facing down and remove the membrane. Yeah, we know it's gross, but you don't want to be eating that, do you? This can be done by using a butter knife and paper towels. If your ribs are cold it tends to be a lot easier to get the membrane off in one piece, which is the goal. If you can't get all of the membrane off it's not the end of the world. It may make it more difficult to add seasoning to the back, and make it tougher to cut, but it will taste all the same. Just do the best you can. At the end of the day if it tastes good that all that matters anyway, right?

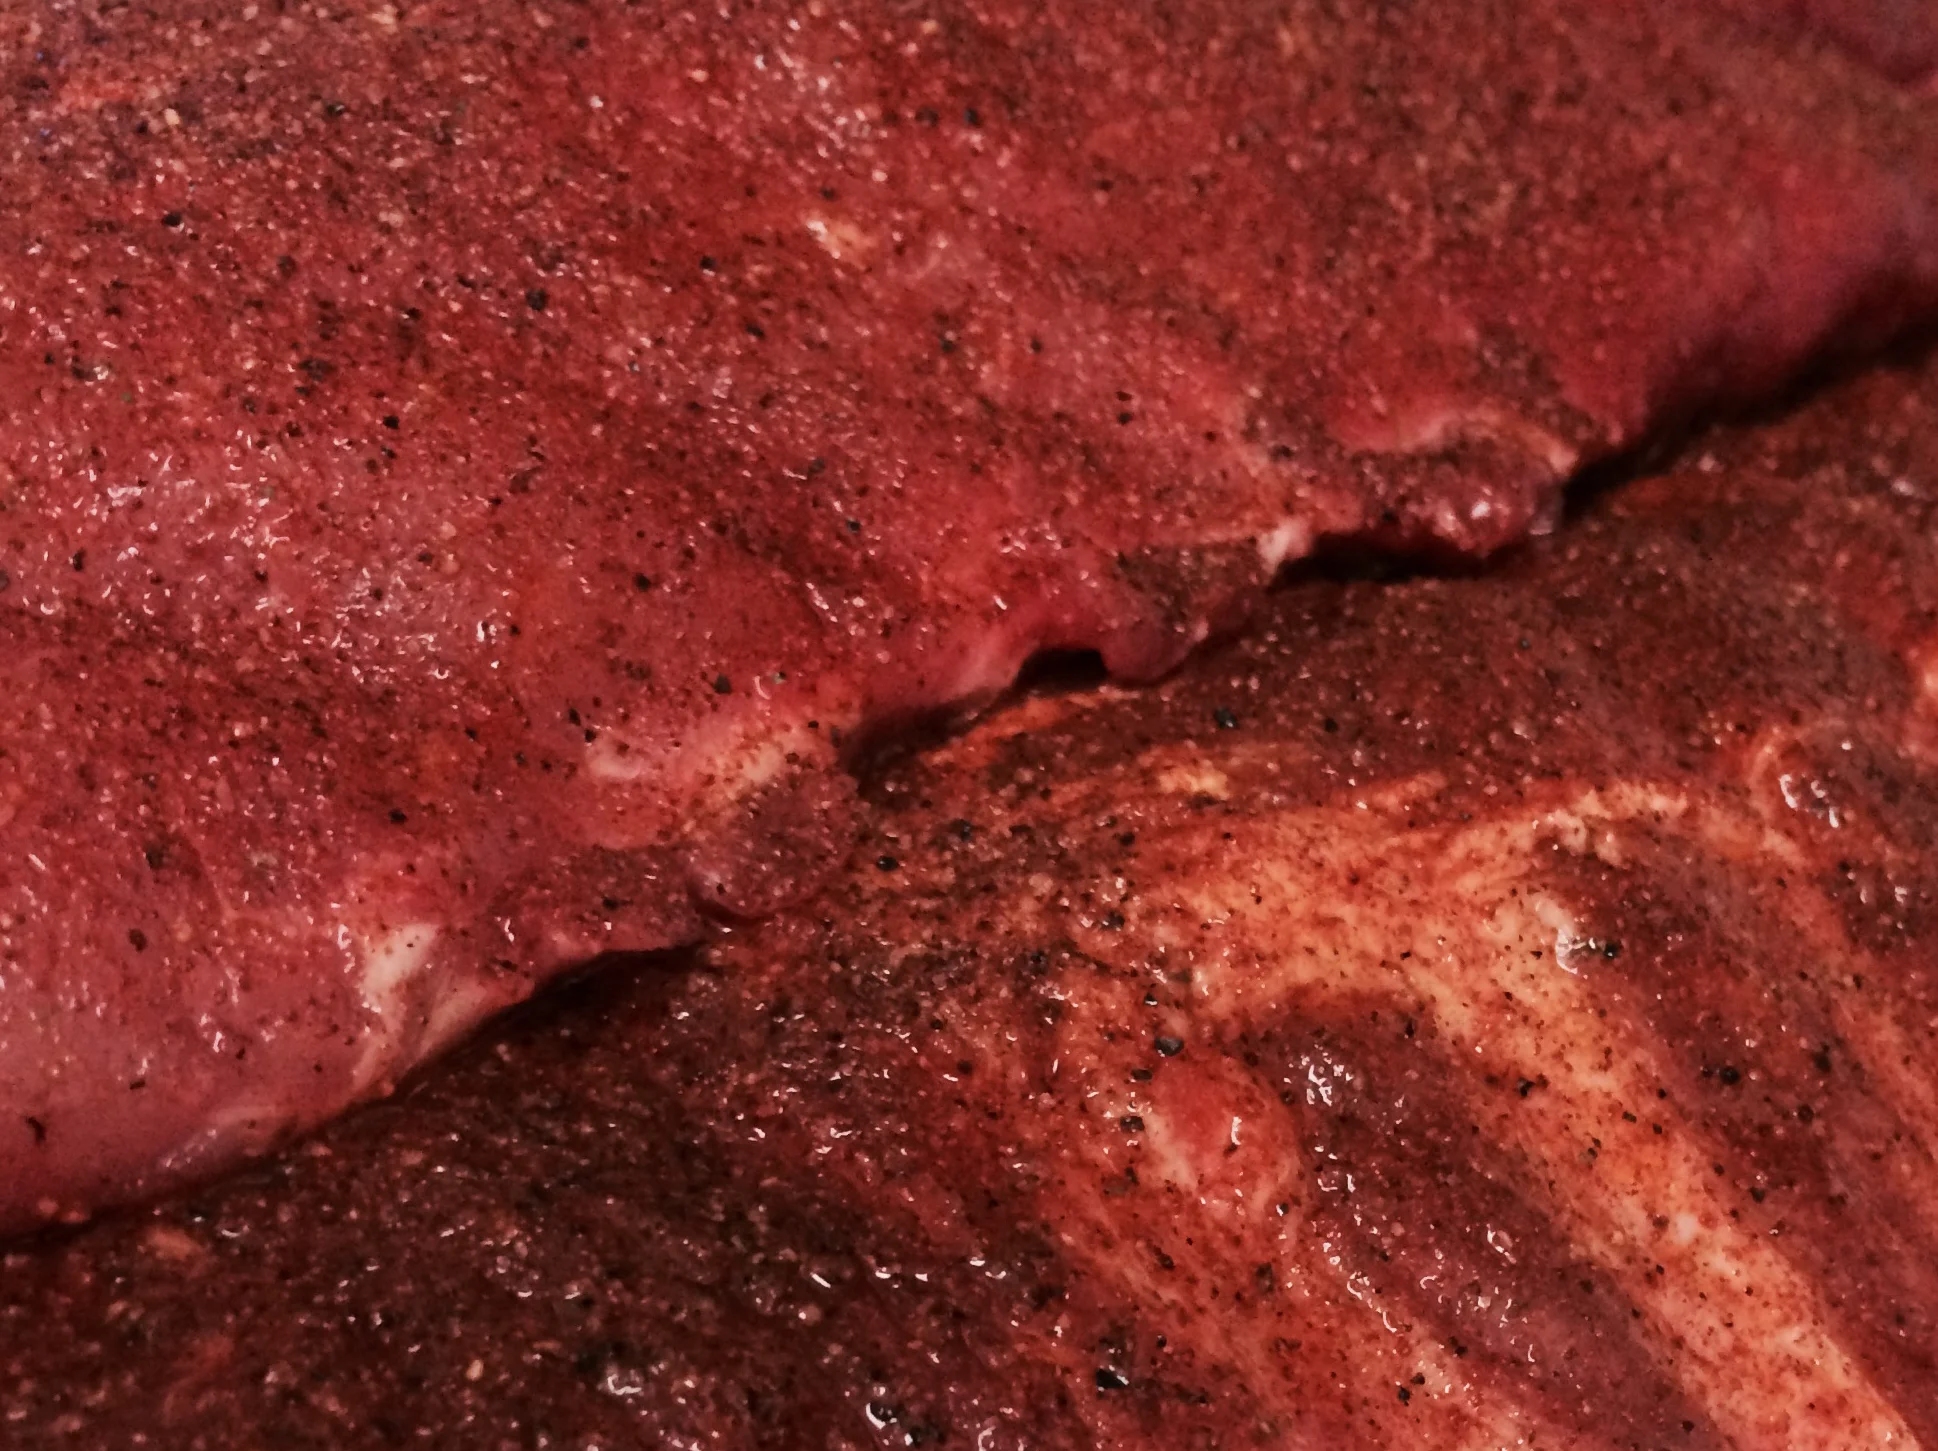
PRE RUB.
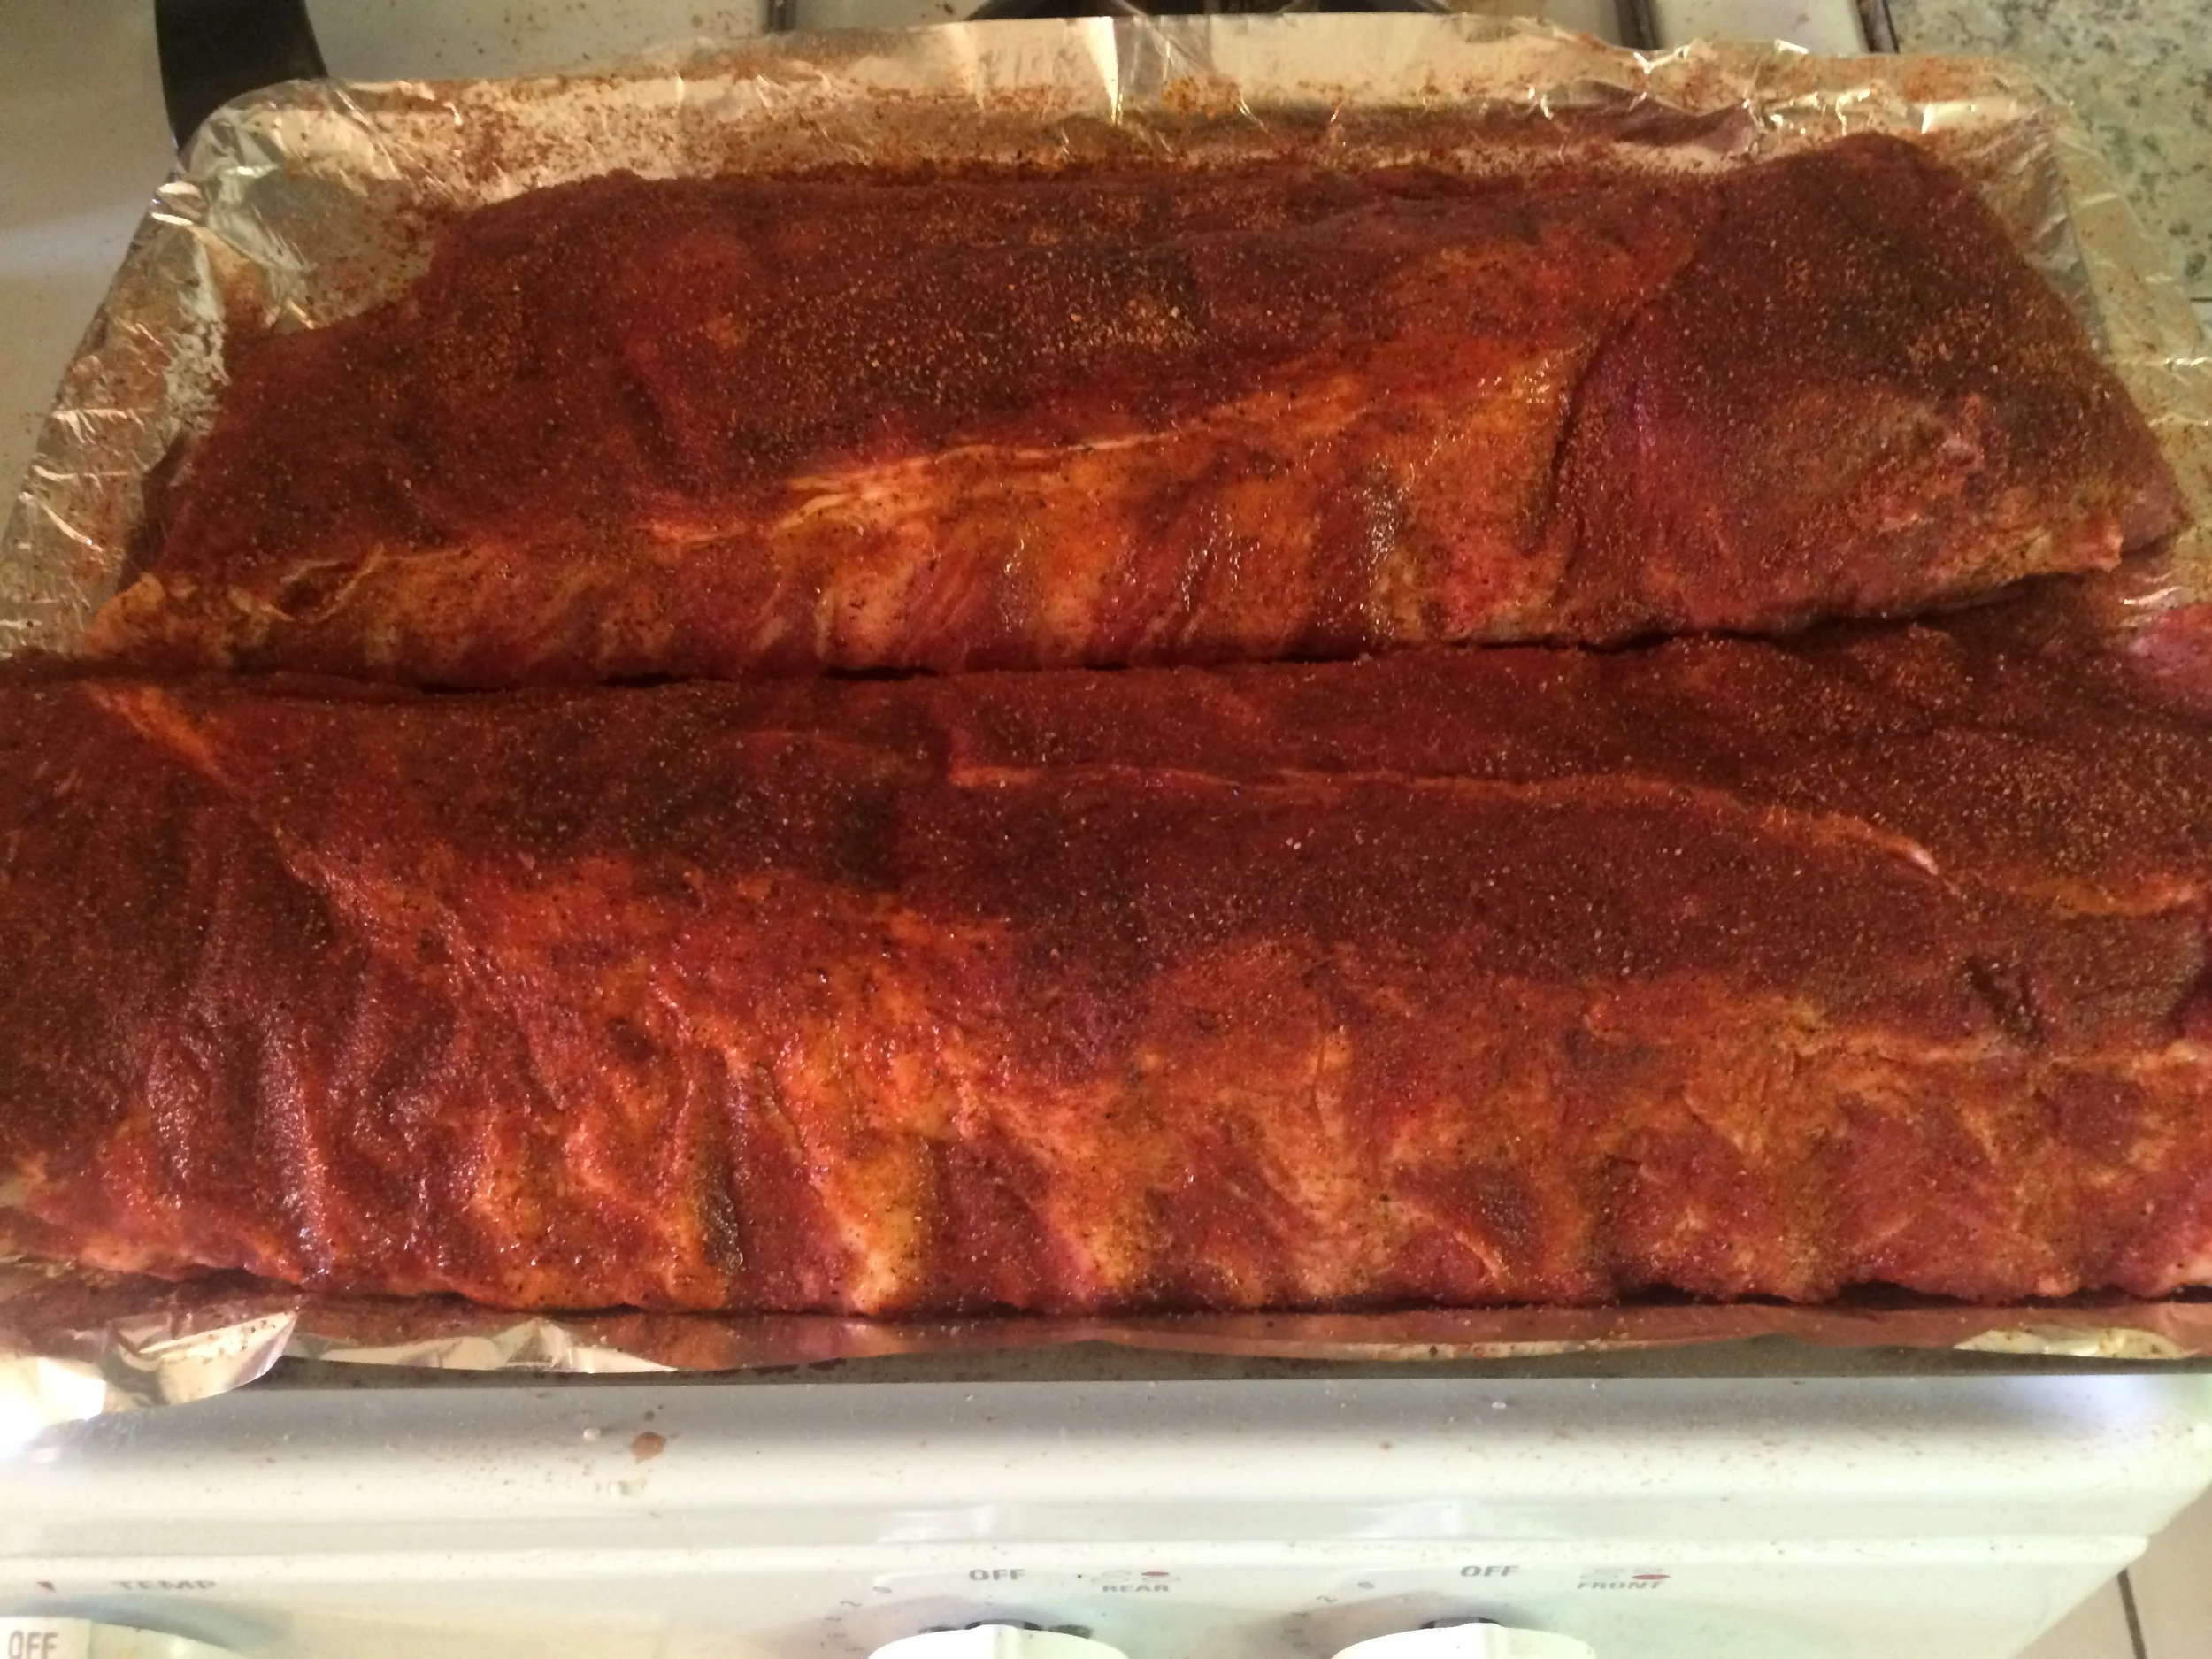
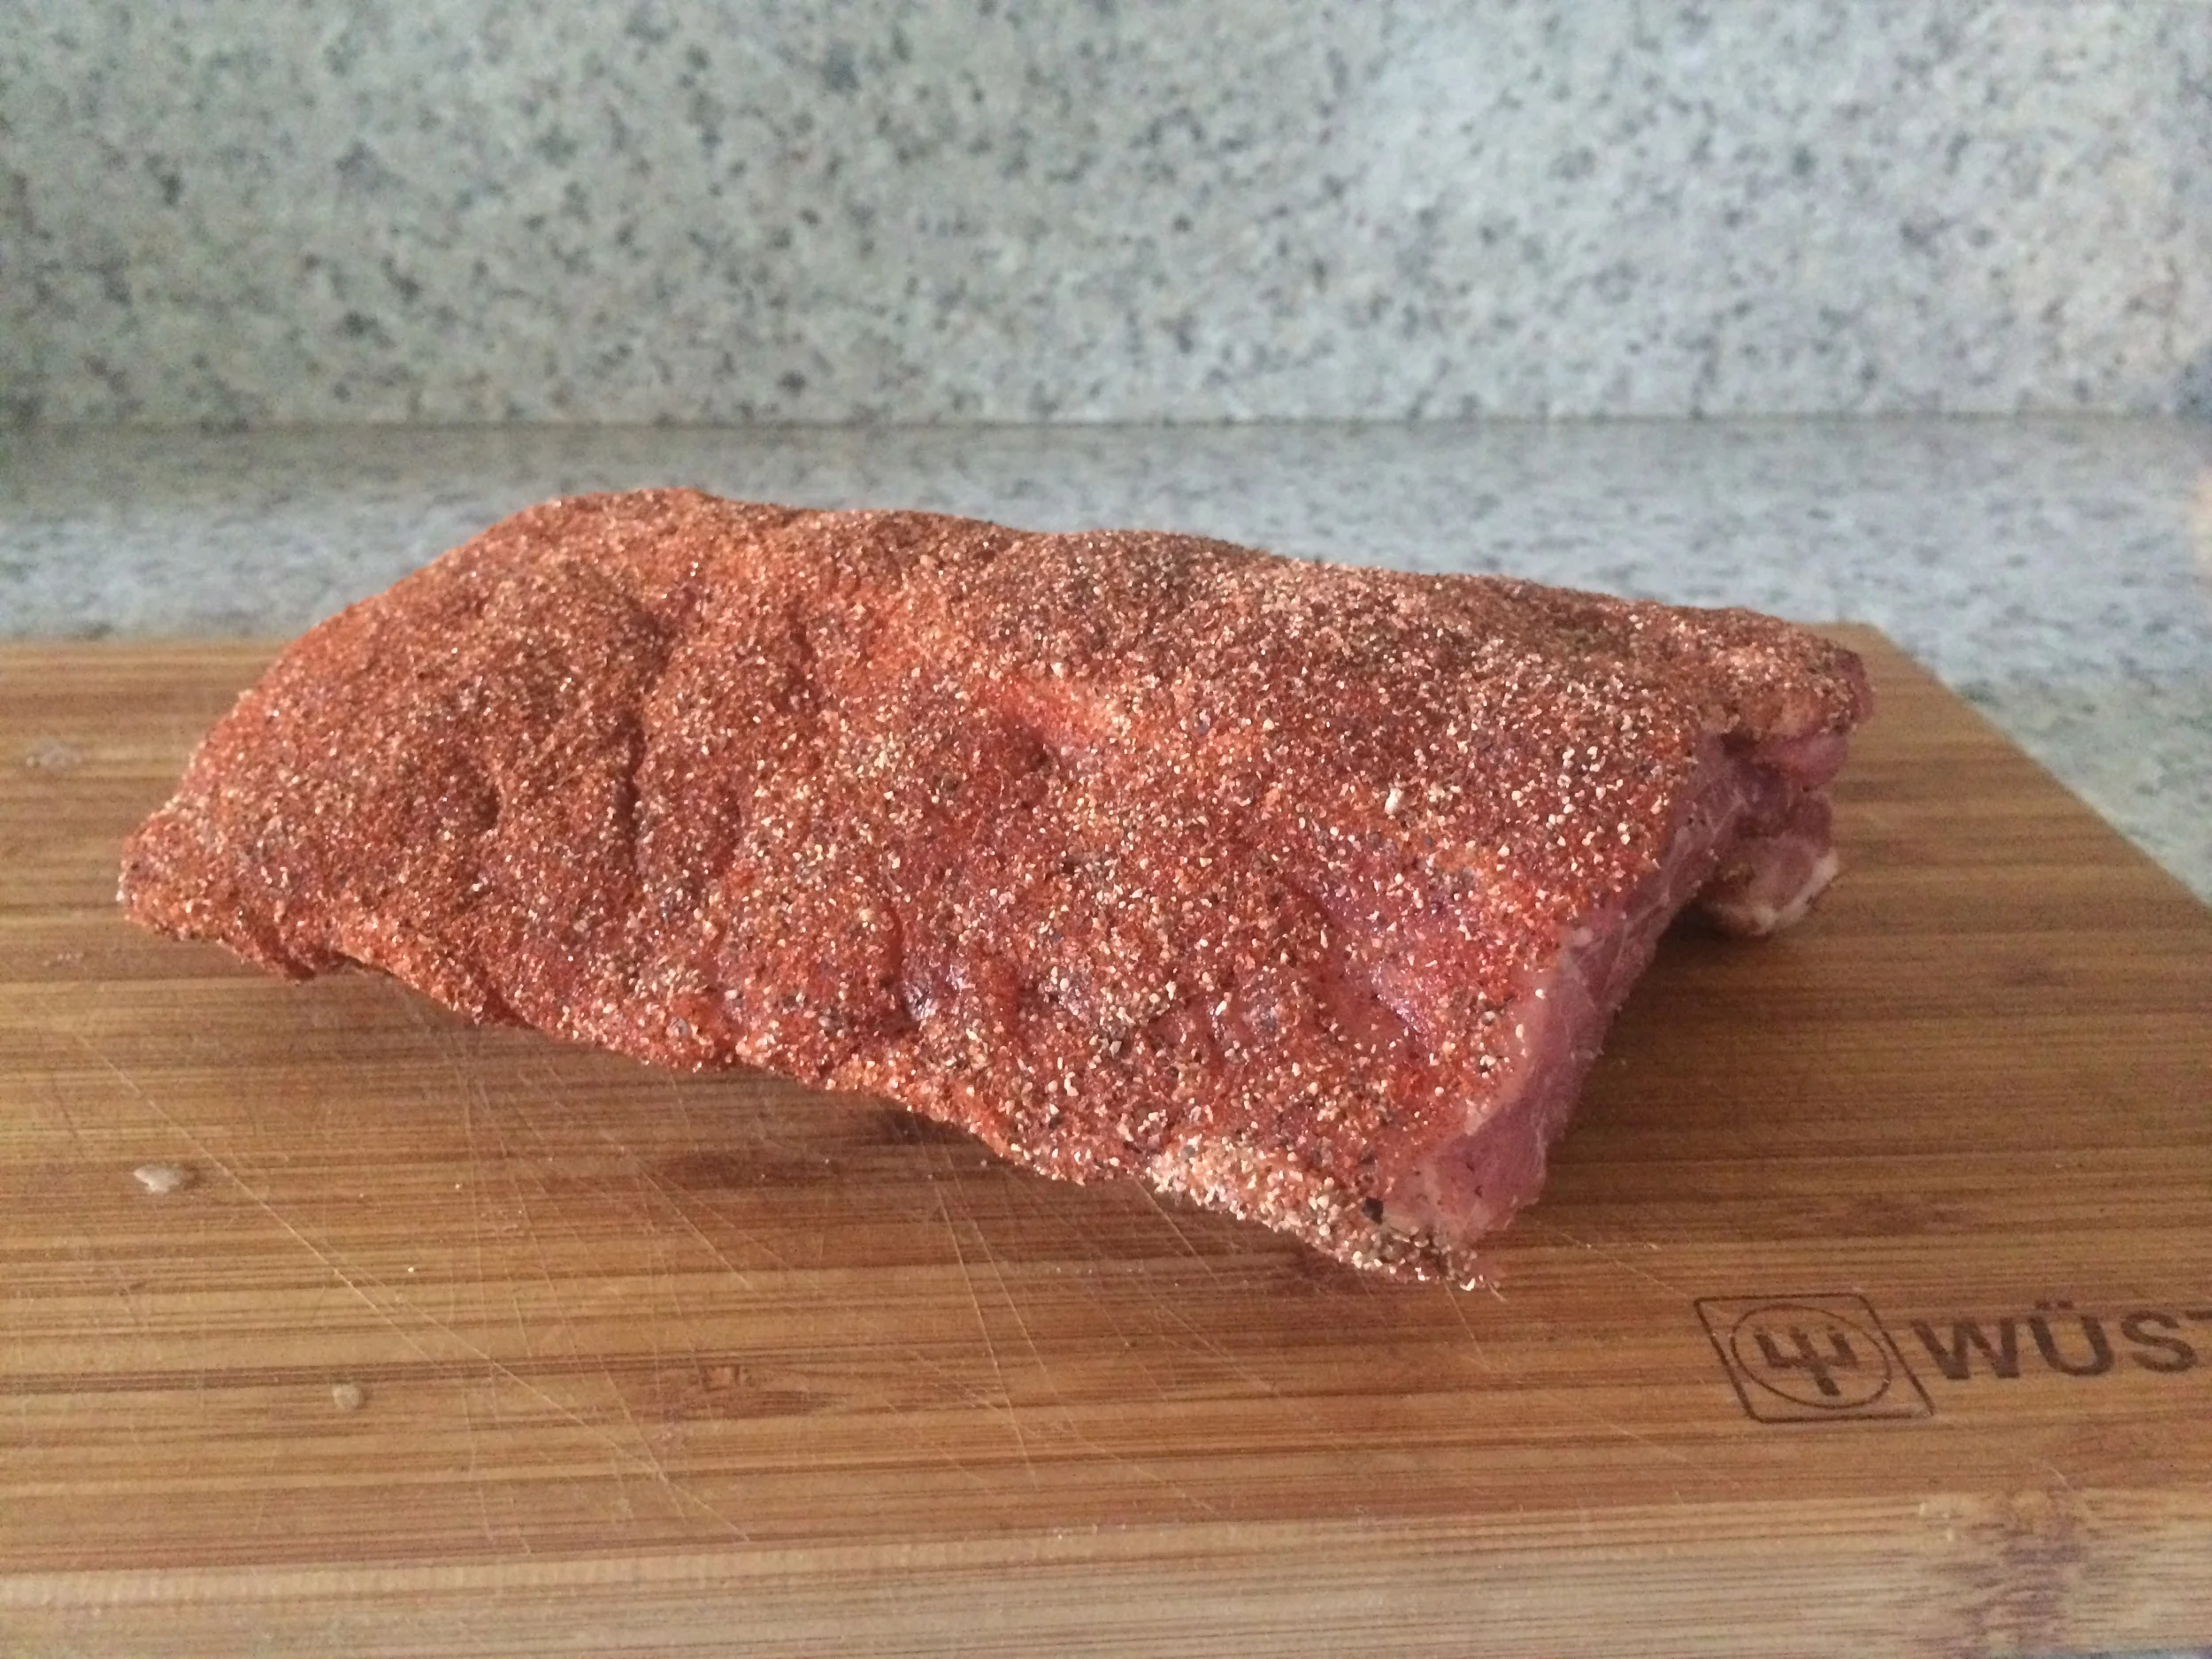
Post Rub ready for the pit.
Once you have the ribs clean of that membrane, it's time to rub your meat. To help your rub stick, first cover your ribs with a light coat of olive oil on all sides. After this is done, put your rub into a shaker and apply a nice even coat. Don't forget to do all sides evenly and liberally, like we said earlier. Since ribs don't have that much meat, there is no need to put a lot of rub on like you would with a brisket or a shoulder. Now that your ribs are nice and rubbed, it's time for my favorite part. It's time to get your pit ready.
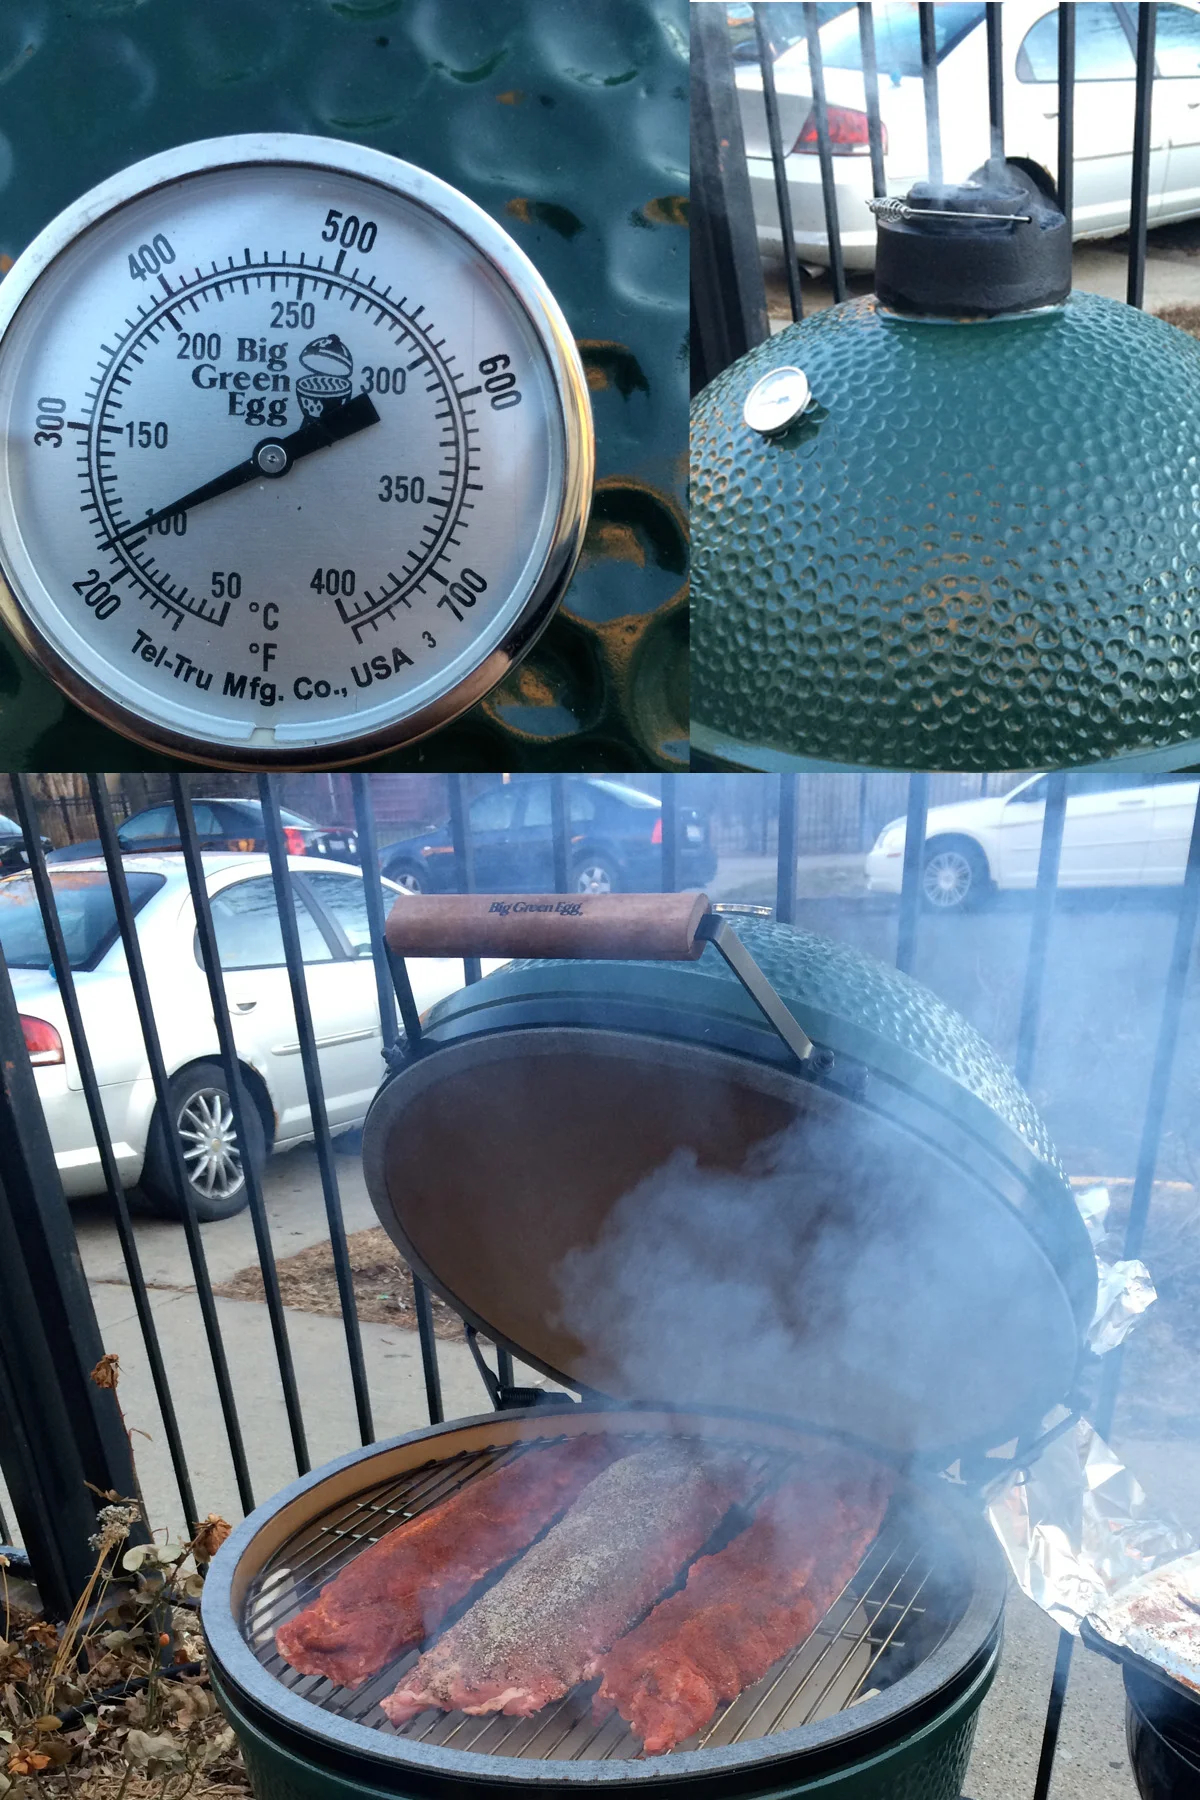
Don't make the rookie mistake of putting your ribs onto the pit before you have your temperature set. The worst thing that you can do to your meat is having the temp go up and down. So please, after all this work, don't throw it away on this part. Here at MMB, we like to get our pit ready with a good amount of Cowboy Brand Lump Charcoal and a mix of Apple, Cherry and Oak wood chucks. After the temp is set at 225-250, put on the ribs and make sure there is H2O in the water pan. Shut the lid for the next 3-4 hours. If you're cooking for friends or just really excited to eat, try not to let anyone open the grill. Opening that lid can change the temperature, and your ribs will not be happy. Trust your instincts, you shouldn't need to check on them if your temp is set and steady. Now that the MMB team has upgraded to The Big Green Egg XL, keeping a steady temp is super easy. But even when we used a Weber, if you know your tool well, it doesn't matter what pit you use for smoking.
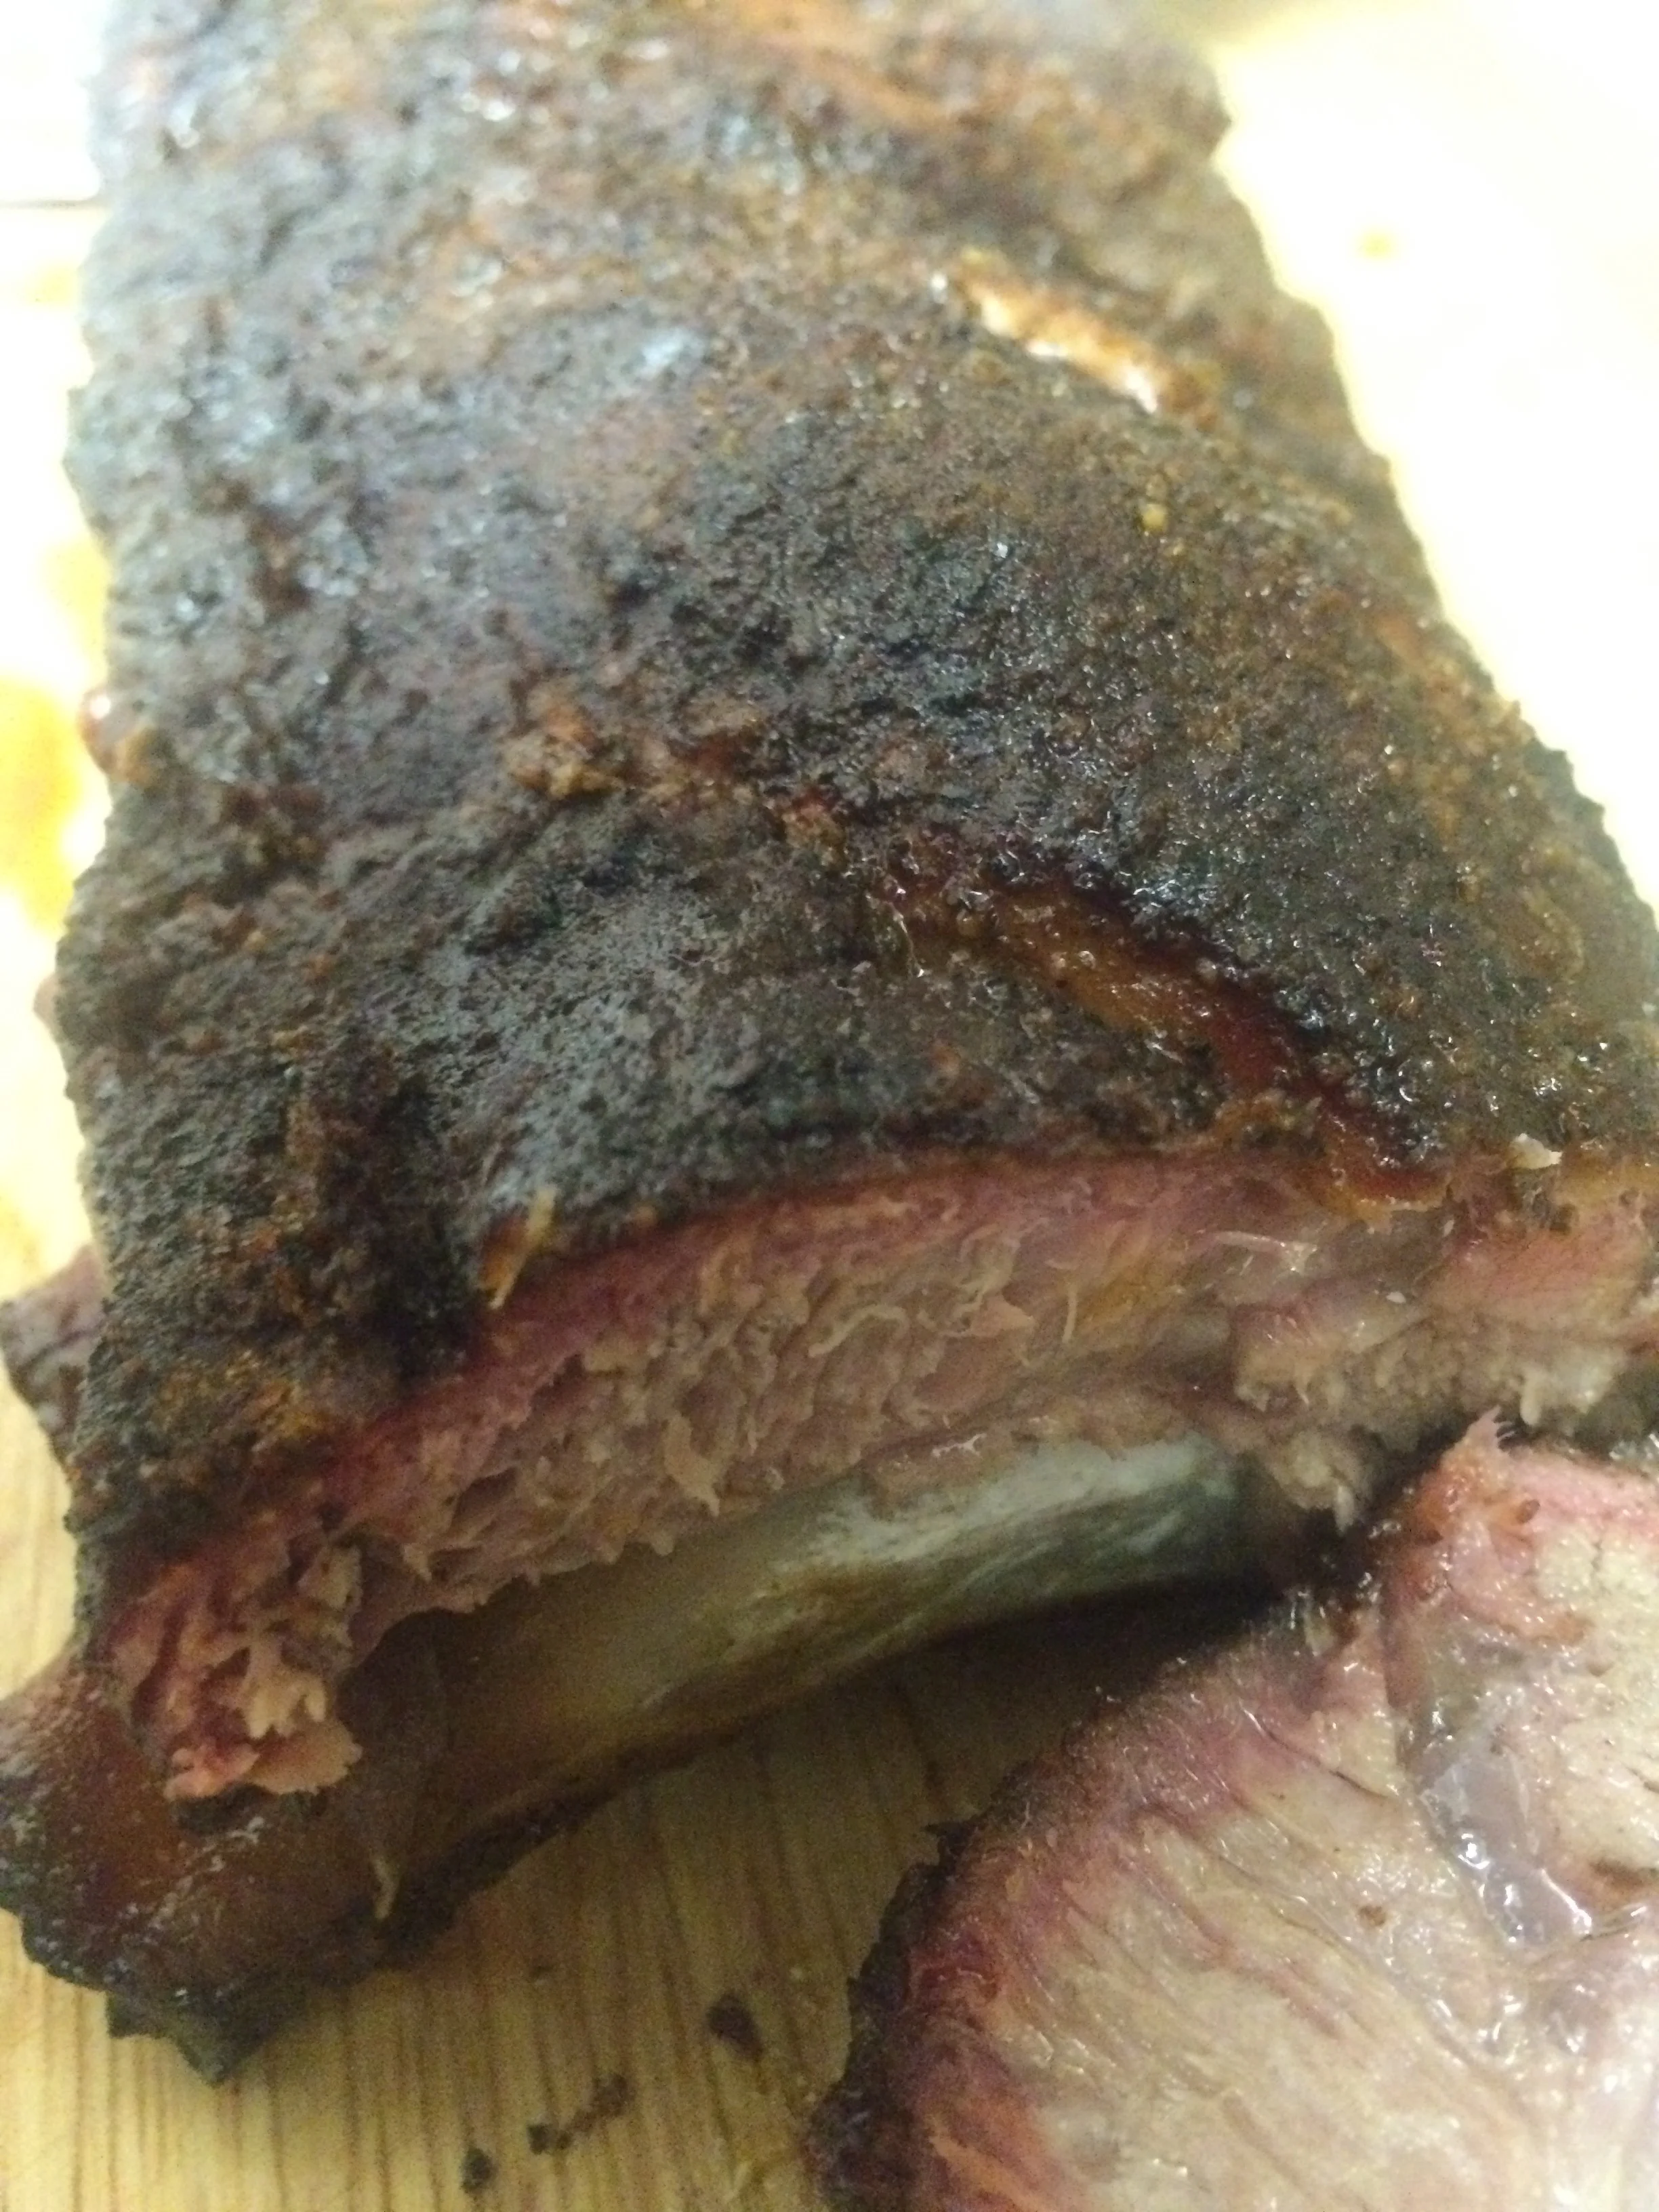
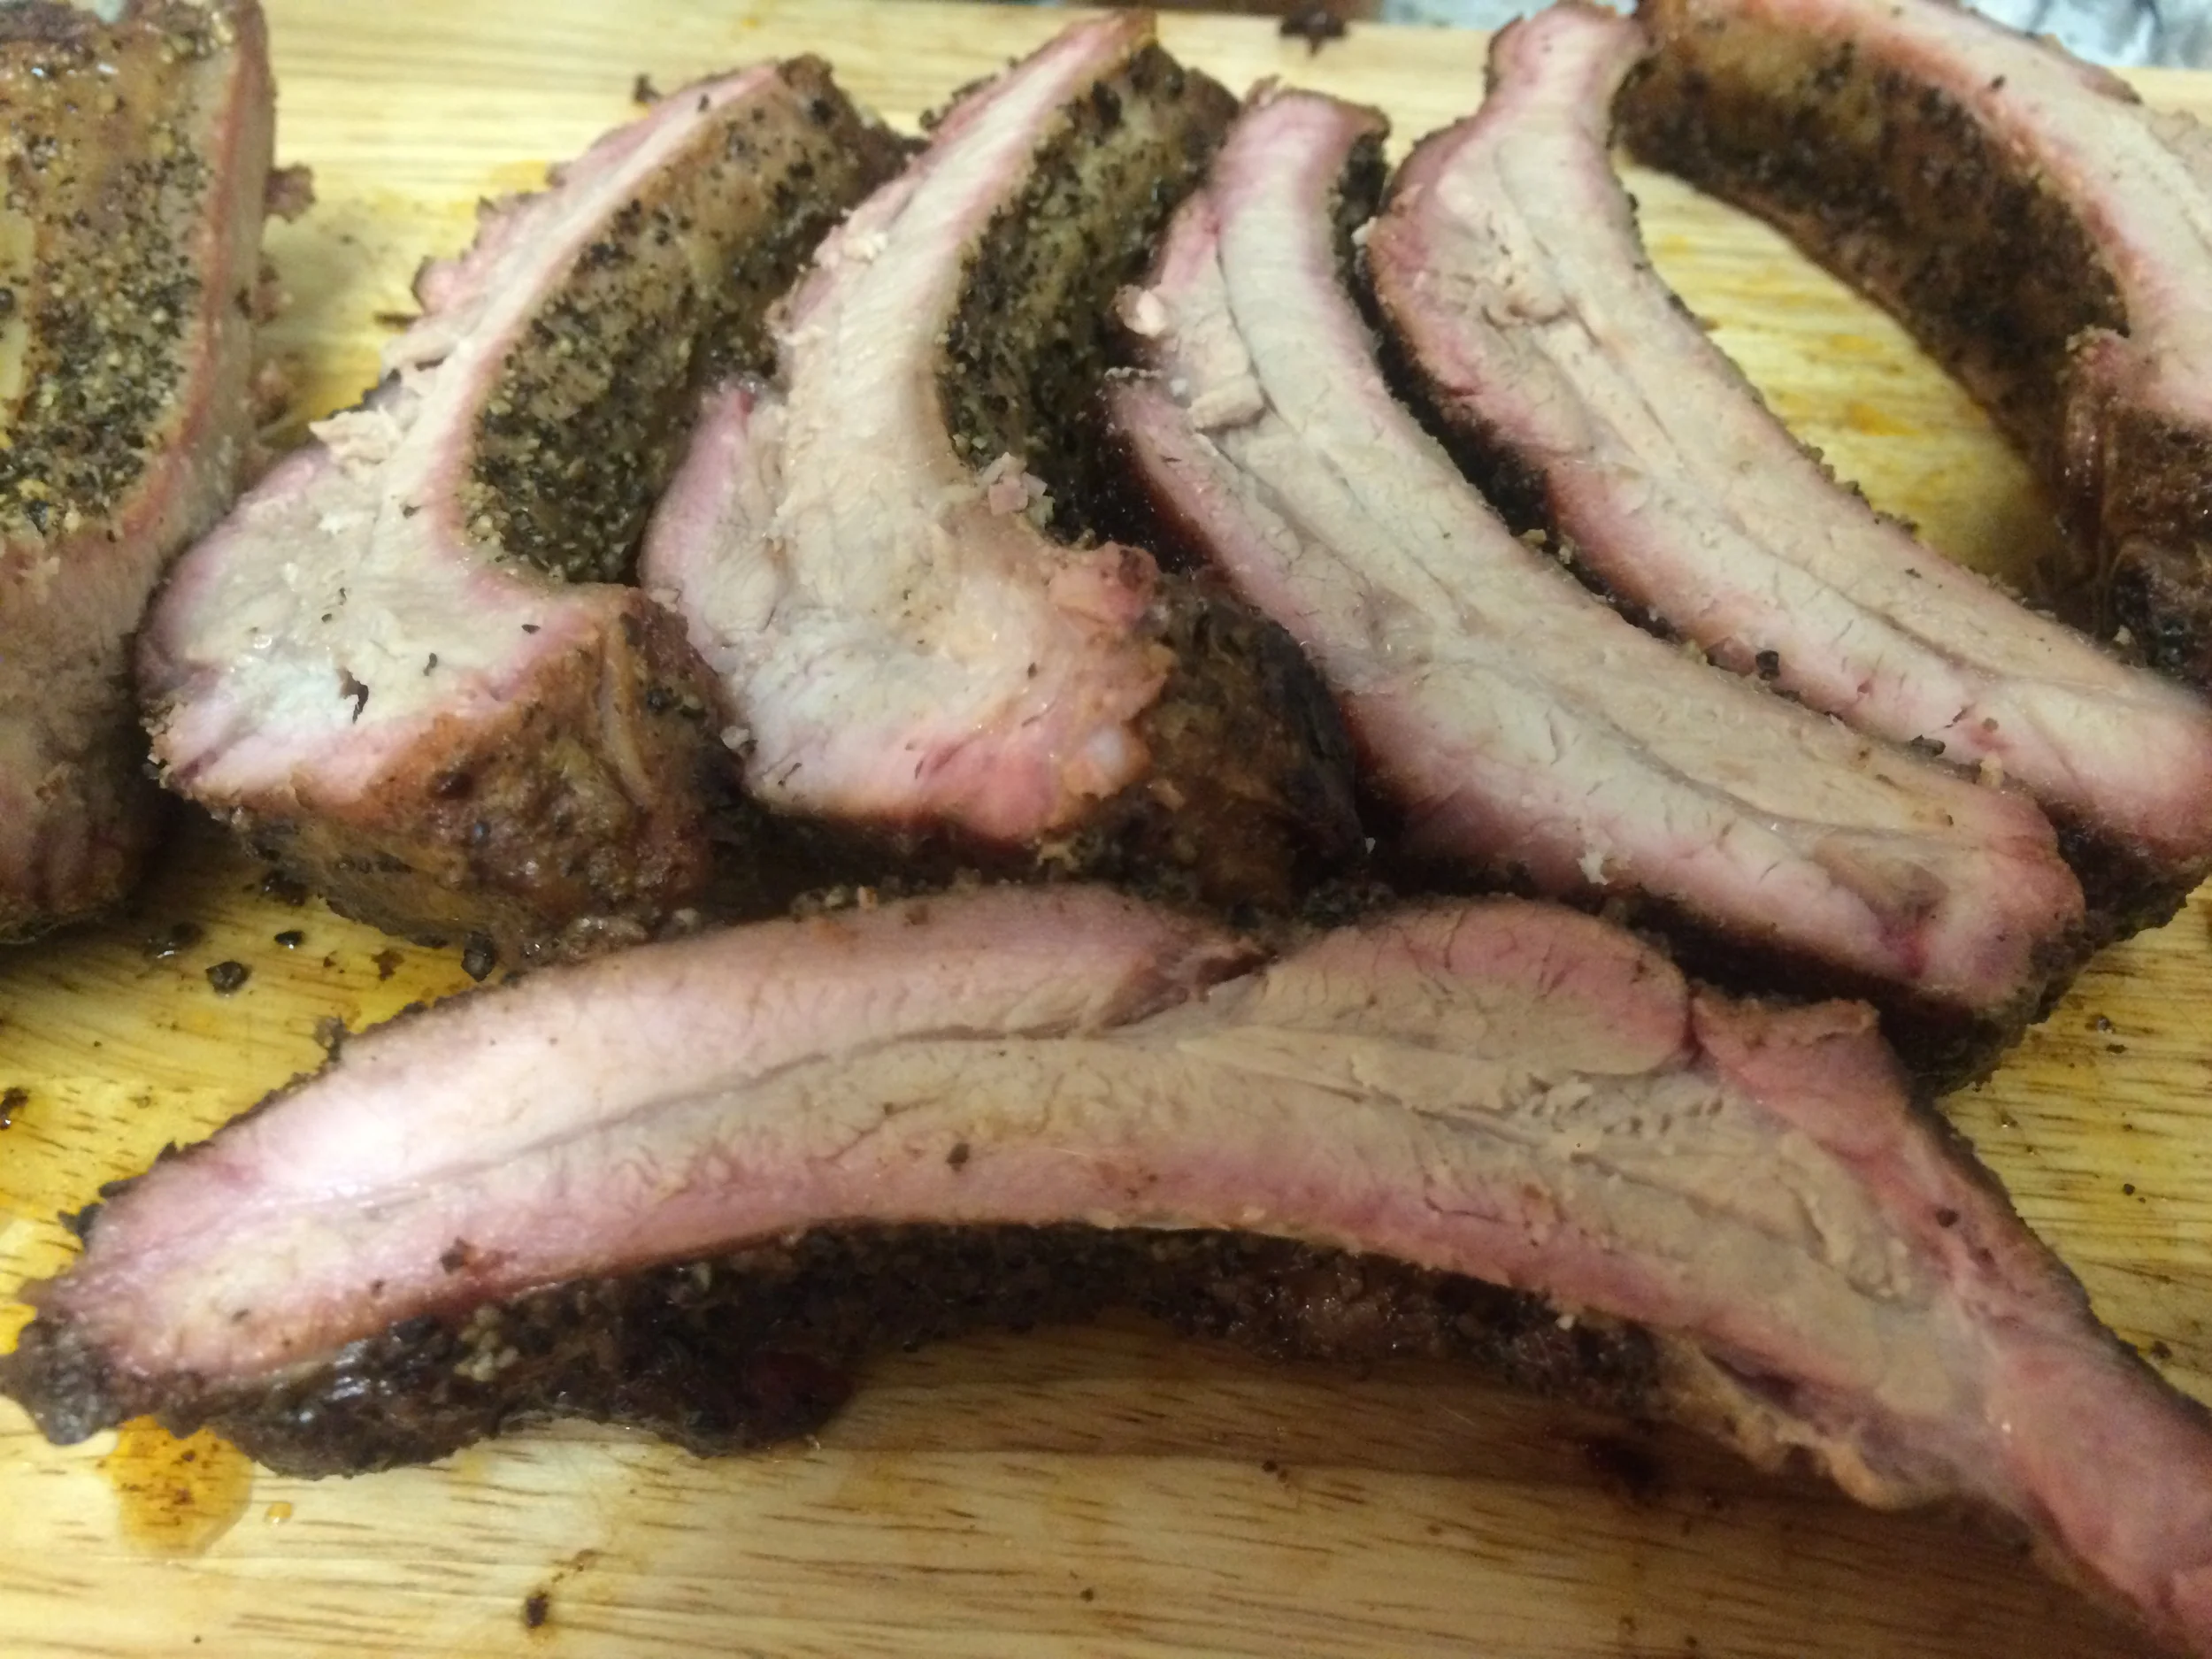
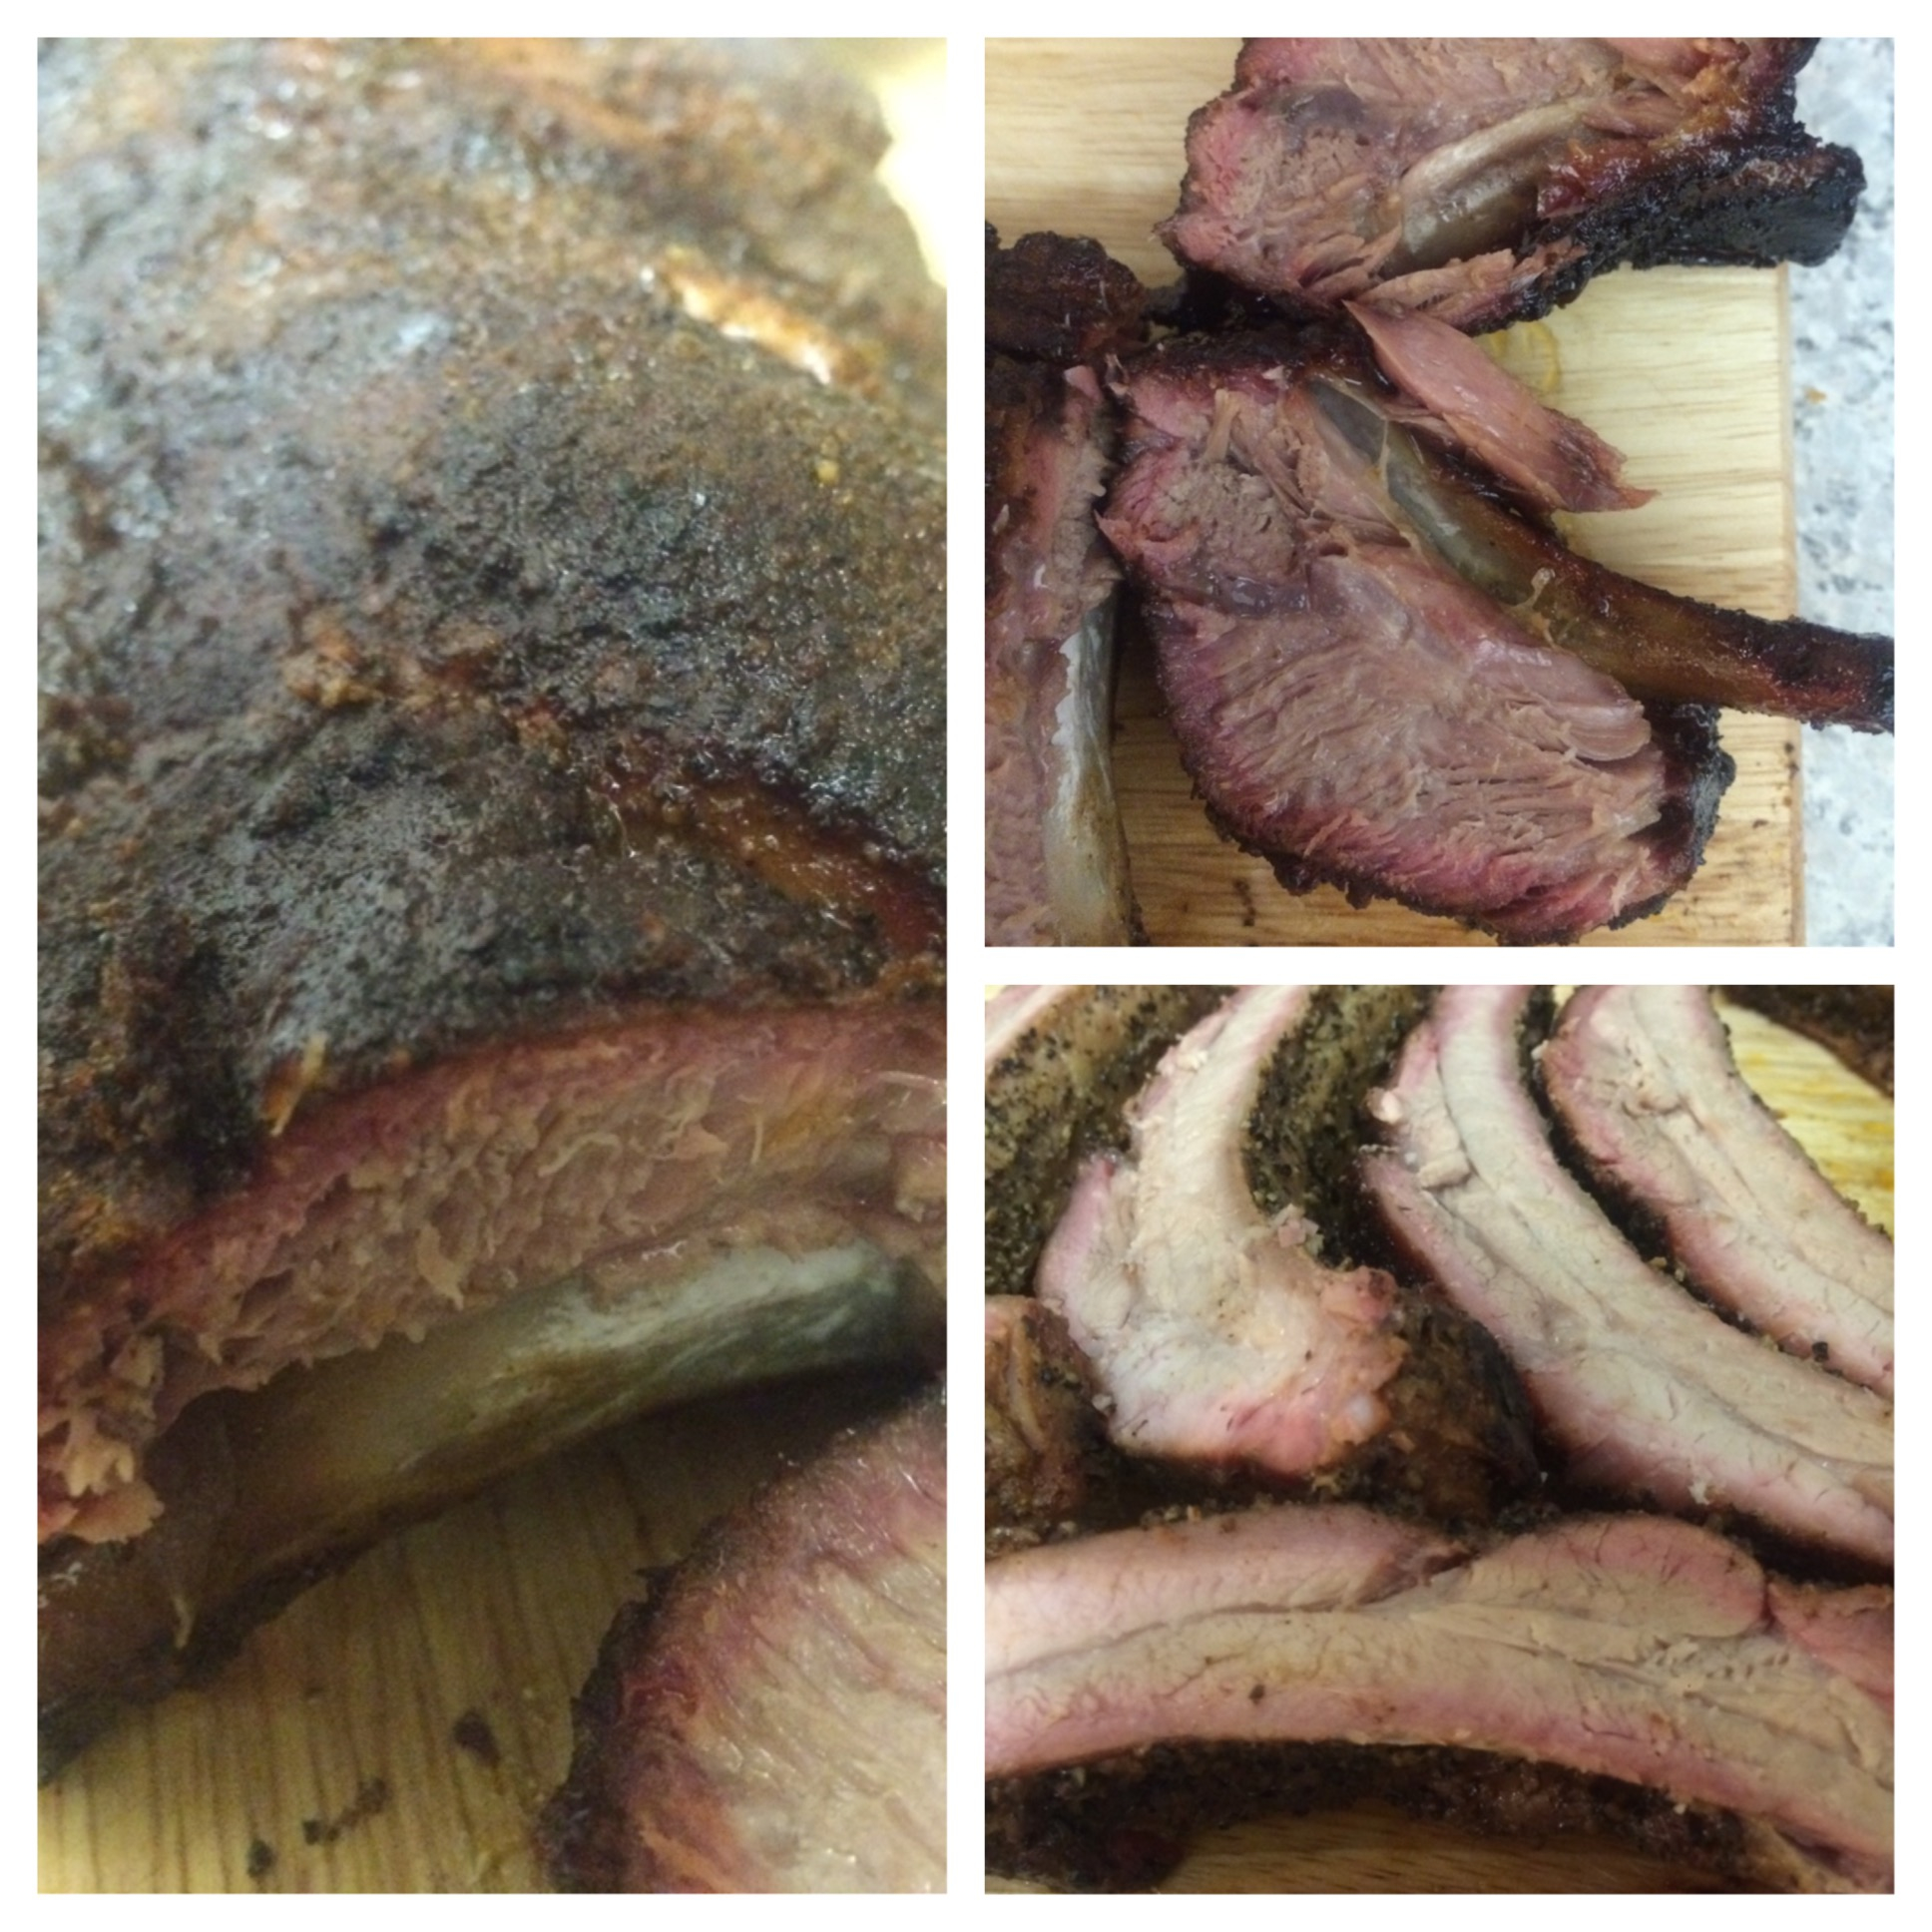
The general rule for smoking anything is 1.5 hours of smoke per pound of meat. Once you have a good amount of smoke on the ribs, let's wrap them up individually and finish up the cook. Lay out foil and place one rack of ribs at a time on each foil sheet, bones down. Grab the squeeze butter and coat the top of the ribs, then crumble and sprinkle some brown sugar on top of that. Wrap the ribs up tight in the foil and repeat that for the rest of the racks. Place all those wrapped ribs back on the grill and finish cooking them for about 1-1.5 hours at 400 degrees. Ribs should be cooked to an internal temp of 170, but because there's not much meat to stick a thermometer in, we just do the toothpick method. If you unwrap the ribs and stick a toothpick between the bones, it should slide in nicely and pull out clean. Whether they are done or not, rewrap the ribs. Once they are done, take them off the pit then let them rest for at least a half an hour. Leaving the ribs wrapped and resting will allow the juices to evenly distribute themselves throughout the meat. Not waiting long enough can make the meat dry out. Please make sure you don't skip this last step. We can't stress enough how important it is when cooking low and slow.
Finally! It's time to cut and eat the ribs. If everything has been done right, you should have a very nice pink smoke ring on your ribs and they should pull off the bone nicely. Whether you followed our recipe step for step or ventured off on your own, we hope you enjoyed the process and your tastebuds are exploding from happiness. And remember, if they didn't turn out as perfect as you had hoped, MMB didn't start out perfect either. Don't ever get down on yourself, just learn from it and try again. Please everyone comment or shoot us an email on how your ribs went, and if you have any questions, ask! We would love to hear from you!