

Easy Pizza
By: Jeff Hillyard
If you’ve been following me on social media lately, you’ll have noticed that I’ve been experimenting with pizza lately on my Weber Kettle. Pizza is incredibly easy to make on your grill, and I doubt I’ll ever eat a frozen supermarket pizza again!
Hardware
To start, you’re going to need some accessories you may not already own. Since you’re checking out Man Meat BBQ, I think it is probably safe to assume you’ve got a charcoal grill. If you don’t, why the hell not? Seriously, just hit up Craigslist and get a Weber Kettle for 50 bucks! Anyway, I’m going to assume you’re using a charcoal grill. Weber, Big Green Egg, PK Grills, whatever. I’m a Weber guy, so I used my Weber Performer.
The next thing you’re going to need is a Pizza Stone. A pizza stone is used to replicate the floor of the original brick and mortar pizza ovens used in Naples, Italy. When picking out a pizza stone, stay away from cheap stones that are meant to be used in your oven. I strongly suggest you use one that is made of cordierite and is designed for the high heats of a charcoal grill. Cordierite is a special material that can absorb heat, hold it, transmit it to your pizza, and is less likely to crack on your grill. I picked up the Weber Pizza Stone. It comes with a carry rack that you can use to both transfer the pizza from your grill to your table, and it also fits in the Weber Gourmet BBQ System grill grates. I use mine without the carry rack.
Lastly, you’re going to need a wooden pizza peel. This way you can prep your pie on the peel, and you can easily slide it onto the stone when you’re ready to cook. Then when the pie is cooked, you can easily scoop it off the stone. I picked my peel up at the supermarket for about $15.
Grill Set-up
In my research I found that many people recommend making a “C” with your charcoal and placing the stone just slightly over the charcoal. This way you’re able to transmit heat to your stone with lowered risk of burning your pizza. You will however have to rotate your pizza when it is about half way through being cooked. This way you do not have one side cooked and the other side still raw.
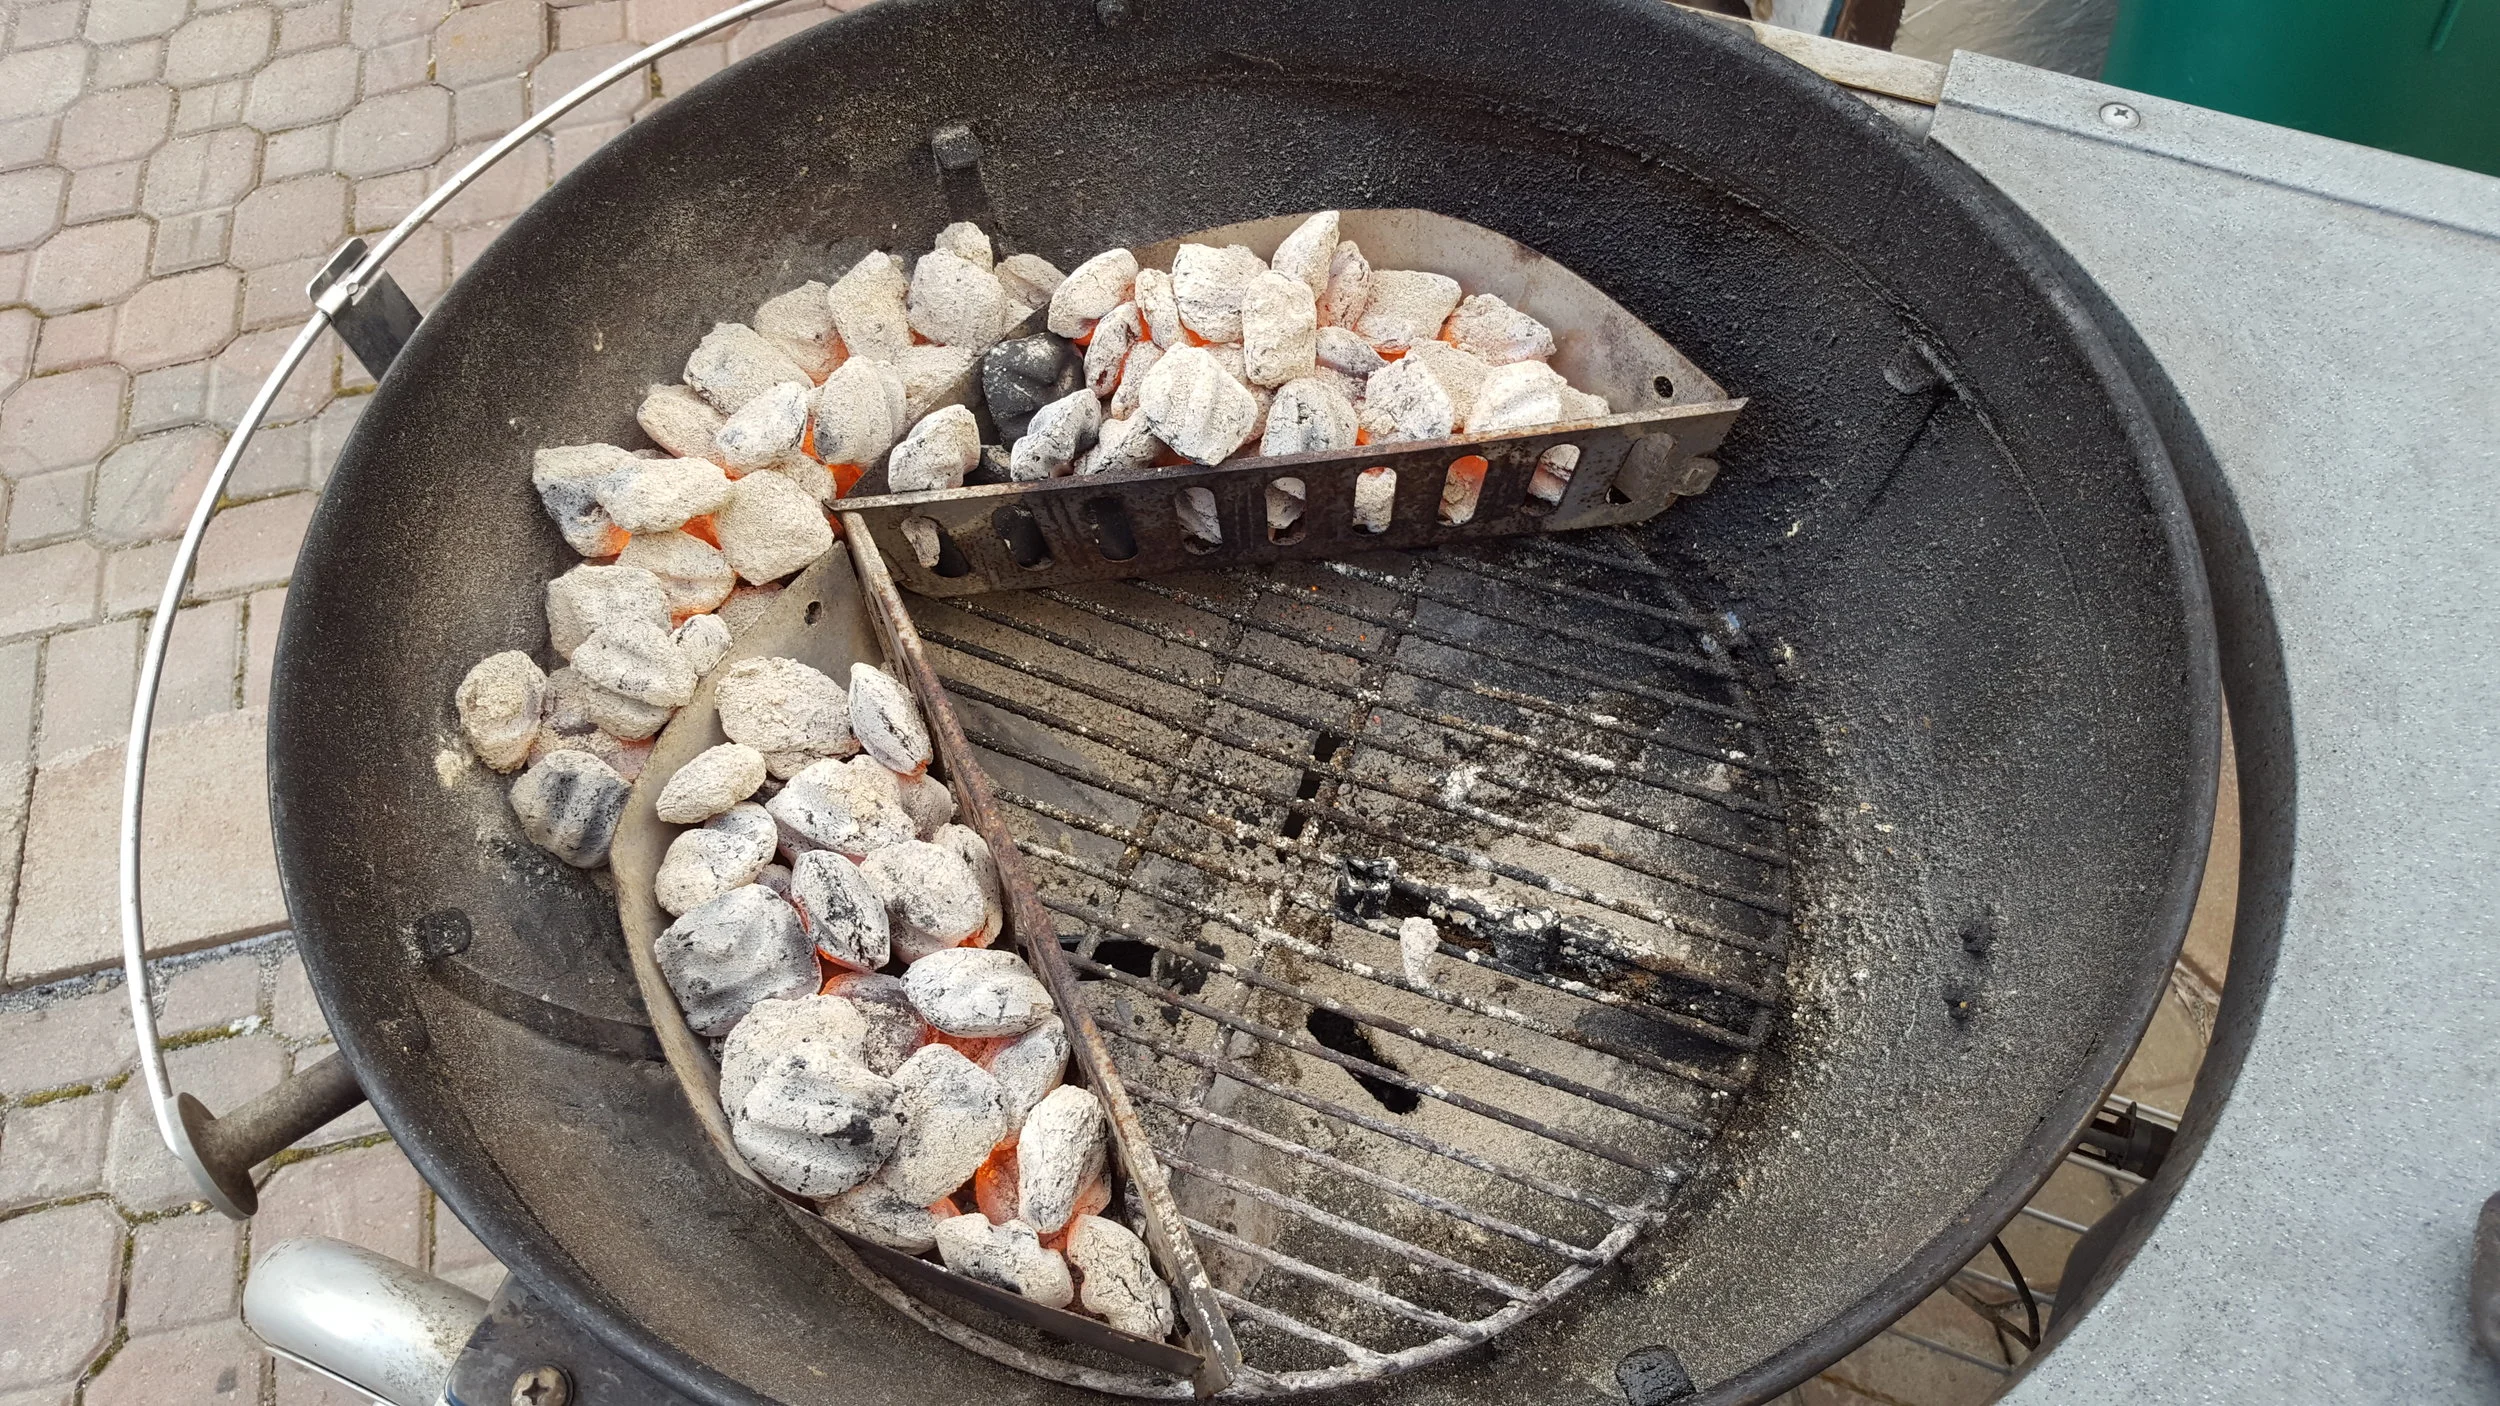
I decided to take my Weber Char-Baskets (they came with my performer), and made a “C” shape (kinda looks like Pacman). I then added about ¼ of a chimney of unlit Kingsford Original Briquettes to the Char-Baskets, and added a few in between. I finally lit a full chimney of charcoal. Once it was ashed over in about 30 minutes I dumped it onto the unlit charcoal in the Char-Baskets and in the gap between the two baskets. This is hard to describe, but I think this pictured does a good job describing what I did.
Making the Pizza
The actual ingredients are very easy to assemble. You’re going to need to assemble some pizza sauce, cheese, dough, toppings, flour, and cornmeal.
For the pizza sauce you can either:
- a) Buy a can of pizza sauce at the supermarket, or…
- b) Make your own simple pizza sauce – essentially, combine a can of peeled tomatoes, salt, sugar, and dried oregano and pulse in a blender
For the dough, you can make your own, but if you’re just starting out I recommend you pick up some pizza or bread dough at your local bakery. There’s a deli in my neighbourhood that sells small bags of dough that is just enough for one pizza.
For cheese you can use fresh mozzarella, but I went with bagged shredded mozza. The flour was regular all-purpose flour. I used this when stretching out the dough, and also put some on the pizza peel so the dough would slide off easily. The cornmeal was placed on the stone so it would be easier to turn the pizza and take off.
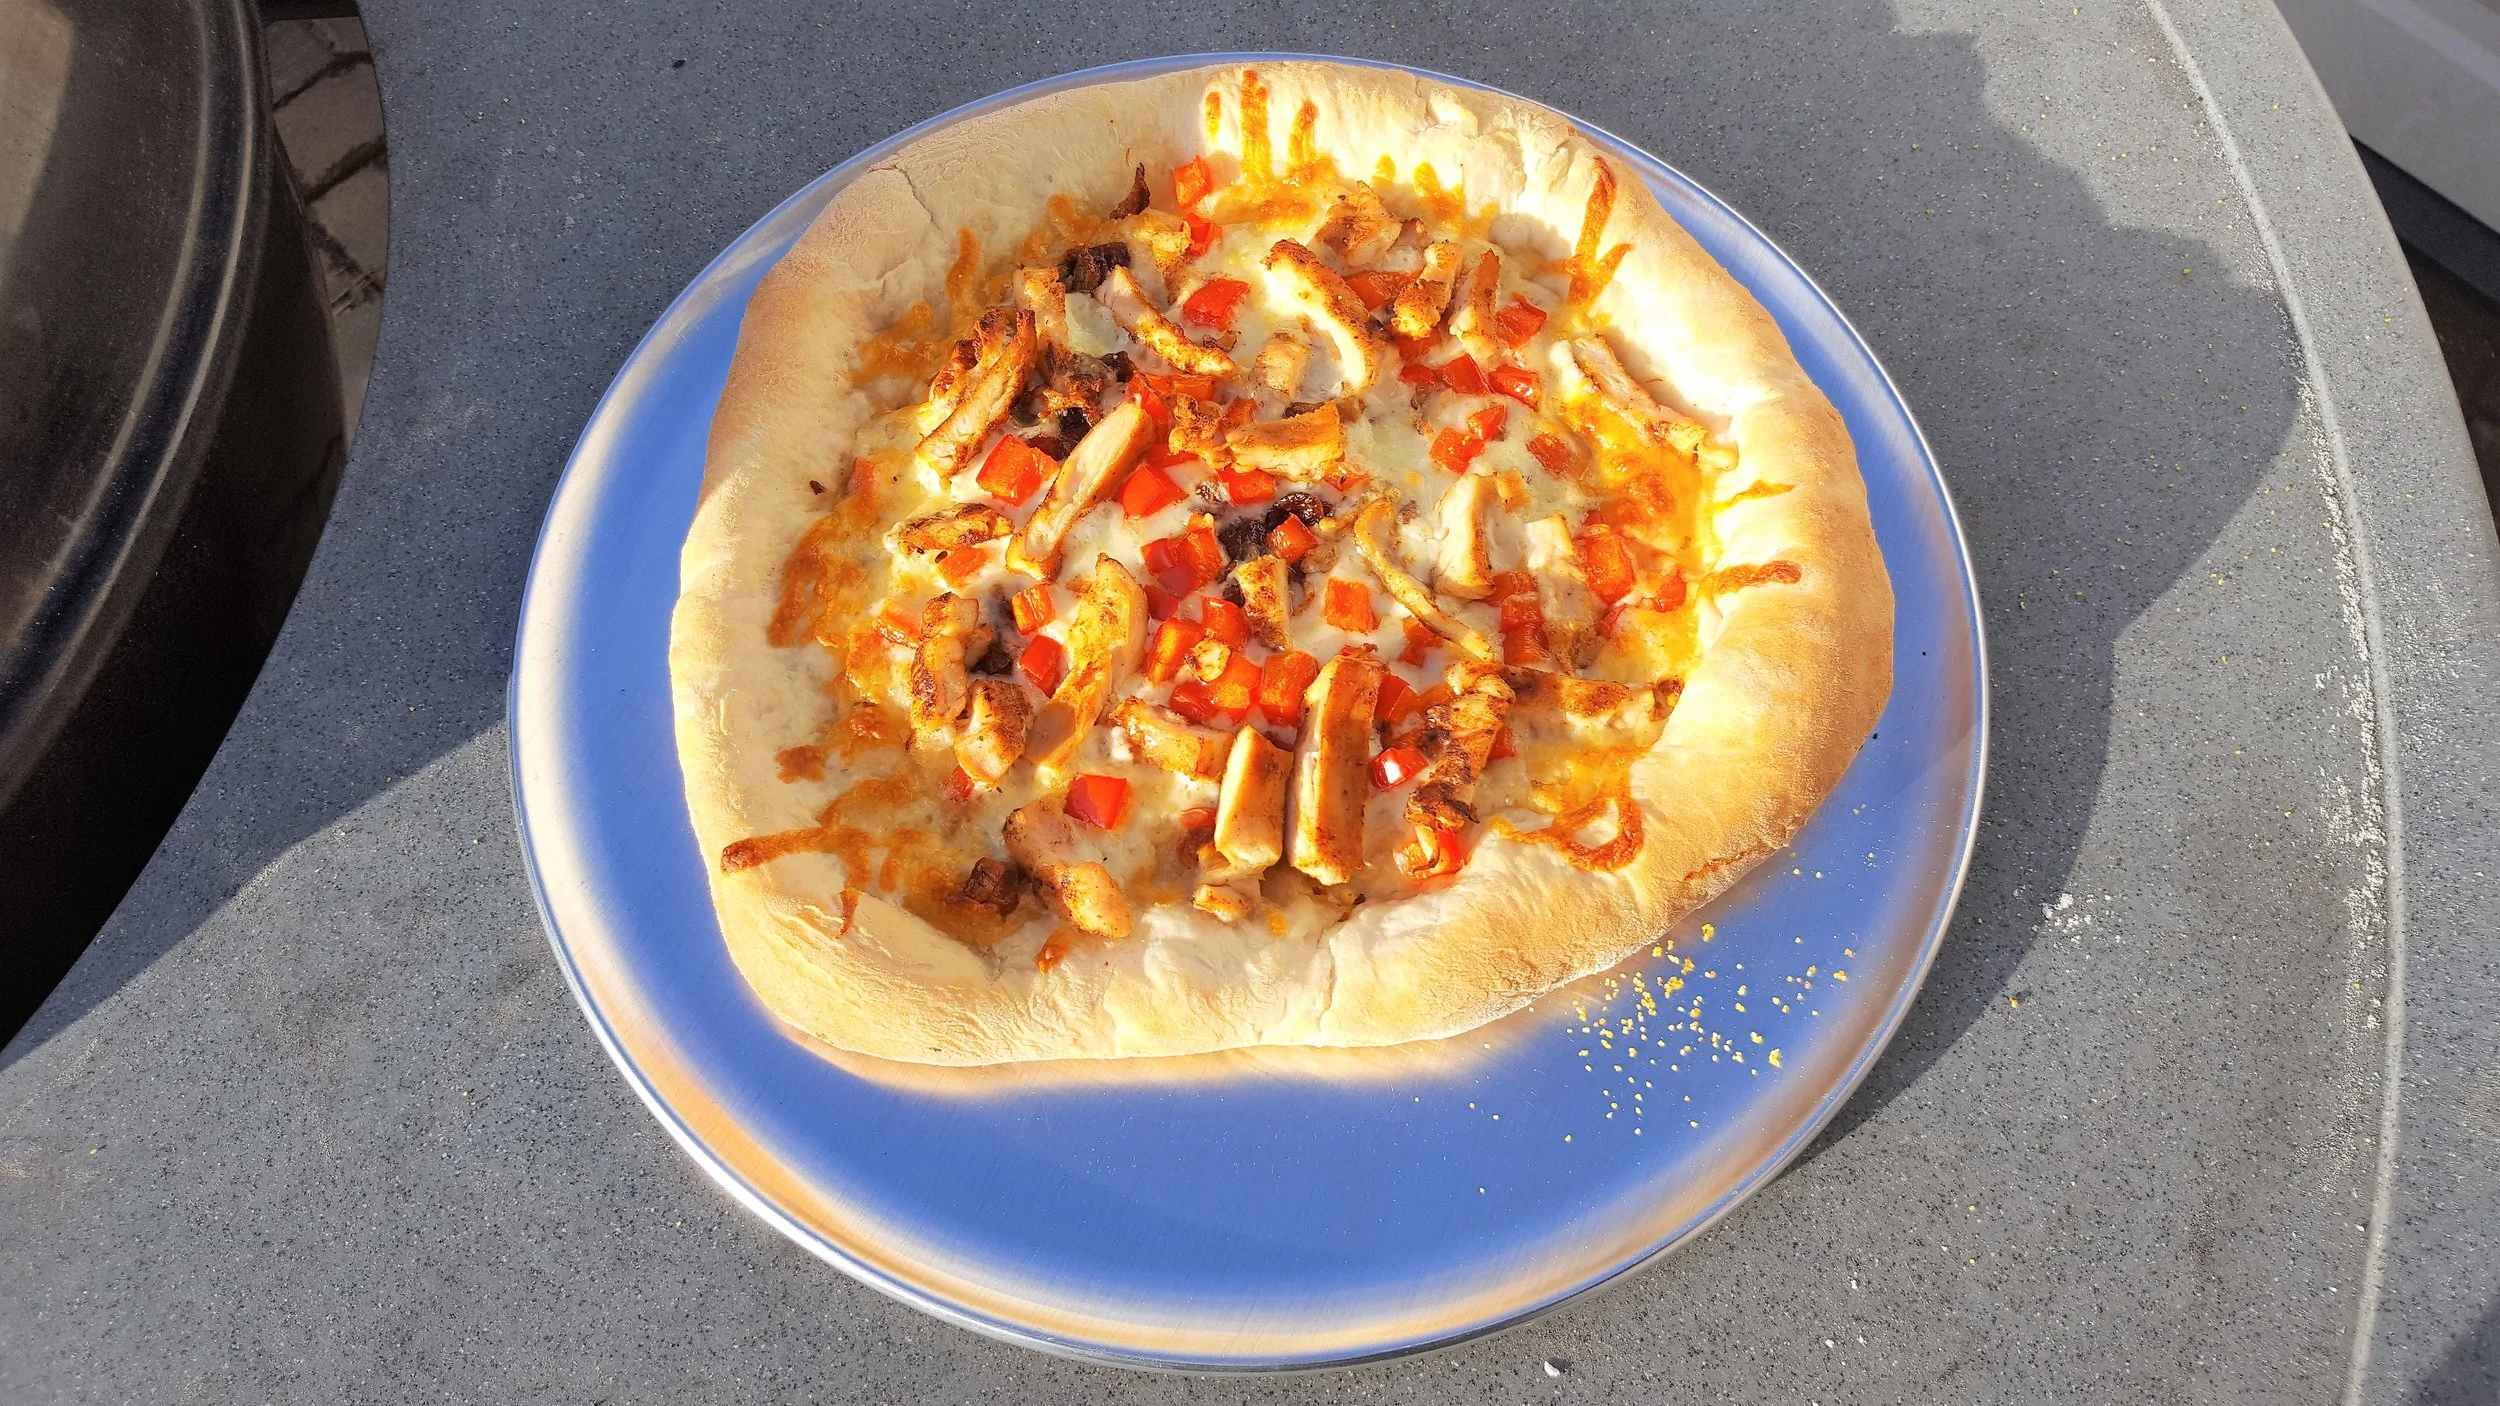
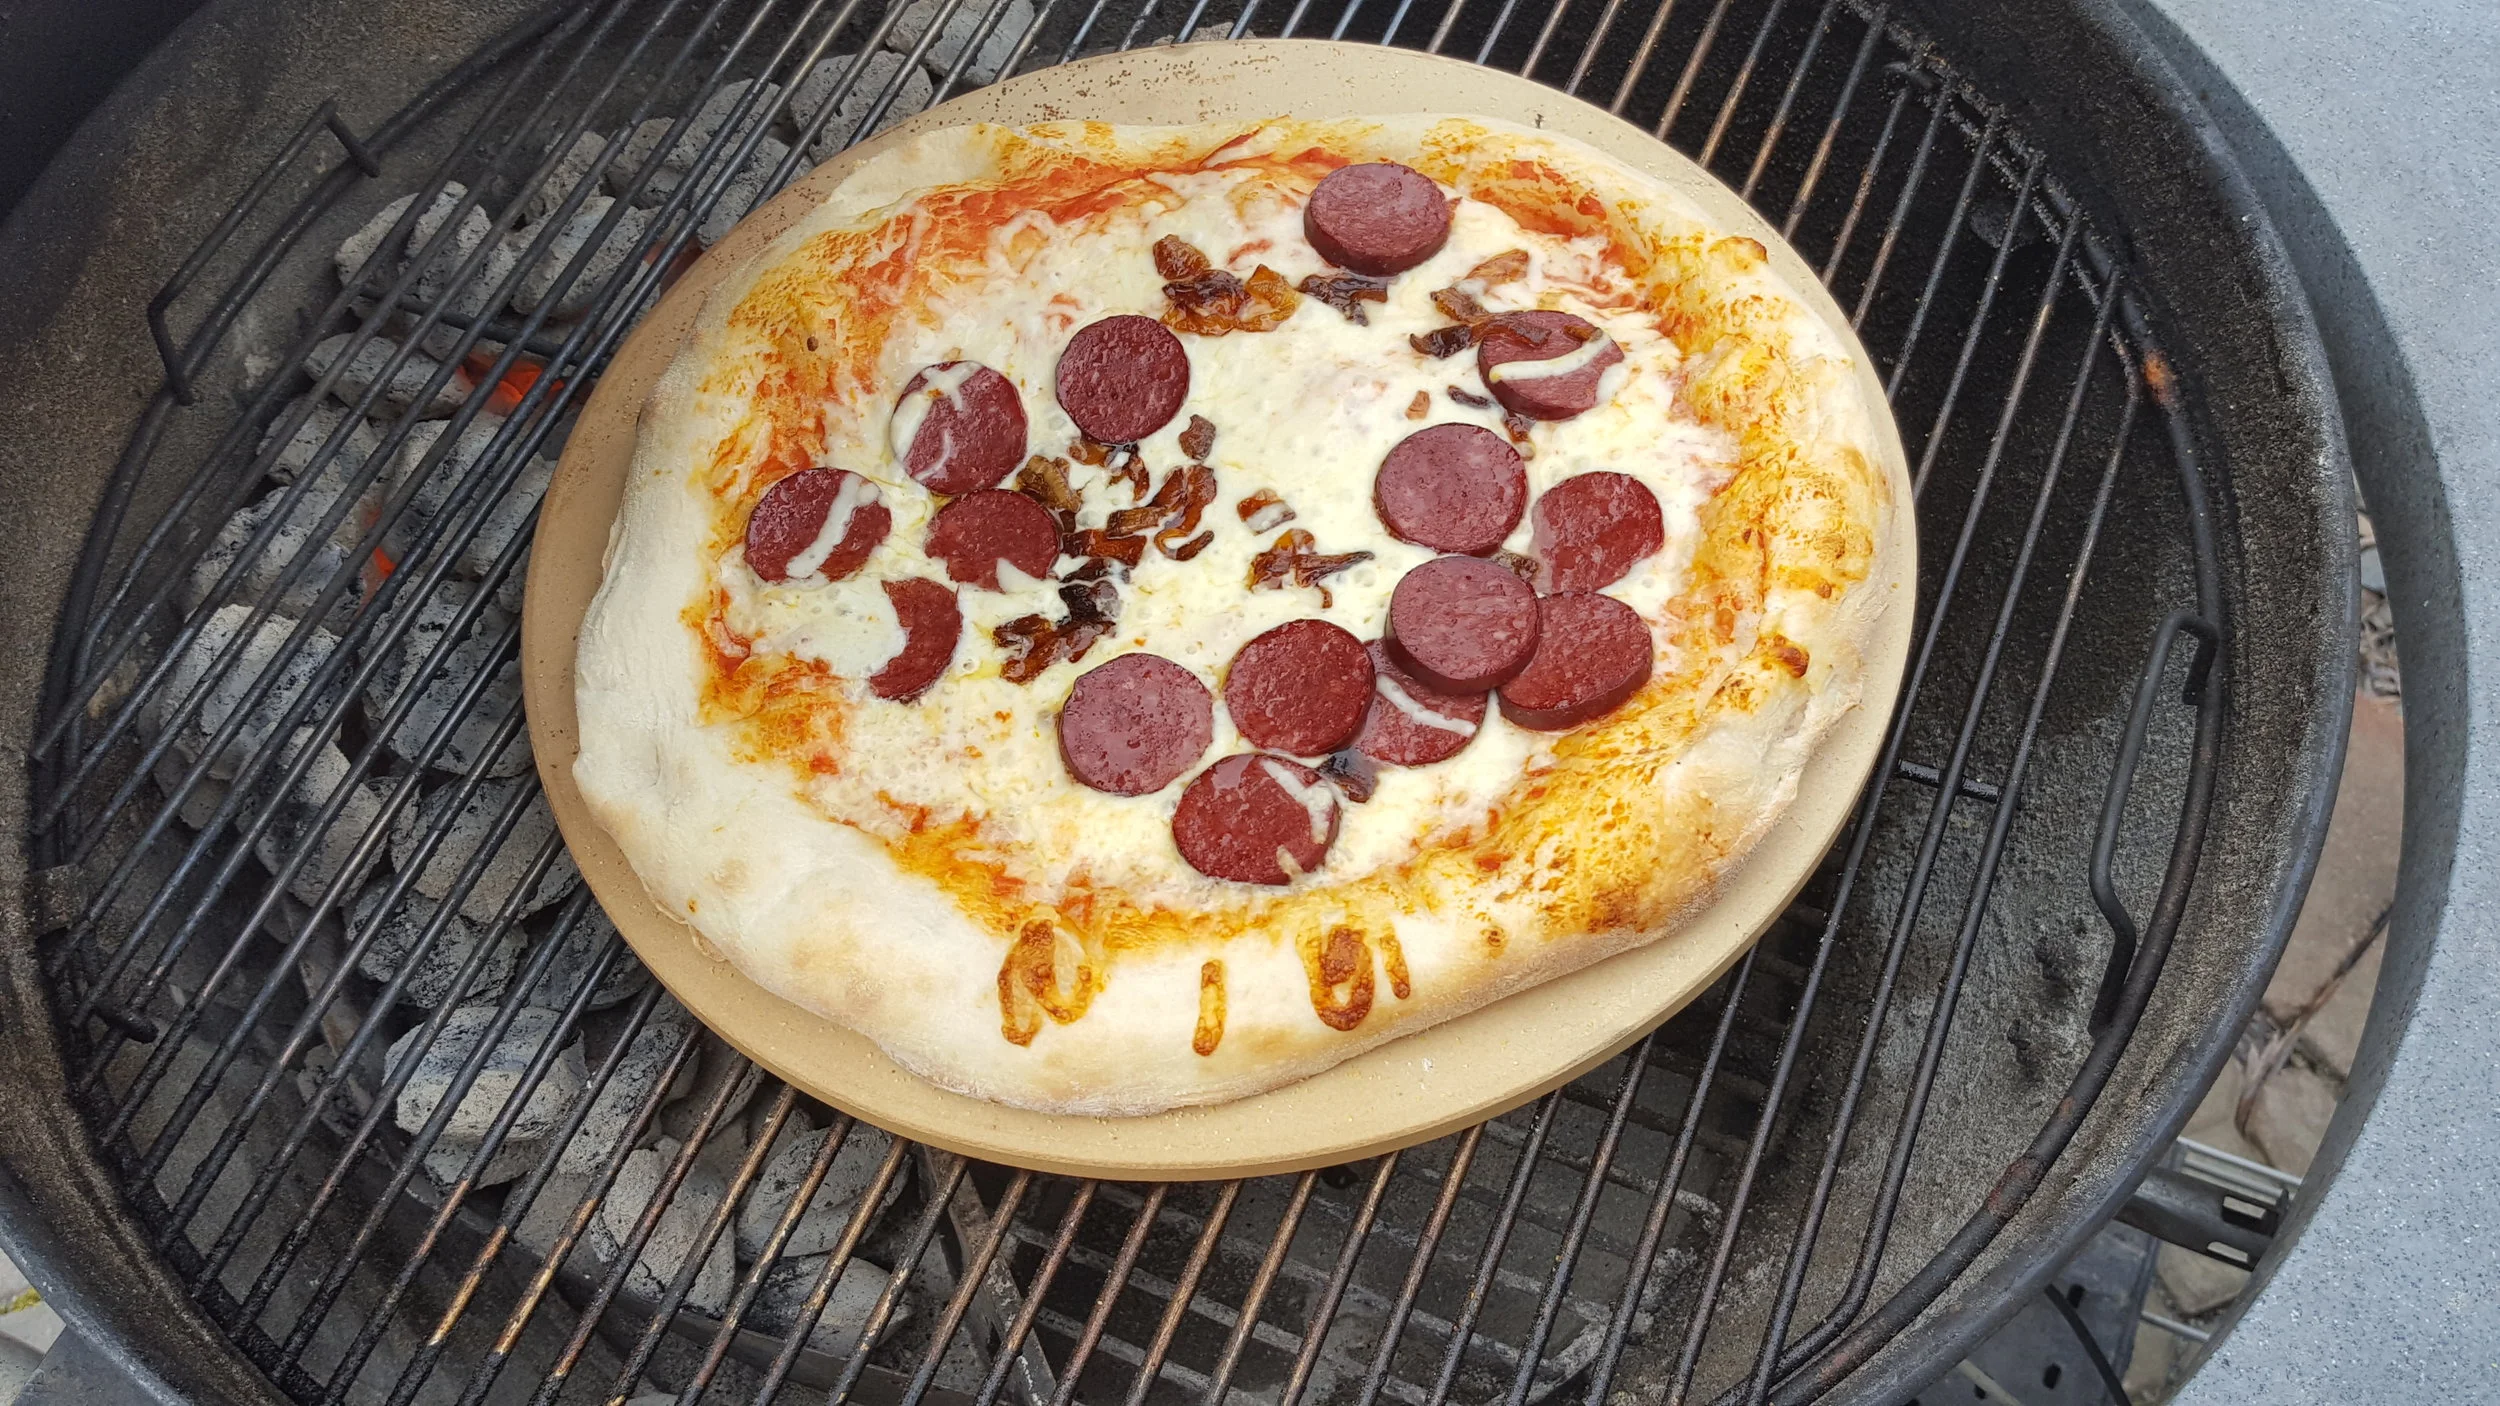
For toppings, you can use what you want. There are no rules with pizza. One pie I made was simply pepperoni with caramelized onion on pizza sauce, the second pie was grilled chicken (cooked ahead of time), with caramelized onion and red pepper, on an olive oil & crushed red pepper flake base. Both topped with the shredded mozza.
To assemble the pie, I followed the instructions in this video:
First I proofed the dough. Proofing is when you take your dough out of the refrigerator and let it come to room temperature and rise for at least one hour. This will make it easier to stretch.
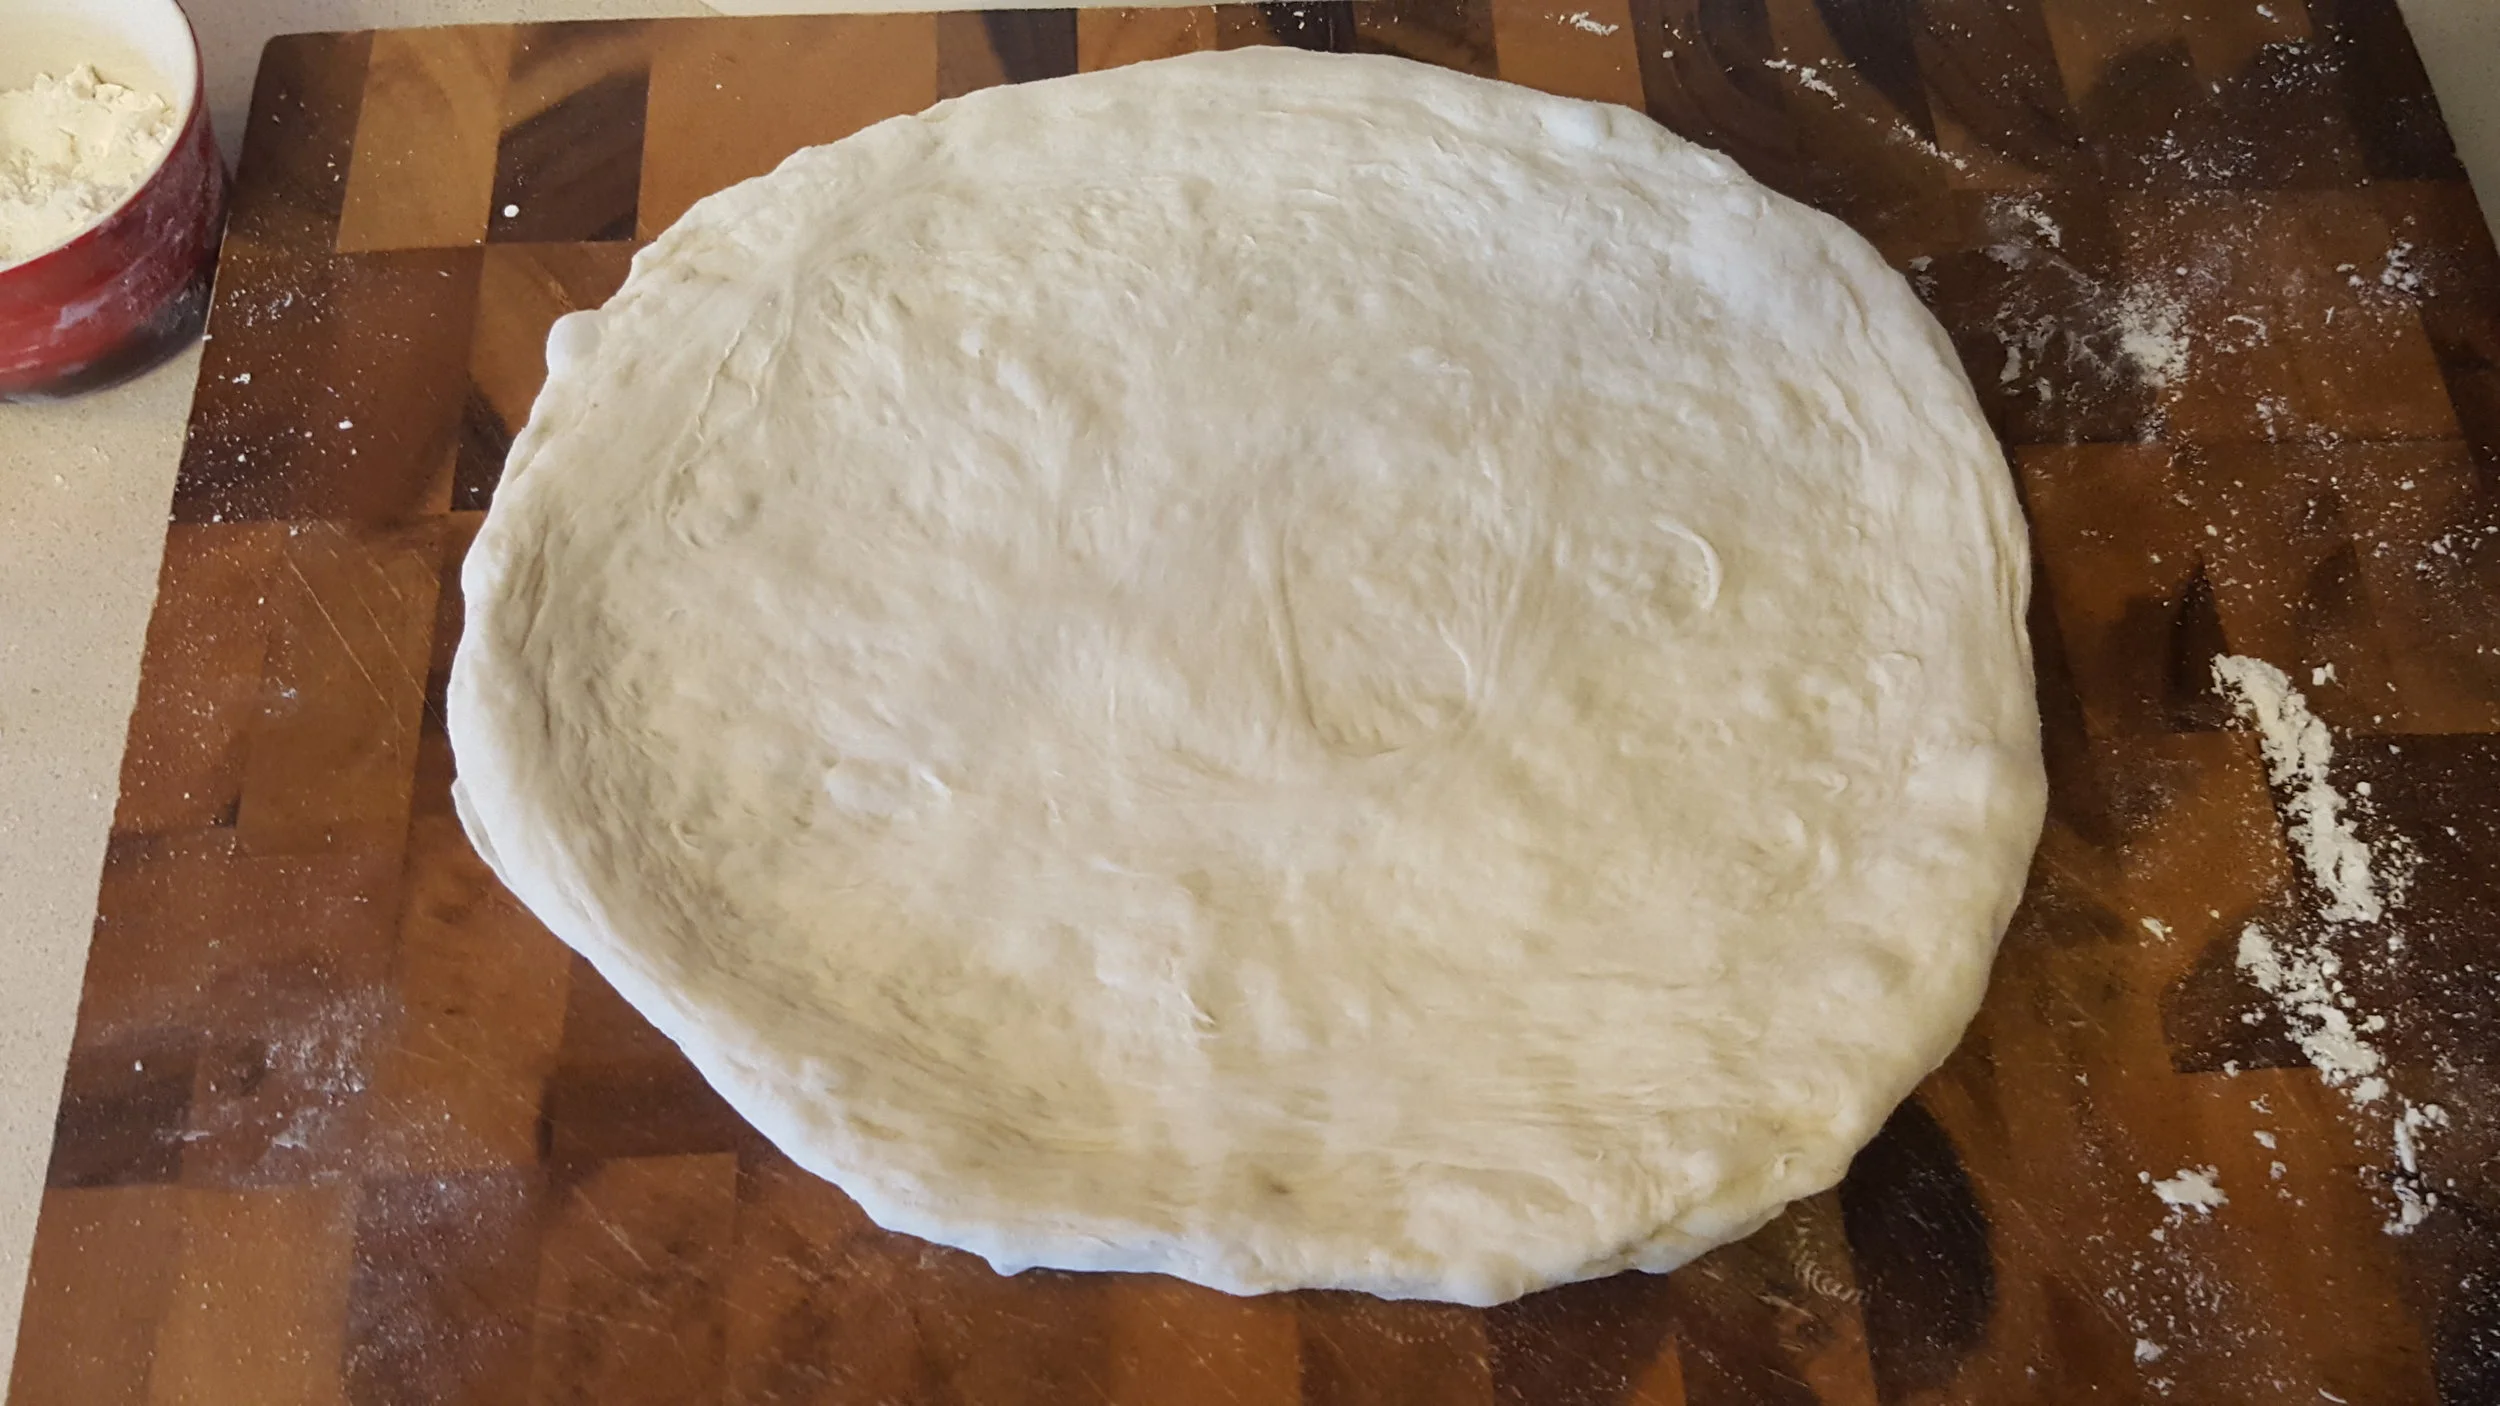
Next, I placed the dough on a floured surface (to keep the dough from sticking to the countertop), and pounded it out with my fingertips. Pounding is basically pressing out your dough using your fingertips and pressing the dough to the outer edge. This outer edge will be the crust.
Now I stretched the dough to my desired size. I did this by picking up my pizza and gently using the back of my hands/fingers to slowly stretch out my pizza.
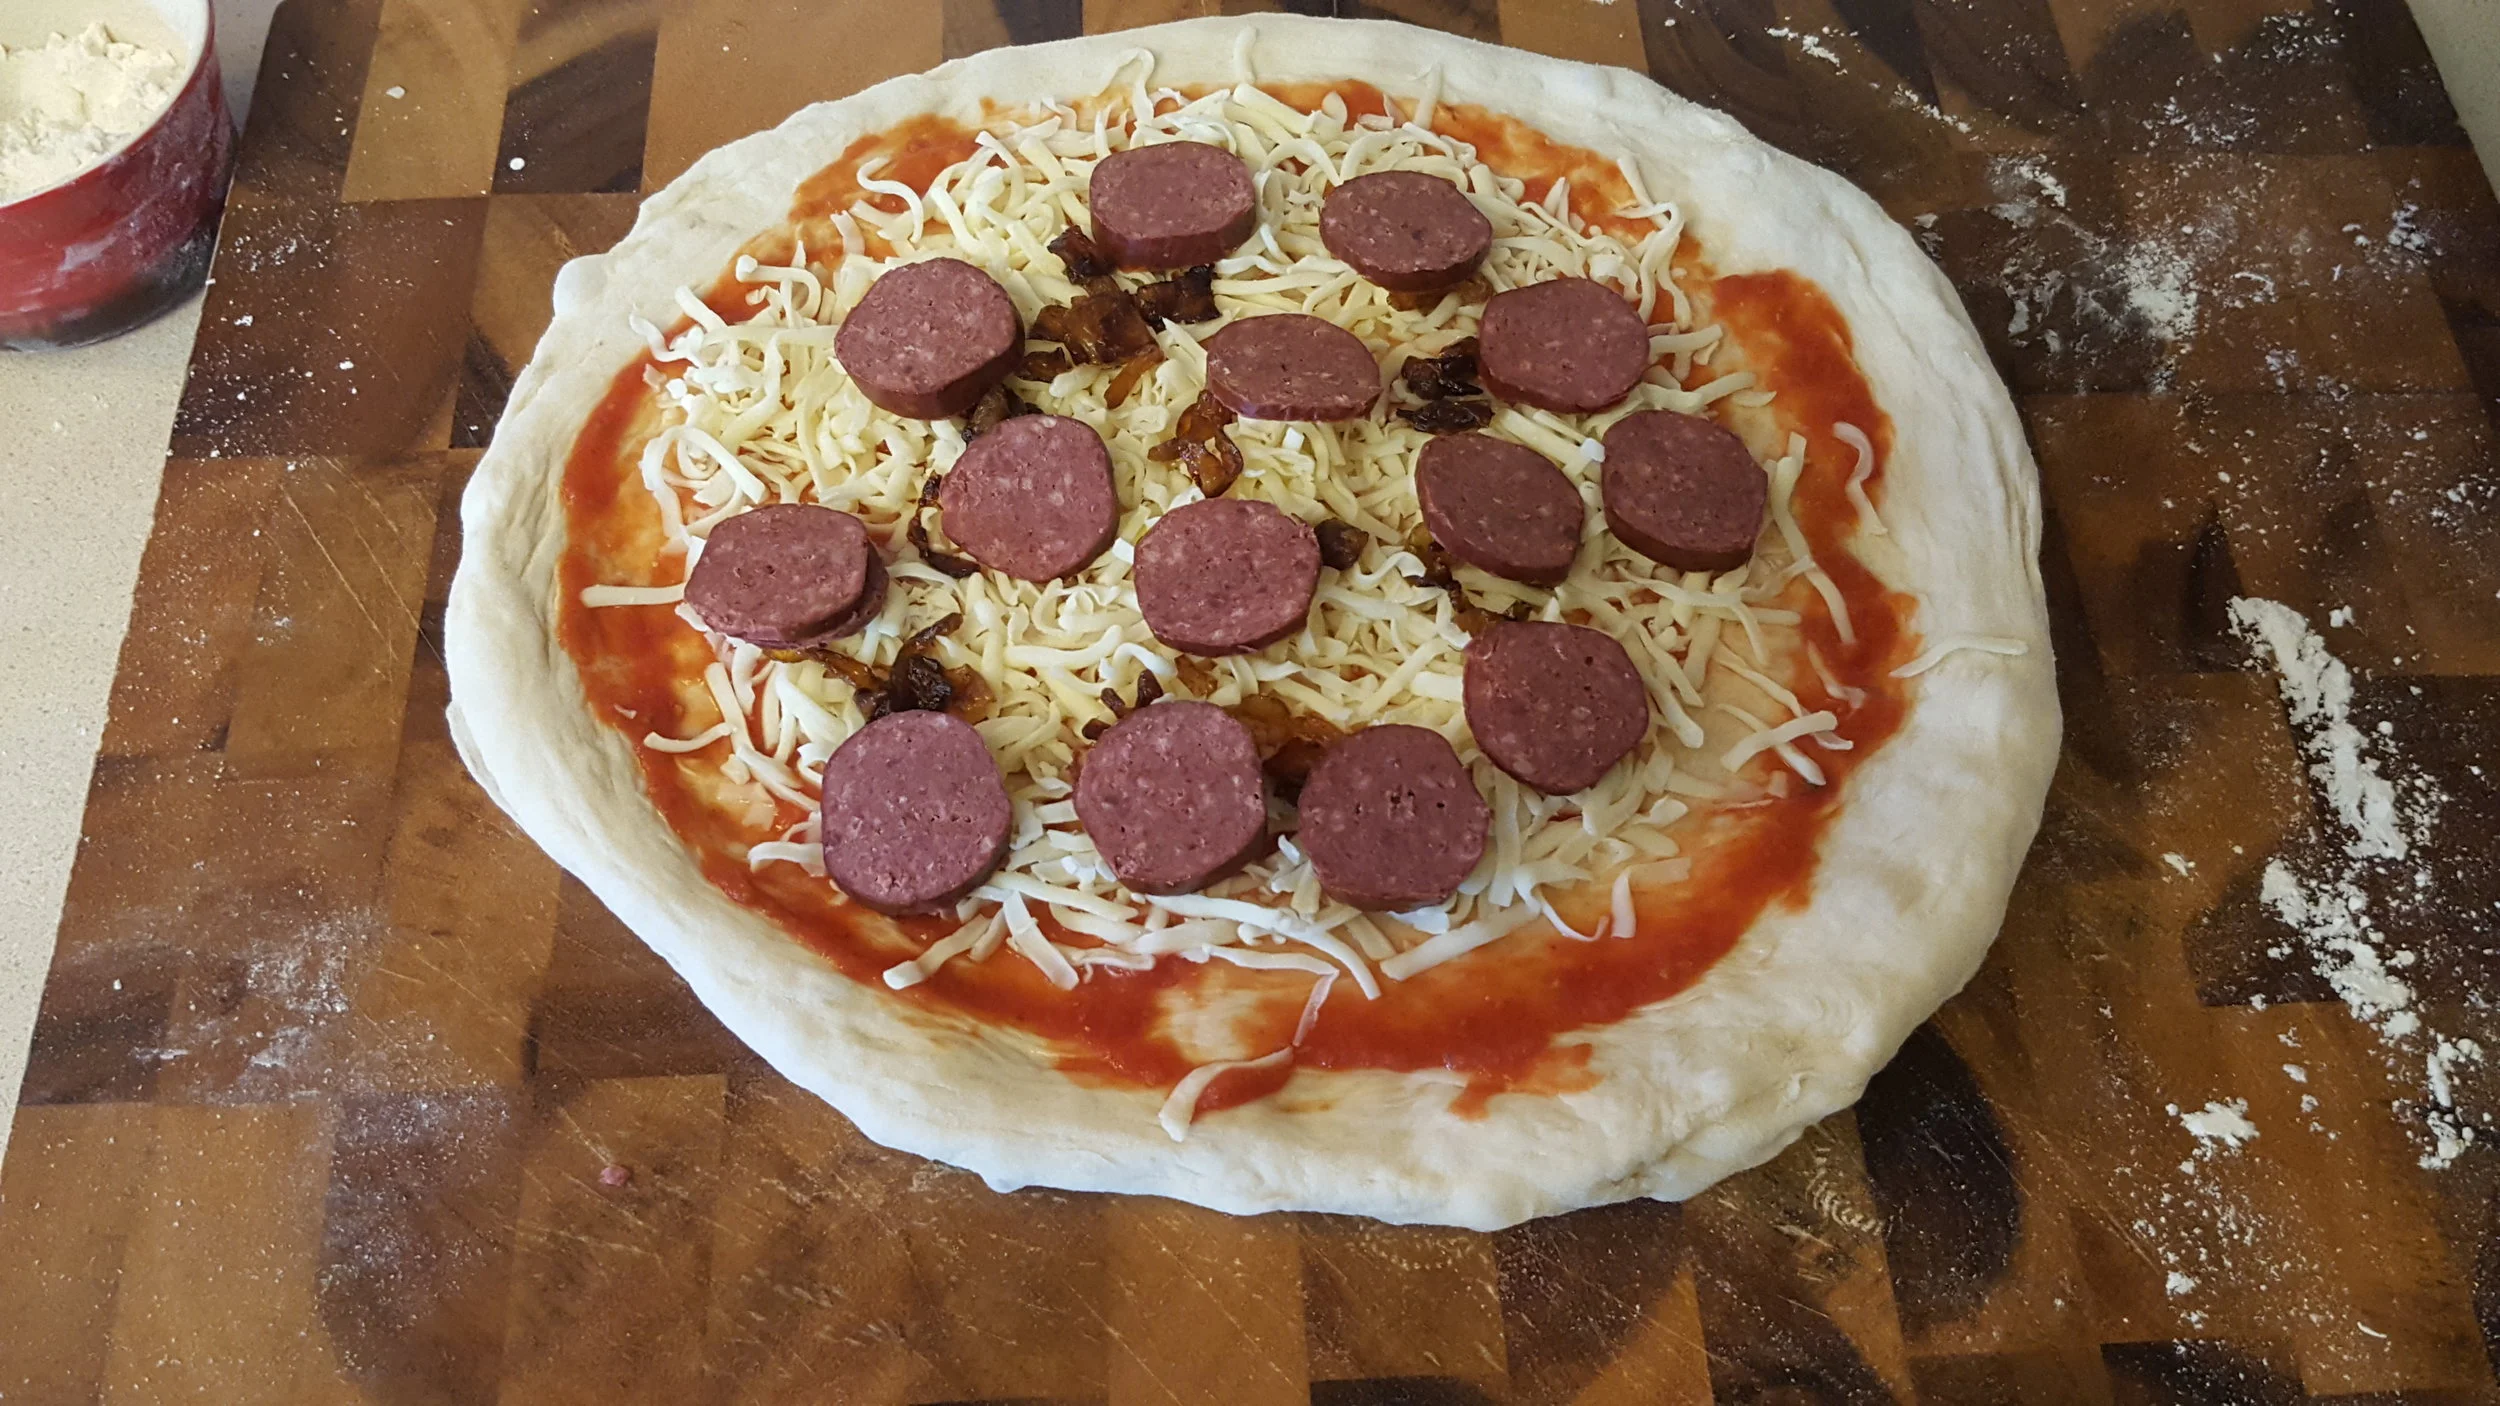
Finally, I laid the pizza onto a floured pizza peel and placed my toppings on. From here, I simply put my pizza onto my pizza stone (pre-heated to ~500°) and after five minutes I rotated the pizza 180° and cooked for another 5 minutes.
The end result was a delicious homemade pizza that would rival many of the pizza joints in my town.
How about you? Have you ever made your own pizza on the grill? Do you think the instructions in this article would make a good pizza? Make sure to share this post on social media and tell others your thoughts!