

By: (link: http://www.jeffhillyard.com) Jeff Hillyard
In part 1 I gave my initial thoughts of the (Link: https://abcbarbecue.com/) Adrenaline Barbecue Company (Link: https://abcbarbecue.com/product-category/slow-n-sear/) Slow ‘N Sear (SnS), in part 2 I’m going to cook a steak using the reverse sear method with the techniques outlined by the folks behind the SnS.
Most of the cooks I did in my first review would fall either into a somewhat “low and slow” cook (but not more than 5 hours), or a “hot and fast”, but without a need for a sear (as was the case with the chicken), so I decided for the next step I would truly test the searing capabilities of the SnS.
For those unfamiliar, the reverse sear is simply when you cook a piece of meat by slowly bringing up its internal temperature to about 15°F – 20°F below your desired temp, then quickly searing it at the end with high heat.
Luckily for me, David from Adrenaline Barbecue Company, and Justin from (Link: https://www.youtube.com/channel/UCgFM3RsJ6Low9nX_OlS8_JA) Baby Back Maniac teamed up to make some awesome YouTube videos for the SnS. One video was for the (Link: https://www.youtube.com/watch?v=xGjJQQCfqNY&t=1s) reverse sear method of cooking a steak. So I decided if I was going to try it myself, I may as well use the advice from the professionals.
I started off by only seasoning my steak (a delicious bacon wrapped filet mignon, I might add) with some kosher salt about 8 hours before I cooked it, and placed it back in the refrigerator. This is called “dry brining”. The salt draws moisture out of the steak, the moisture dissolves the salt, which is then reabsorbed into the meat, bringing the salt in with it. This salt will help flavor the meat and also help the meat retain moisture when cooking.
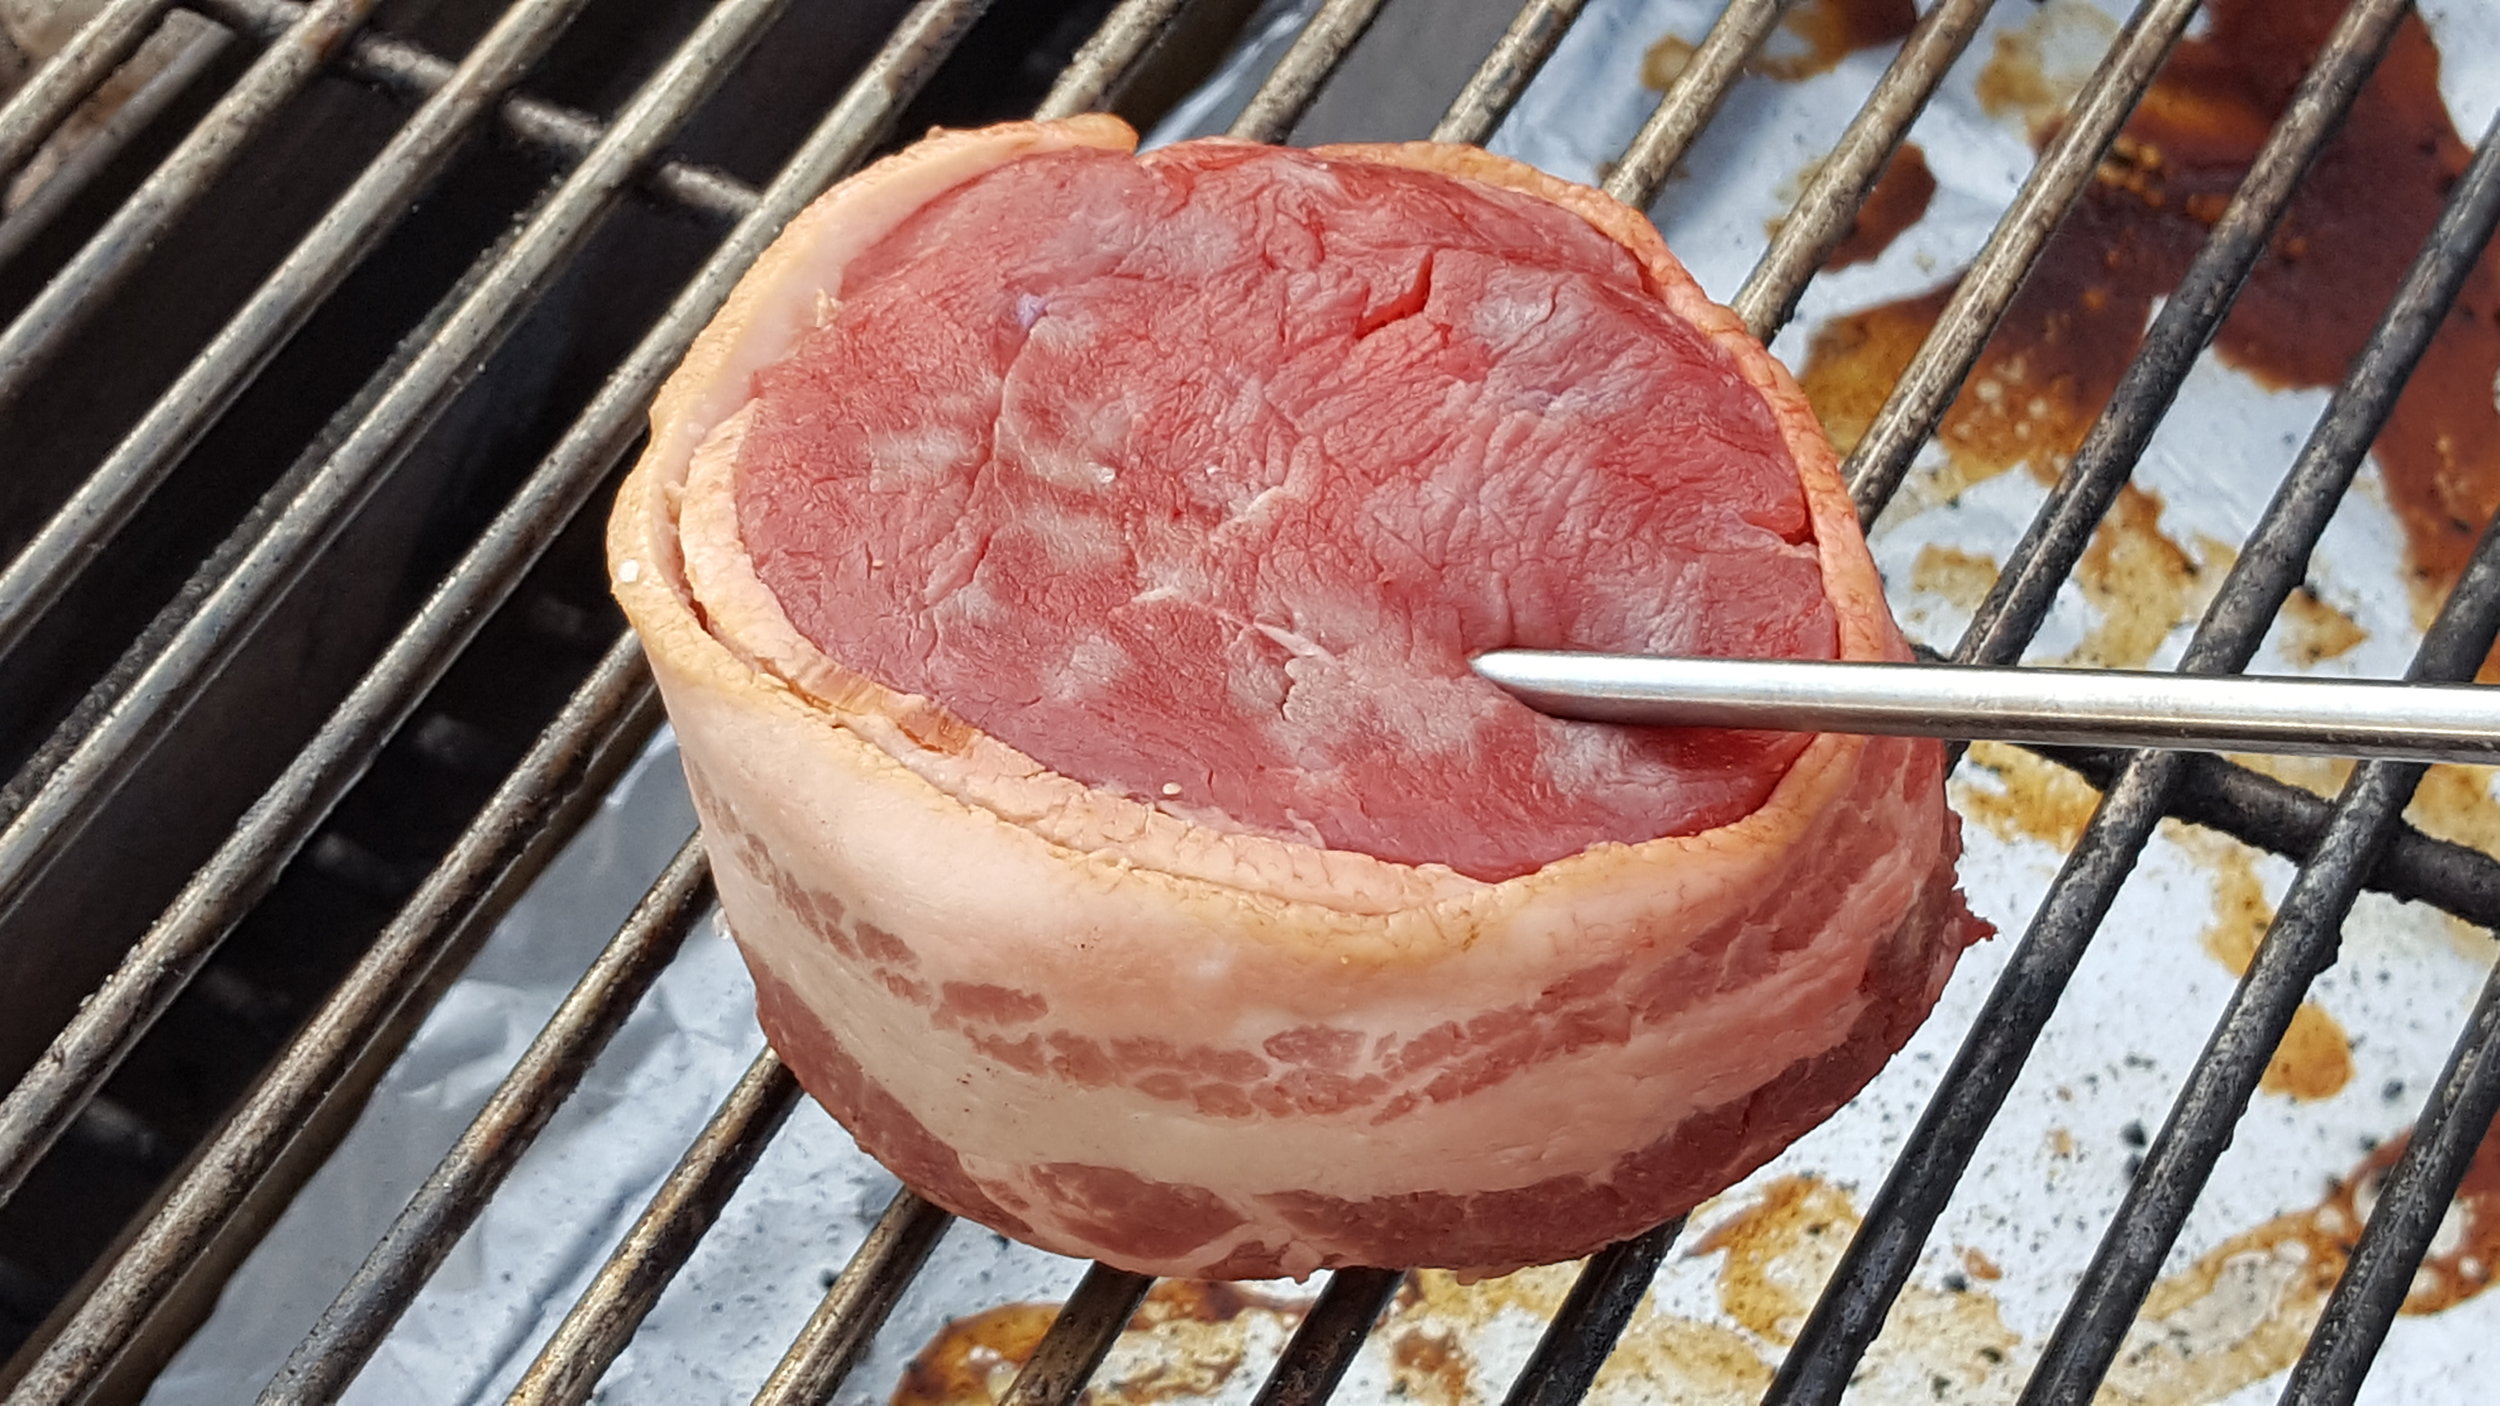
Next I lit about 20 briquettes of Kingsford original charcoal. Once they were ashed over I put them into my SnS, spreading them evenly. I then put my steak on the grill and inserted a probe thermometer and placed a thermometer on the cooking grate next to the meat.
My intention was to cook at around 250°F, but I found that the temp climbed up to about 325°F pretty quickly. Luckily it didn’t turn out to be a big deal in the end. After about 15 minutes my steak was at 90°F, so I filled a charcoal chimney about half-way with briquettes and lit it. After another 5 minutes the steak was at an internal temp of 110°F, so I removed it from heat while the charcoal was lighting in the chimney. I also removed the cooking grate.
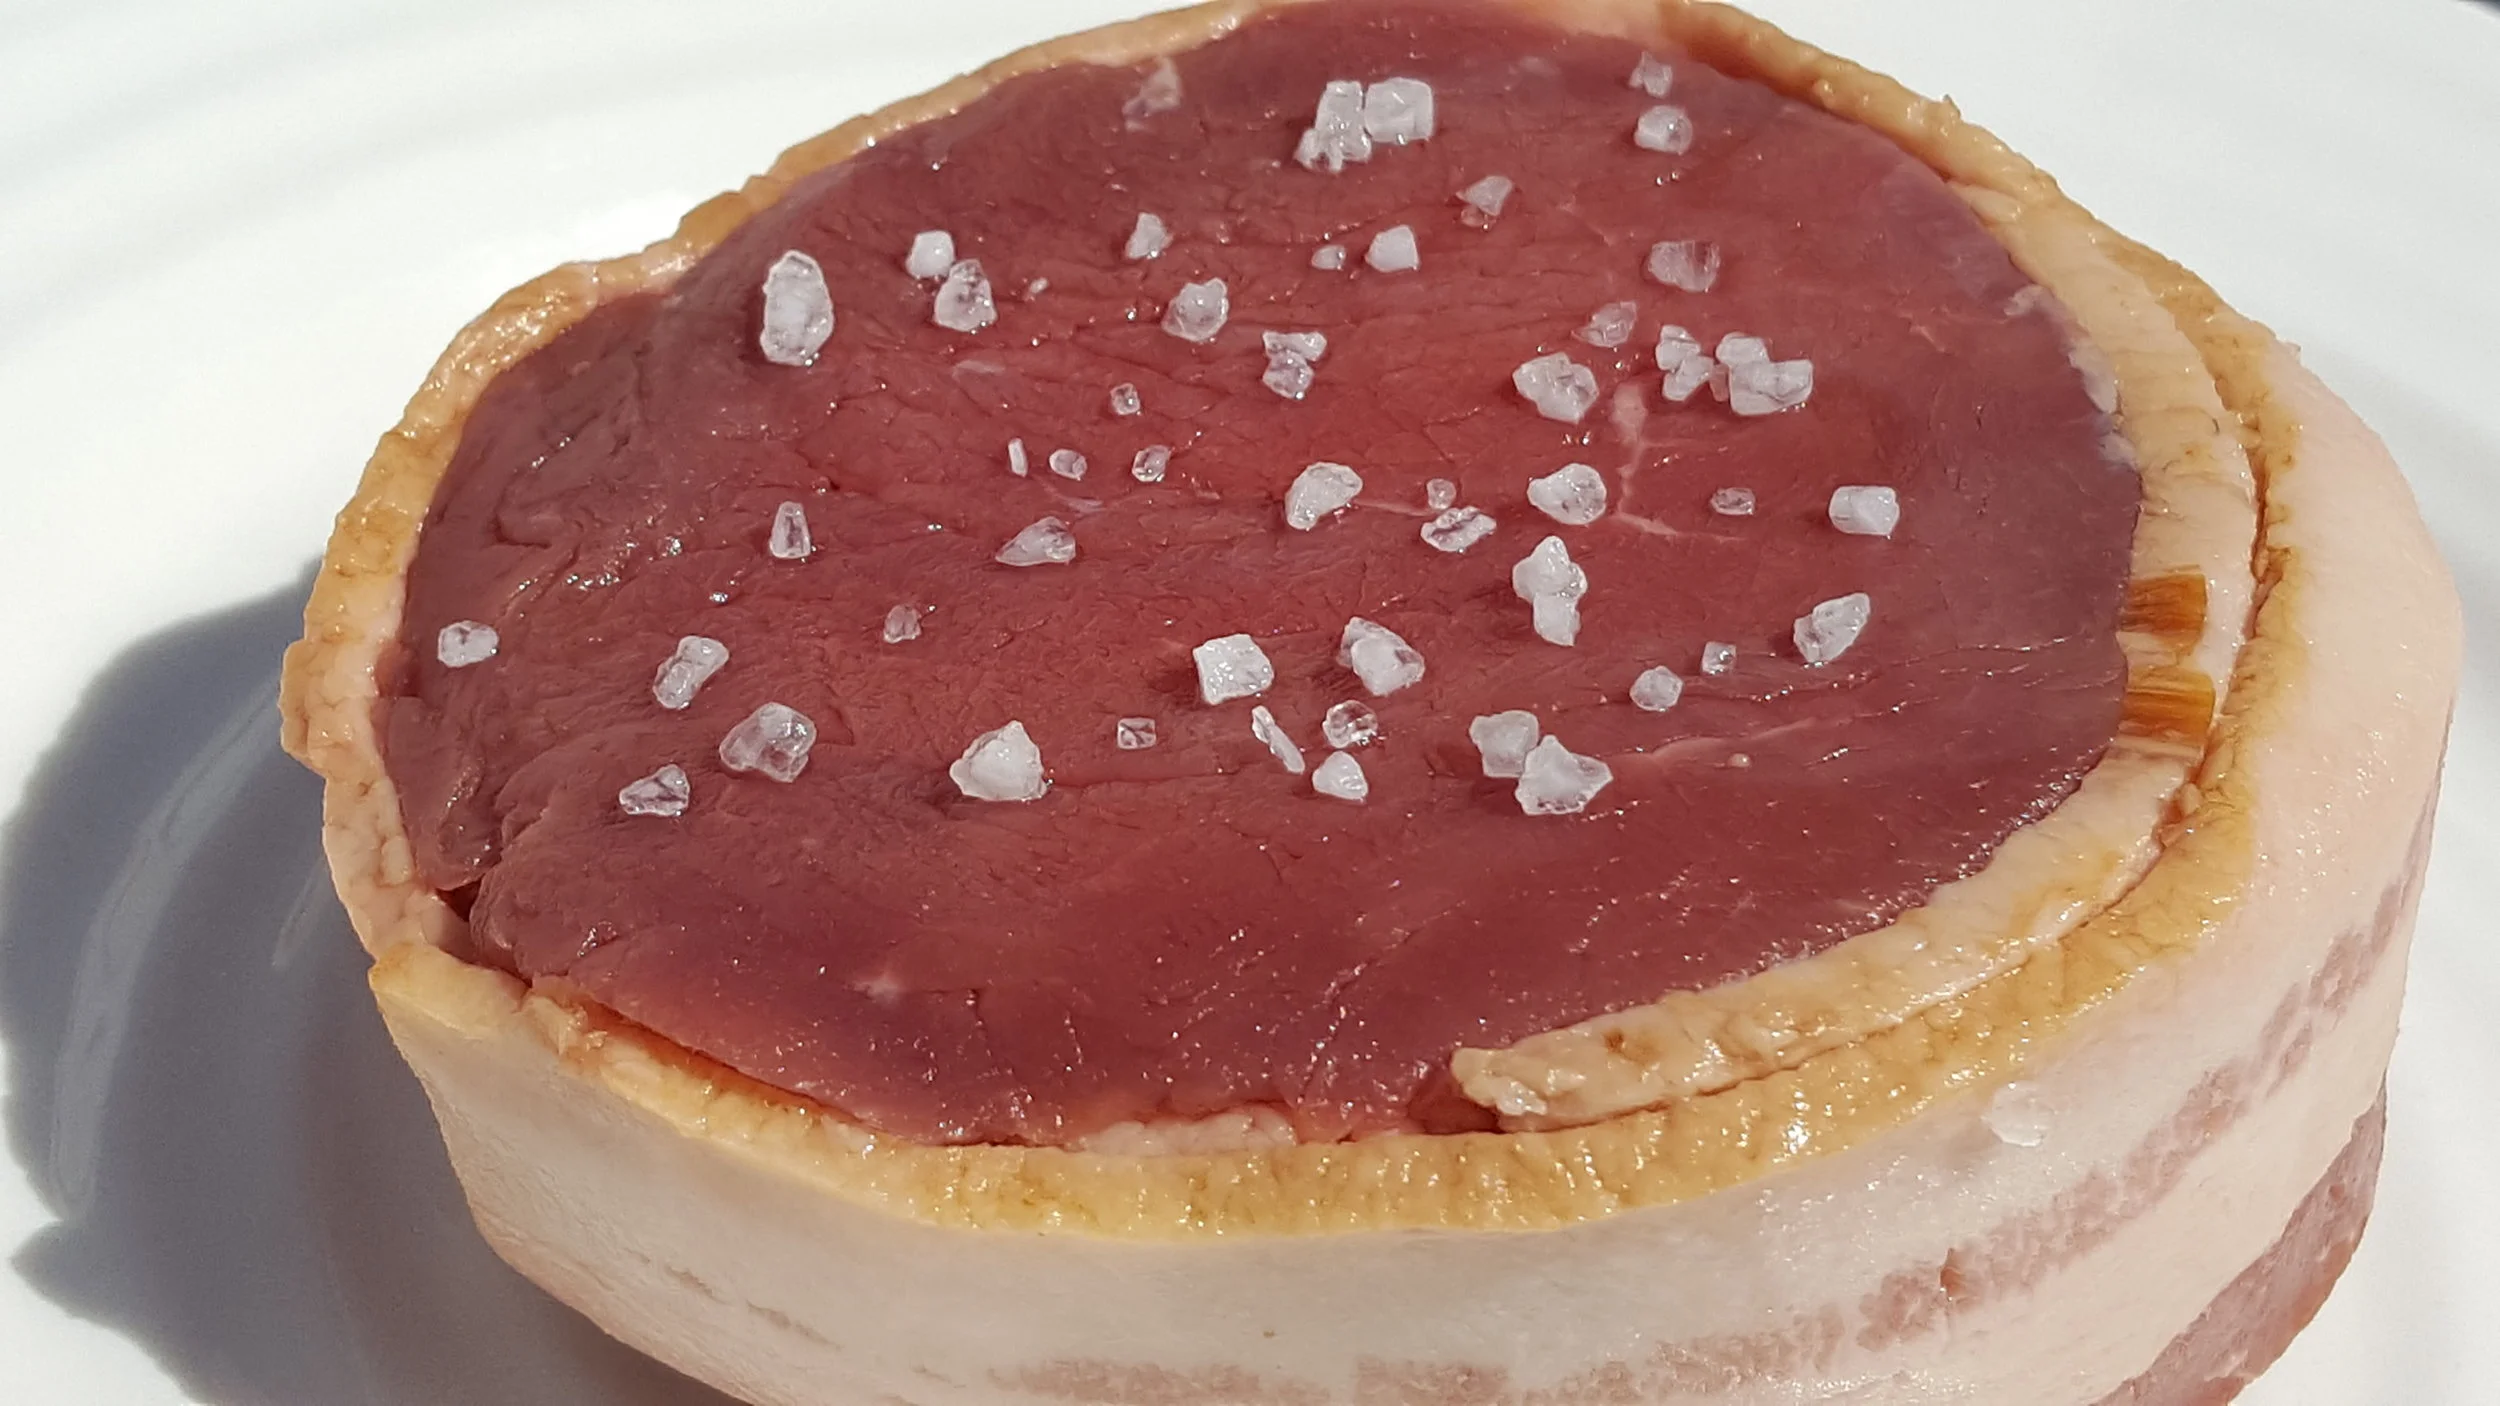
While I was waiting for the chimney to light, I used a paper towel to blot any moisture on the steak off. Then I put a thin layer of vegetable oil onto the steak and seasoned with some fresh cracked pepper.
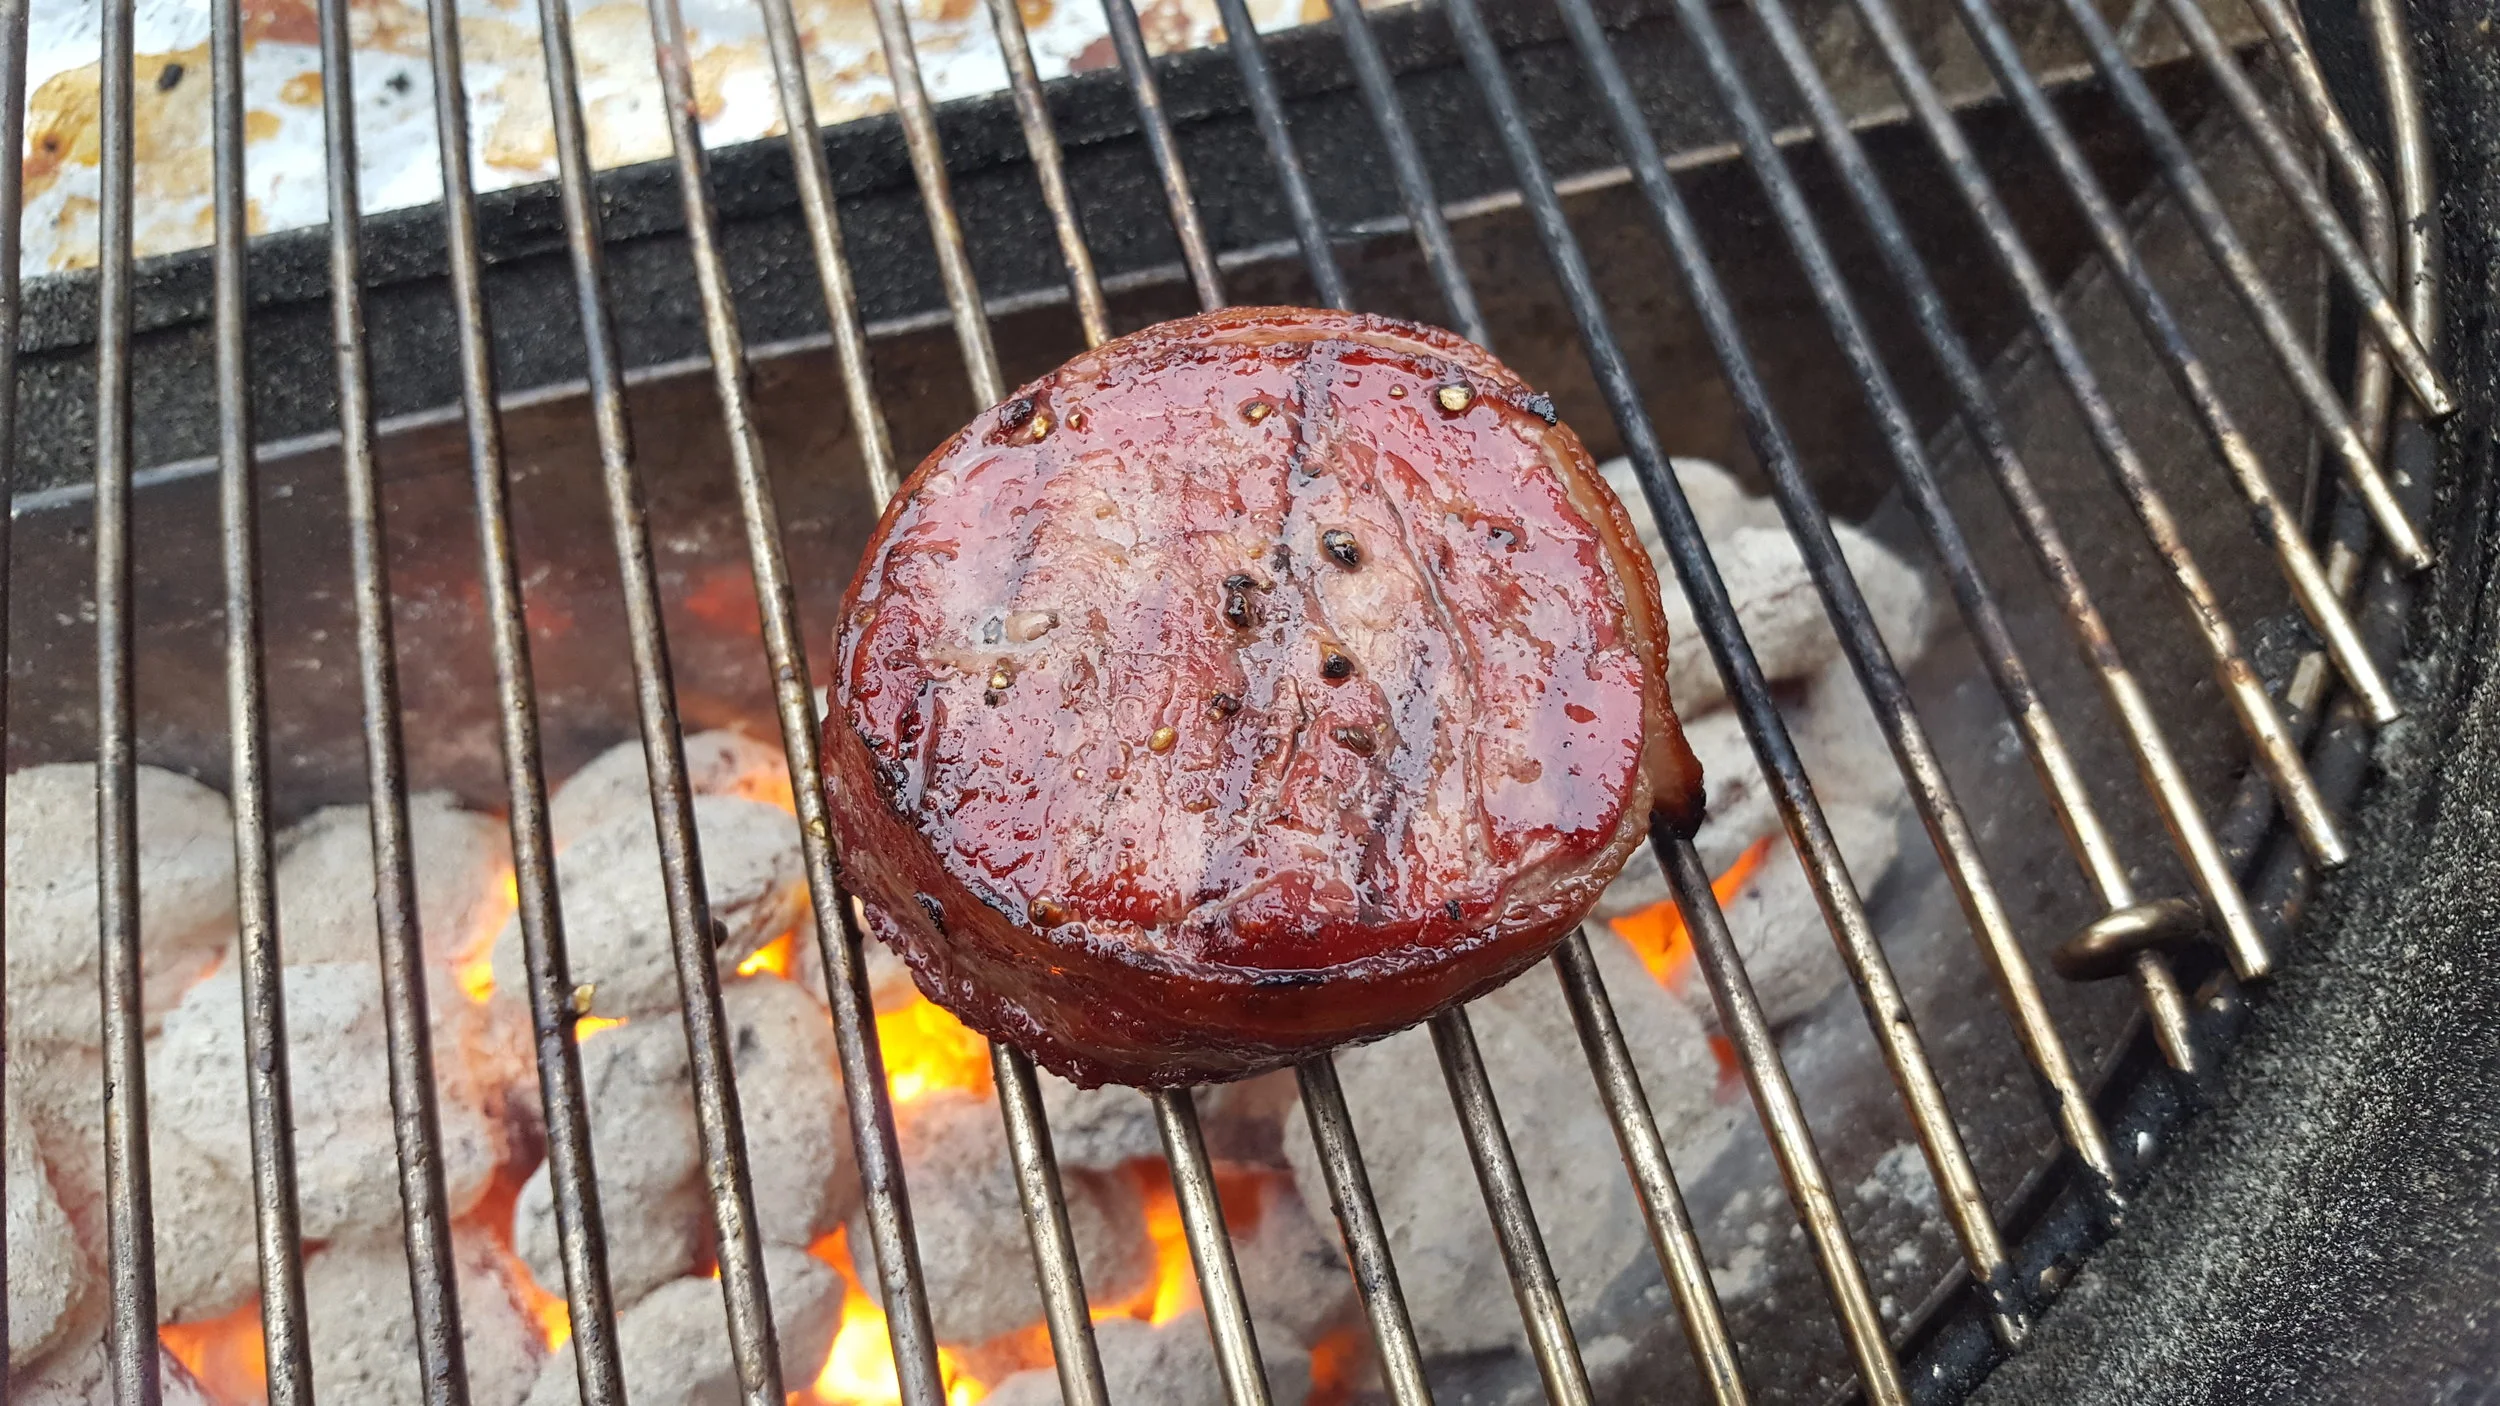
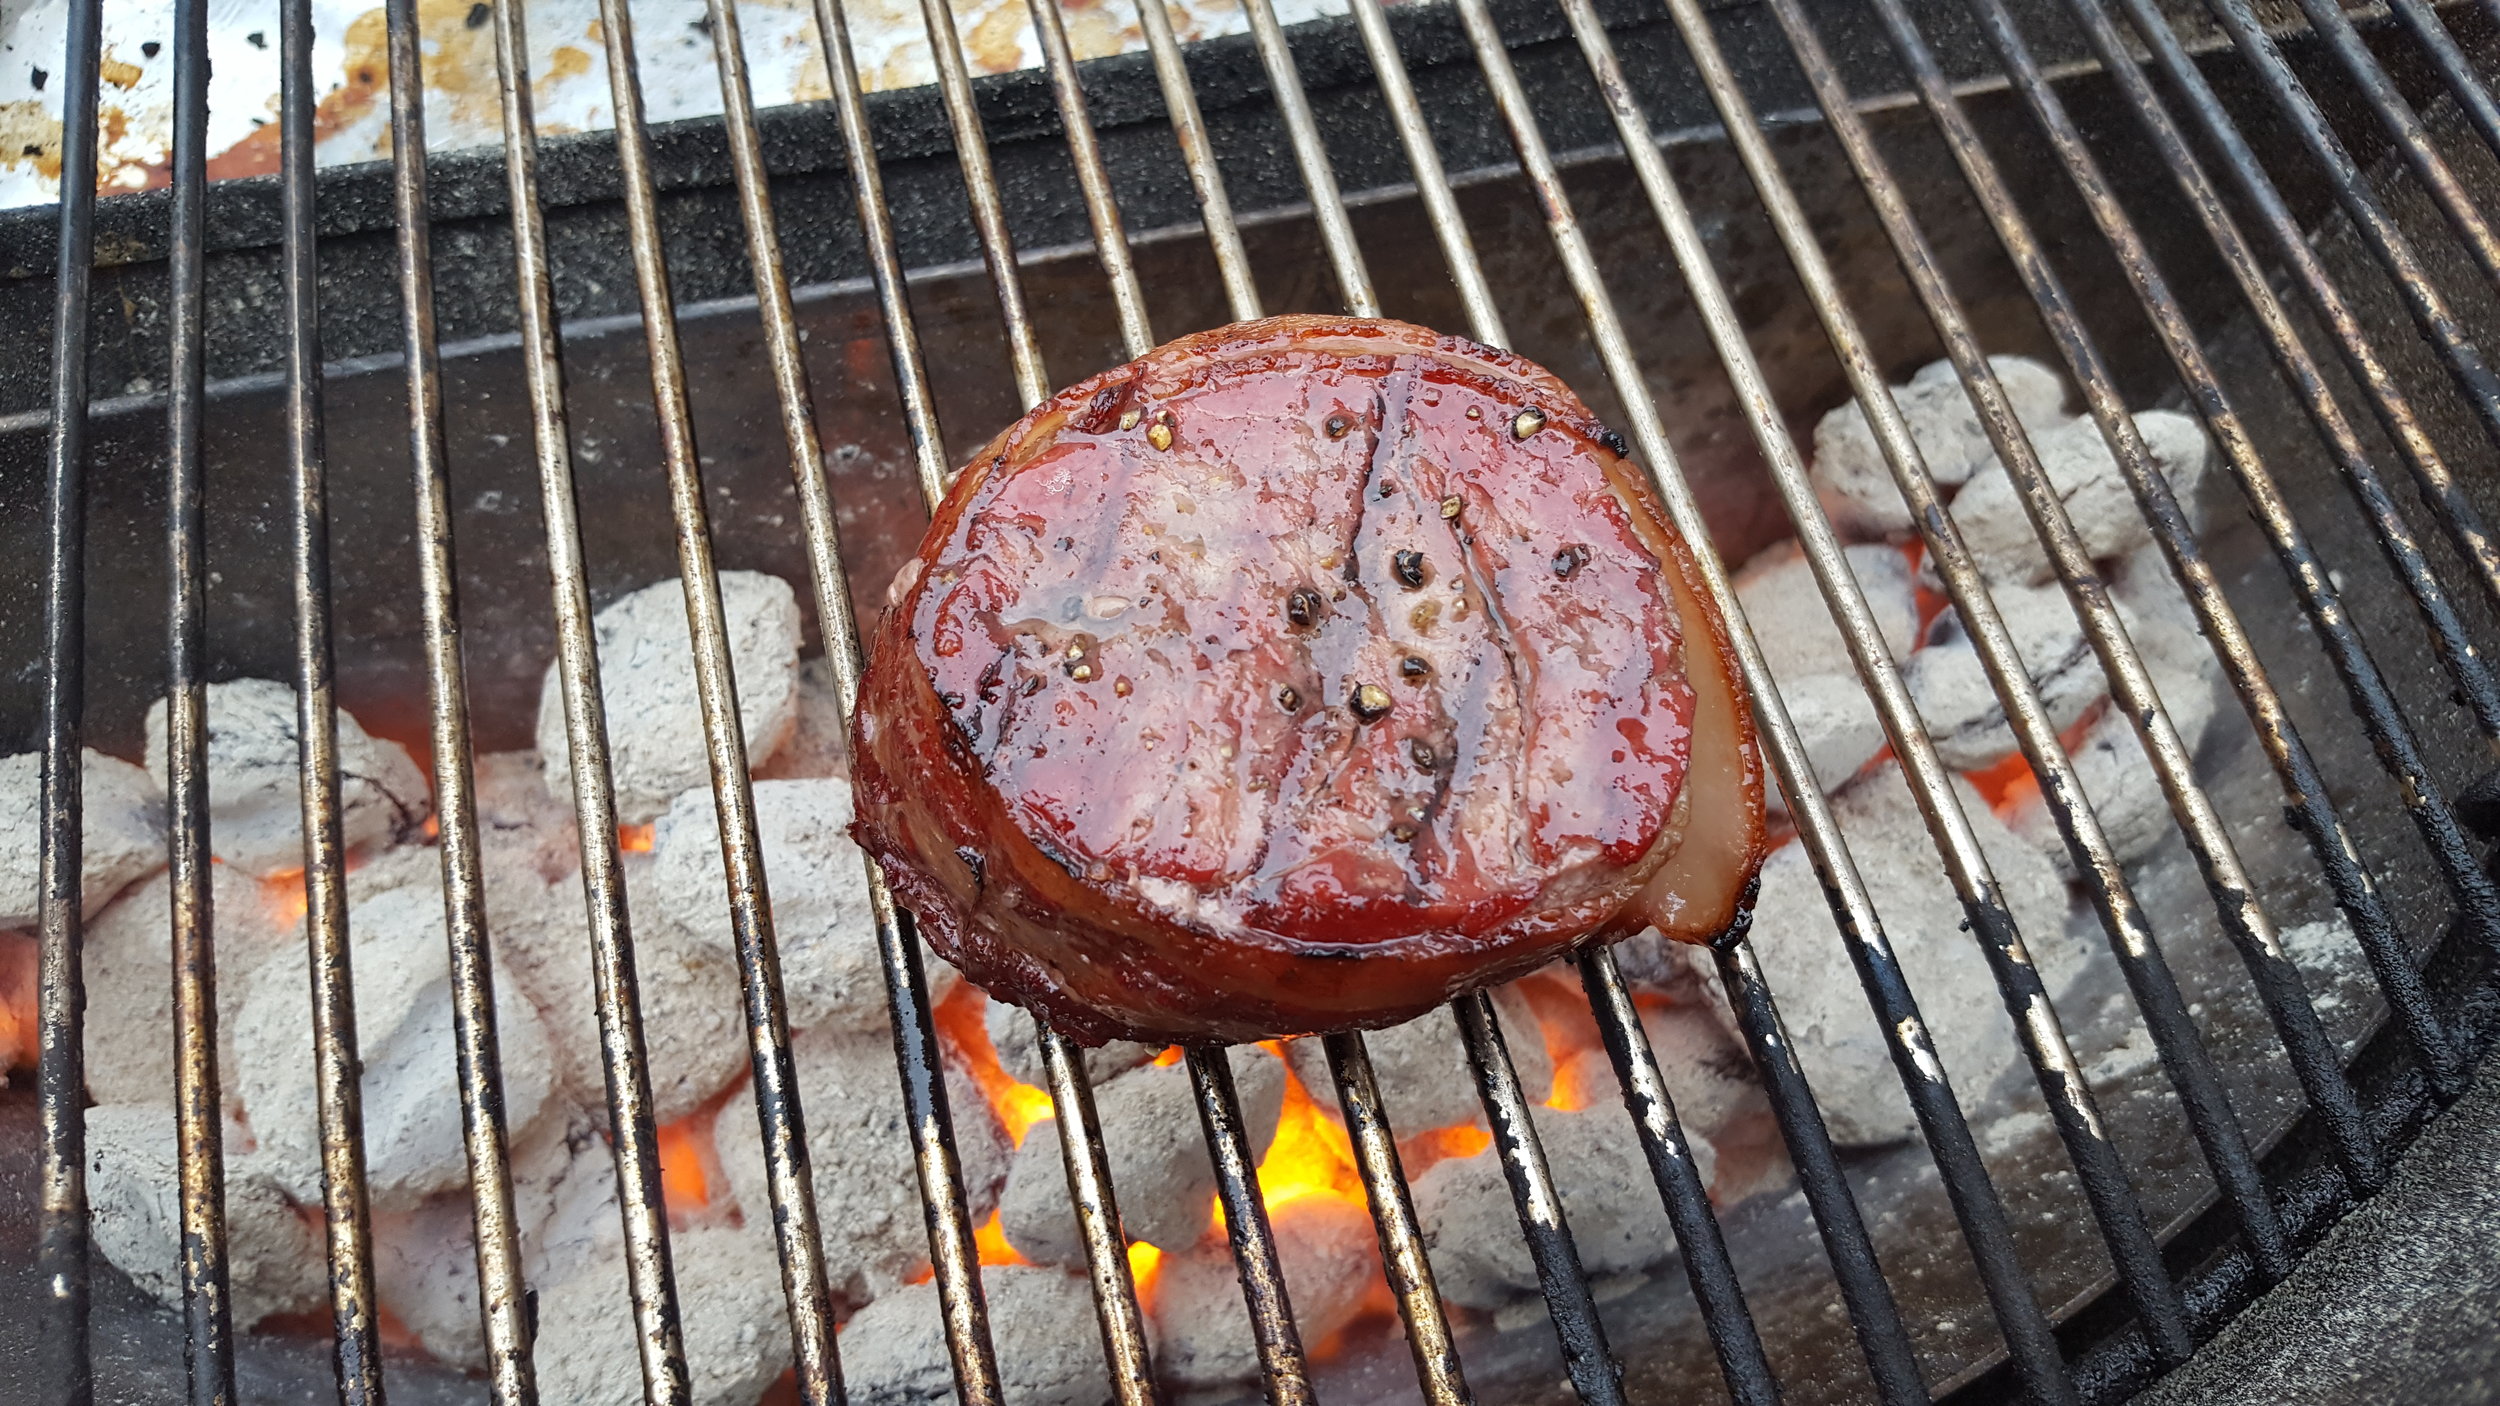
Once the charcoal was lit, I dumped it into the SnS and placed my (now cold) grate onto the kettle, and placed my filet directly over the charcoal. In their video, David from Adrenaline Barbecue Company explains that the reason we want a cold grate is simple: when grates get hot and food gets put on them, they create sear marks, and while that looks cool, an even browning tastes better.
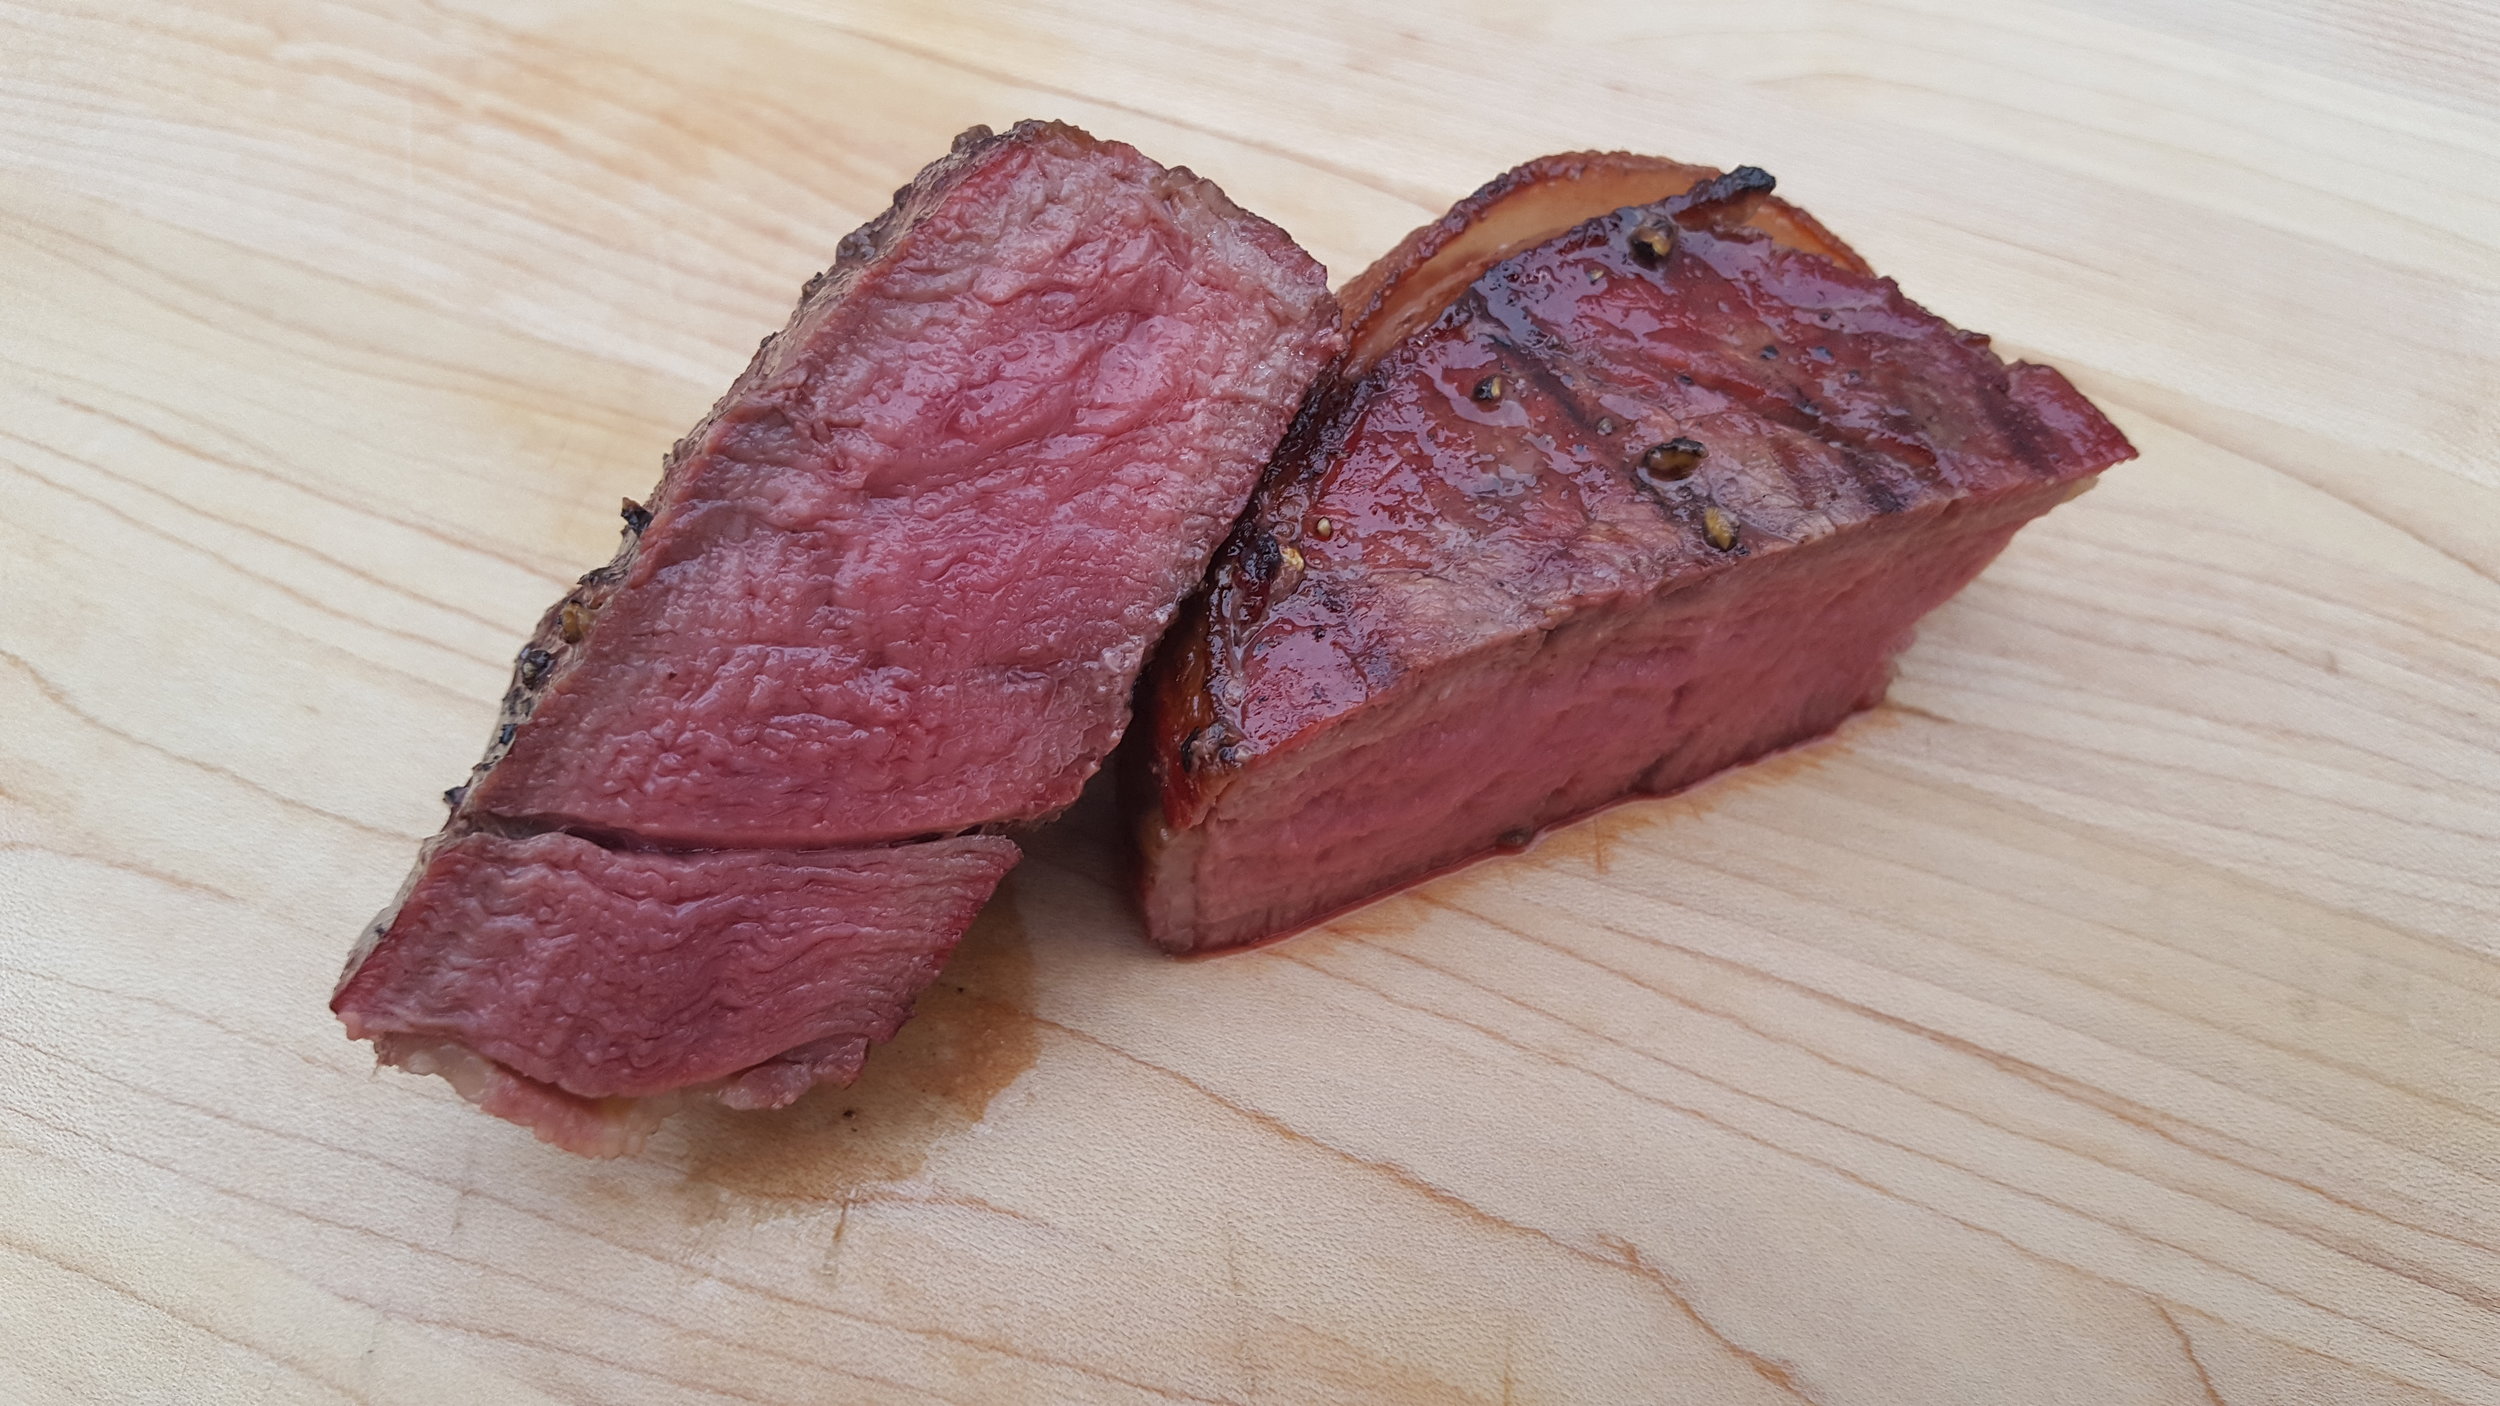
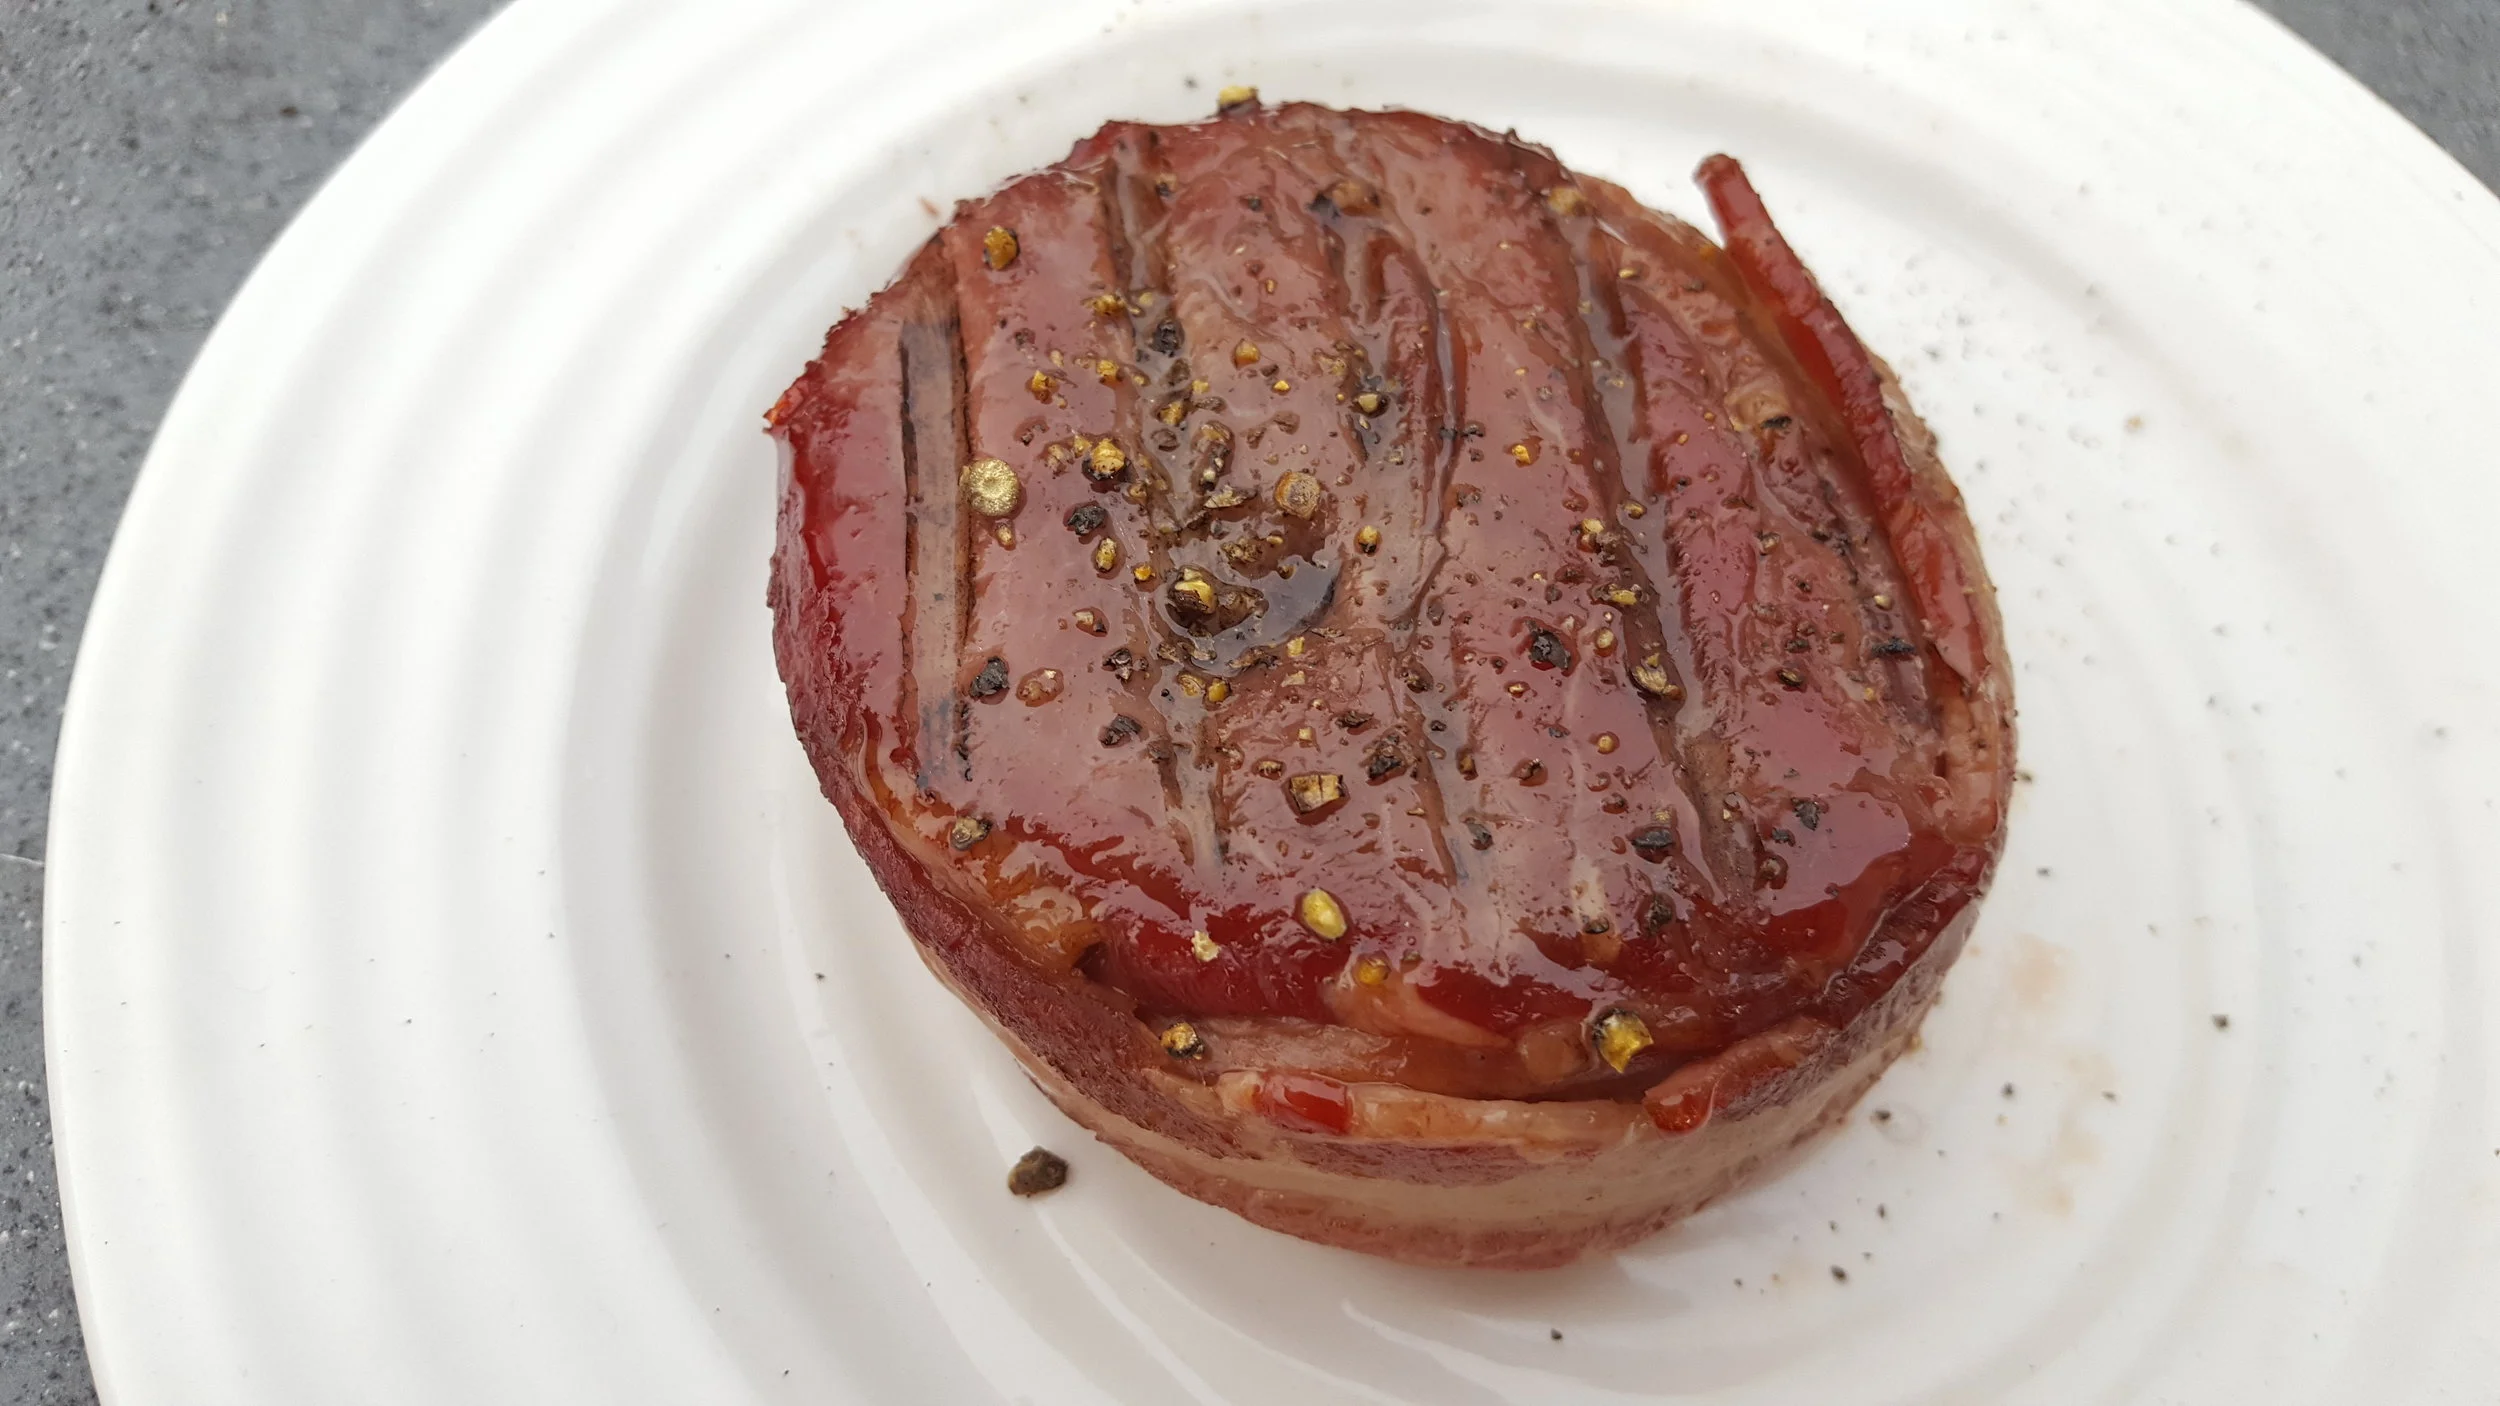
After searing for four minutes total (flipping and rotating after each minute), I checked my temp using my Thermapen, and it was a perfect rare at 125° which was okay by me! I removed it from the grill, and quickly sliced into my steak. It was a bumper to bumper red with absolutely no overcooked edges.
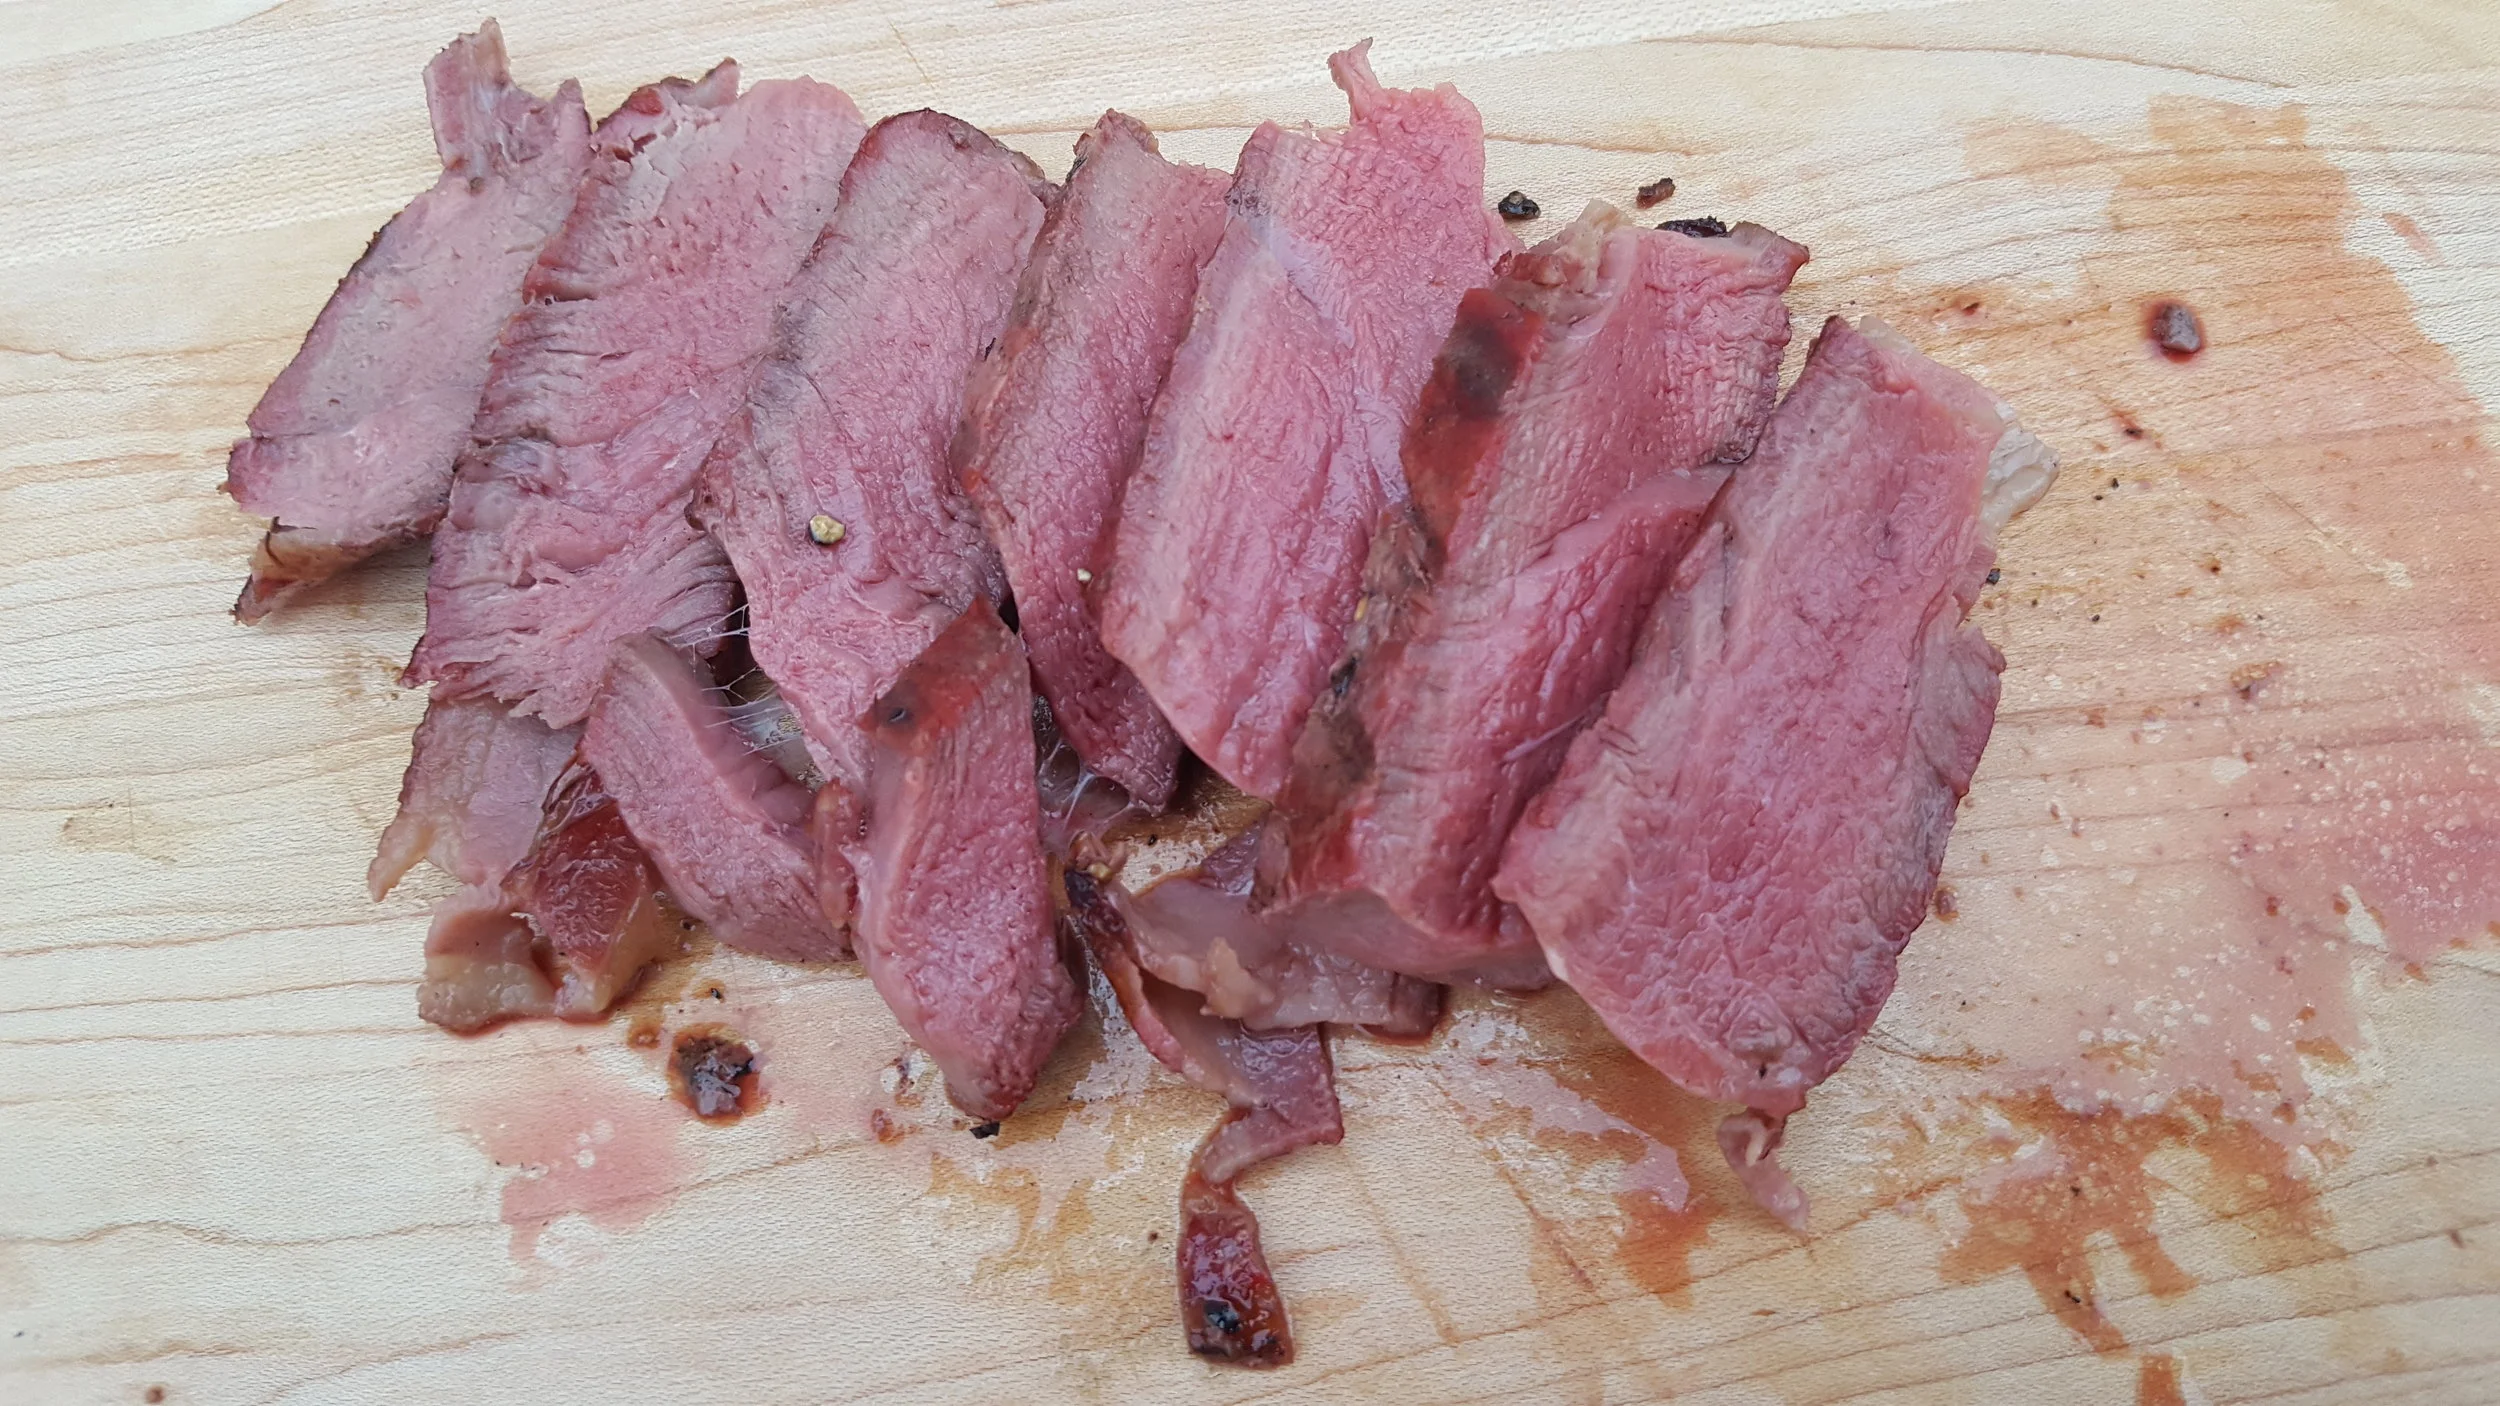
I sliced it up and took a bite. Wow, it was bar none one of the best steaks I’ve ever eaten, let alone cooked.
The intramuscular fat inside the meat had rendered away while slowly cooking, giving the steak a very buttery texture. The bacon on the filet was cooked but not burned, which can be difficult if you cook it over high direct heat for prolonged period of time. The sear using the “cold grate” method provided me with an even brown outer crust unlike anything I’d ever experienced.
Needless to say, the Slow ‘N Sear reverse seared steak passed the test.
In the final installment of the Slow ‘N Sear review, I plan to cook either a brisket of a pork shoulder for a long (10+ hour) low and slow cook. I’m actually considering an overnight cook, something I’ve never done before. I just need to convince my wife I won’t burn the house down!