

Slow ‘N Sear Review Part 3 – All-Day Brisket (AKA Easy Brisket)
By: (Link: http://www.jeffhillyard.com) Jeff Hillyard
I already gave you a general run-down of the (Link: https://abcbarbecue.com/products/) Slow ‘N Sear (SnS); I showed how easy it was to set up, and I showed you how it could handle relatively short cooks with ease. Then I showed it was a reverse sear machine.
But how about a serious, all-night, knock down drag em out, low and slow smoking session? Was the SnS up to the test? Was it really as easy as people say? Could you truly, “set it and forget it”?
In my mind, there is only one test I could do: a 10+ hour brisket cook.
I was already pretty comfortable with my SnS, but I set out and did my research. Lucky for me, (Link: https://abcbarbecue.com/) Adrenaline Barbecue Company (manufacturer of the SnS) have made several “how-to” videos, and one was specific to cooking a (Link: https://www.youtube.com/watch?v=0ihn4znOrdA) brisket. I watched it and jotted down notes to myself.

When it came time for the cook, I simply prepped my brisket as I usually would – by removing any large pieces of hard fat and trimming the fat cap down to ¼” thickness. I seasoned it with (Link: http://www.lanesbbq.com/store/brisket-rubs) Lanes BBQ Brisket Rub, and let it sit in the fridge overnight.
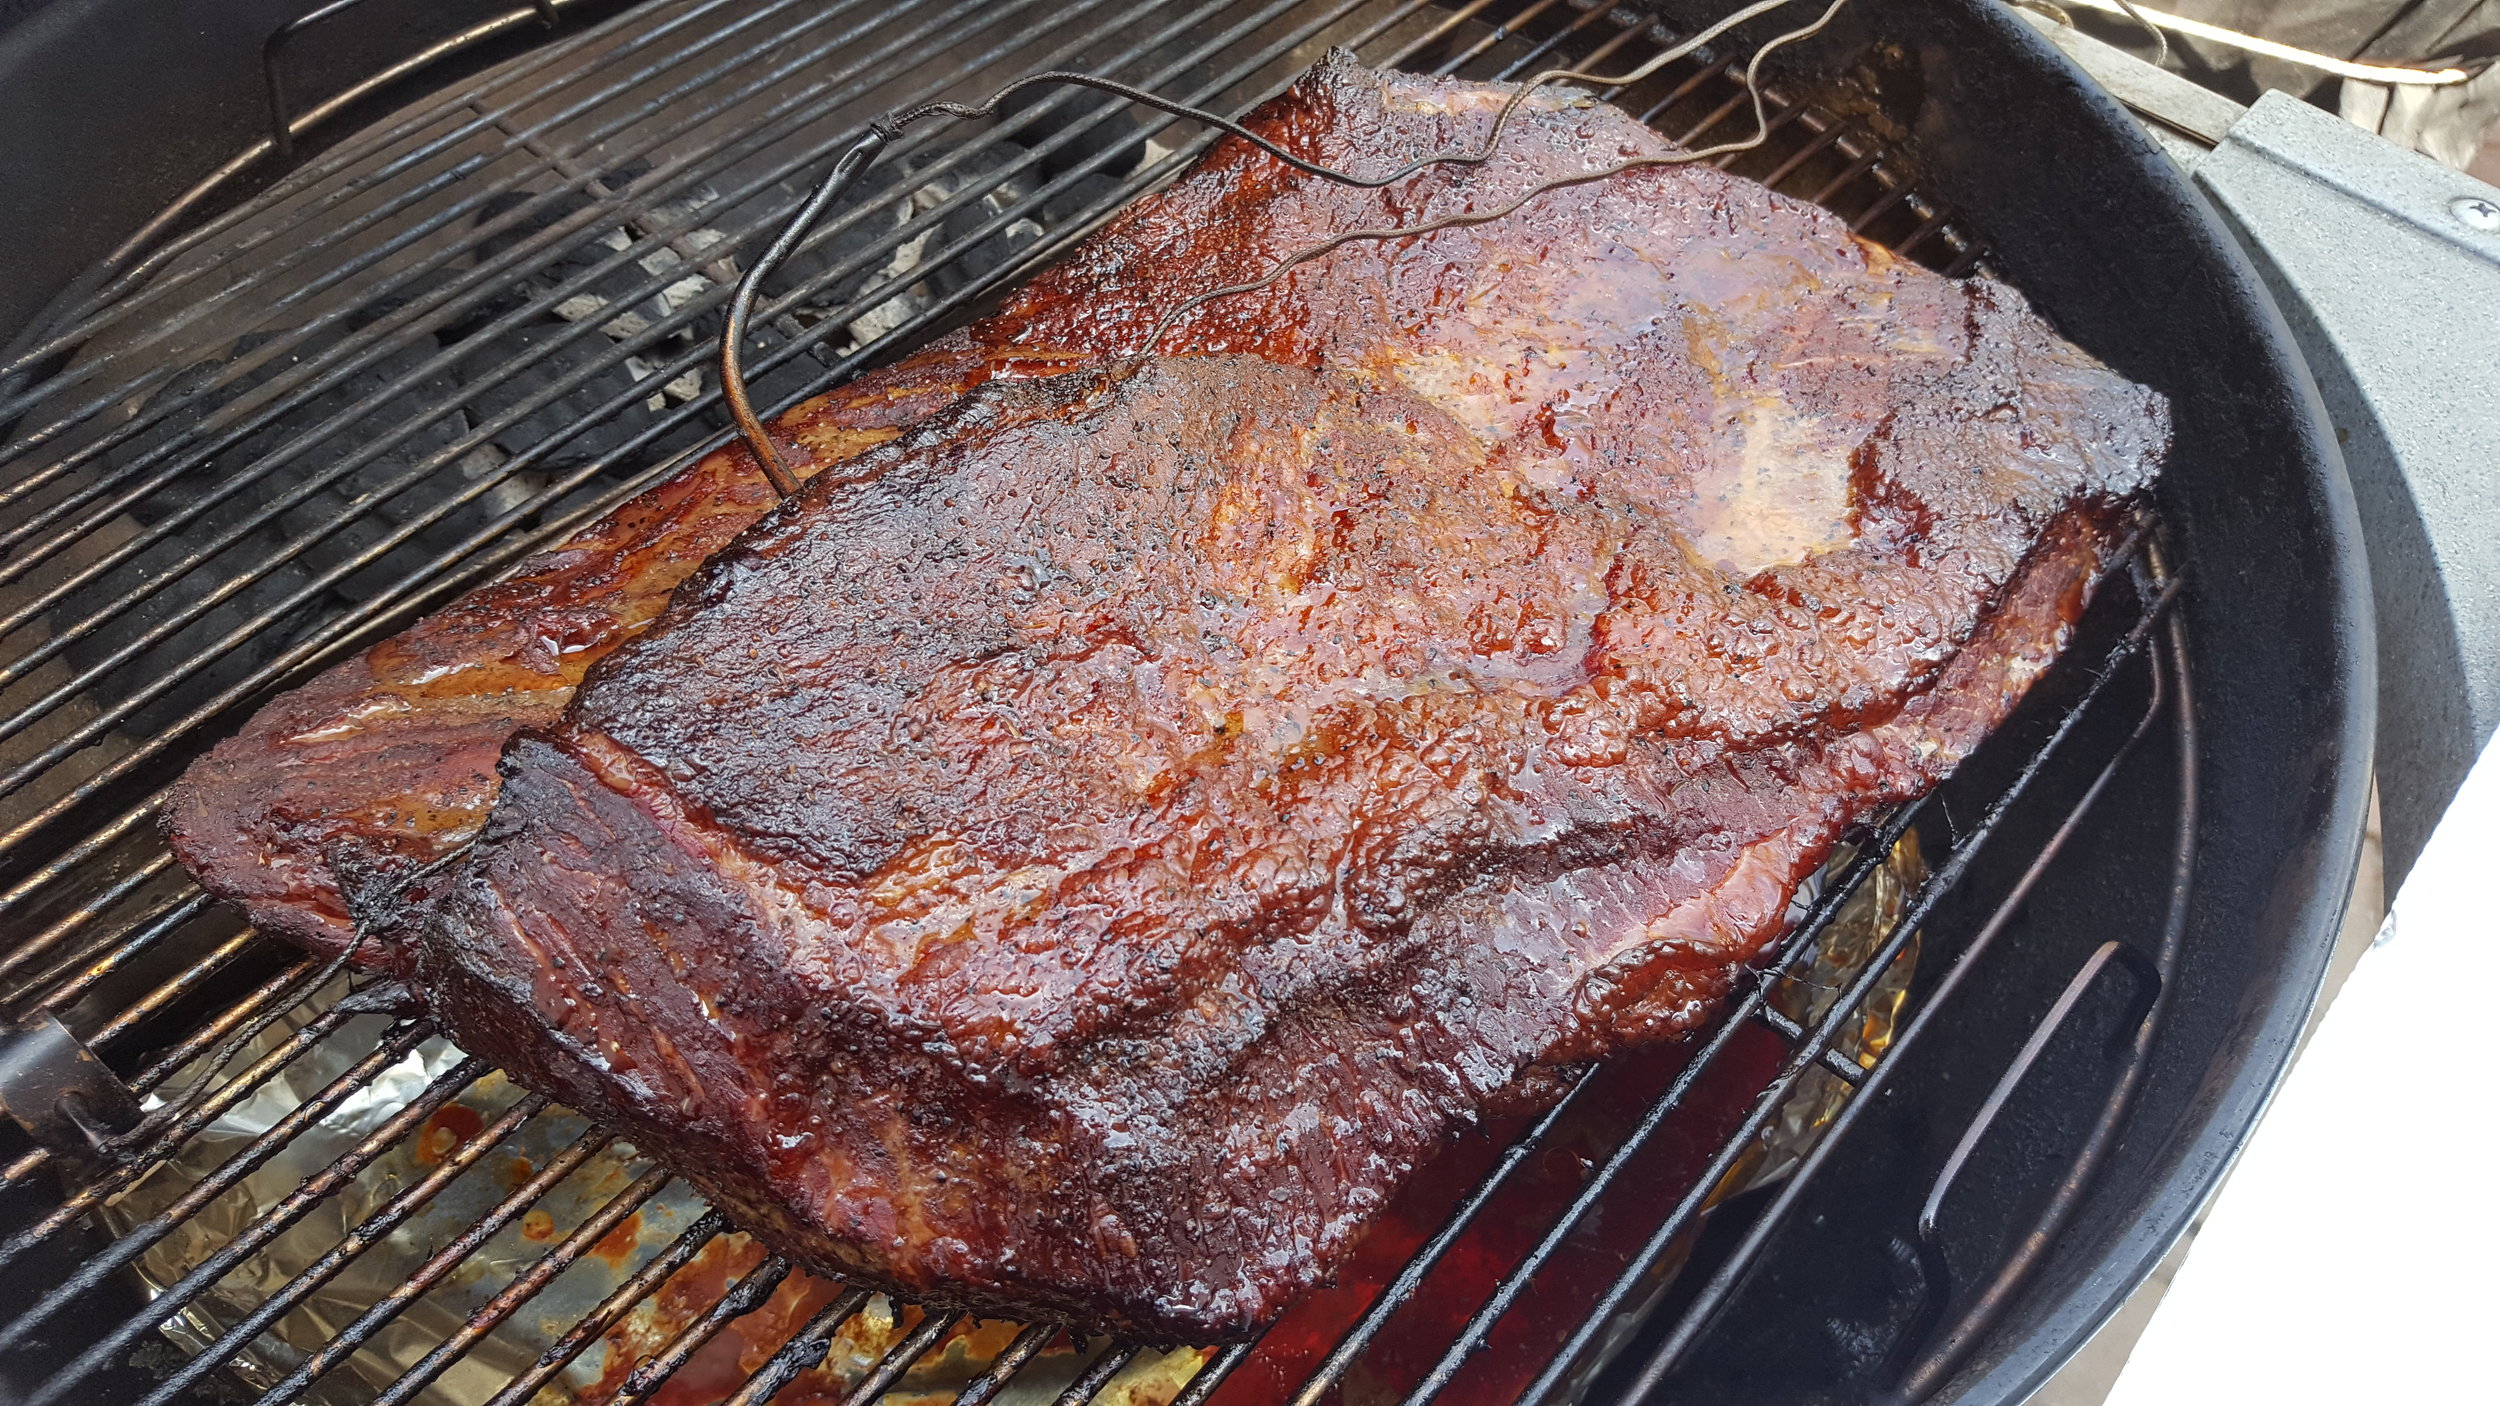
The next morning I got up at 3:00 am, lit 12 briquettes in my charcoal chimney and placed them in a corner of my SnS when they were completely ashed over. Then I loaded up the remaining space in the SnS with unlit briquettes. I added boiling water to the water reservoir and two fist-sized chunks of mesquite. Finally, I placed the brisket on (fat side up).
From my experiences, I knew that the SnS can come up to temp very quickly, so I didn’t bother to wait before I placed my brisket on. Finally, using my Maverick Et-732 digital wireless thermometer I placed a probe into the thickest part of the point and another on the grill grate.
Just like in the video, I left my top and bottom vents 100% open until the temp in the grill read 175F. At which point I closed the top vent to 1/3 open, and bottom vent to ¼ open.
I like to cook my brisket between 225F and 275F. I know for a lot of people that is too wide of a gap in temps, but I find it is simply too hard to keep the kettle dialed into a specific temperature. Anyway, by 4:00 am the kettle had settled into a temp of around 232F, and it stayed there for about 5 hours. I was actually able to go back to sleep!
At hour 5, the temp was starting to drop so I knocked the ash off the charcoal and slightly opened the top vent to ½ open and it shot back up. Also at hour 5 the brisket reached the stall. The internal temp was 156F and that is where it stayed for the next 3 hours.
At hour 6 I topped up the charcoal and refilled the water pan.
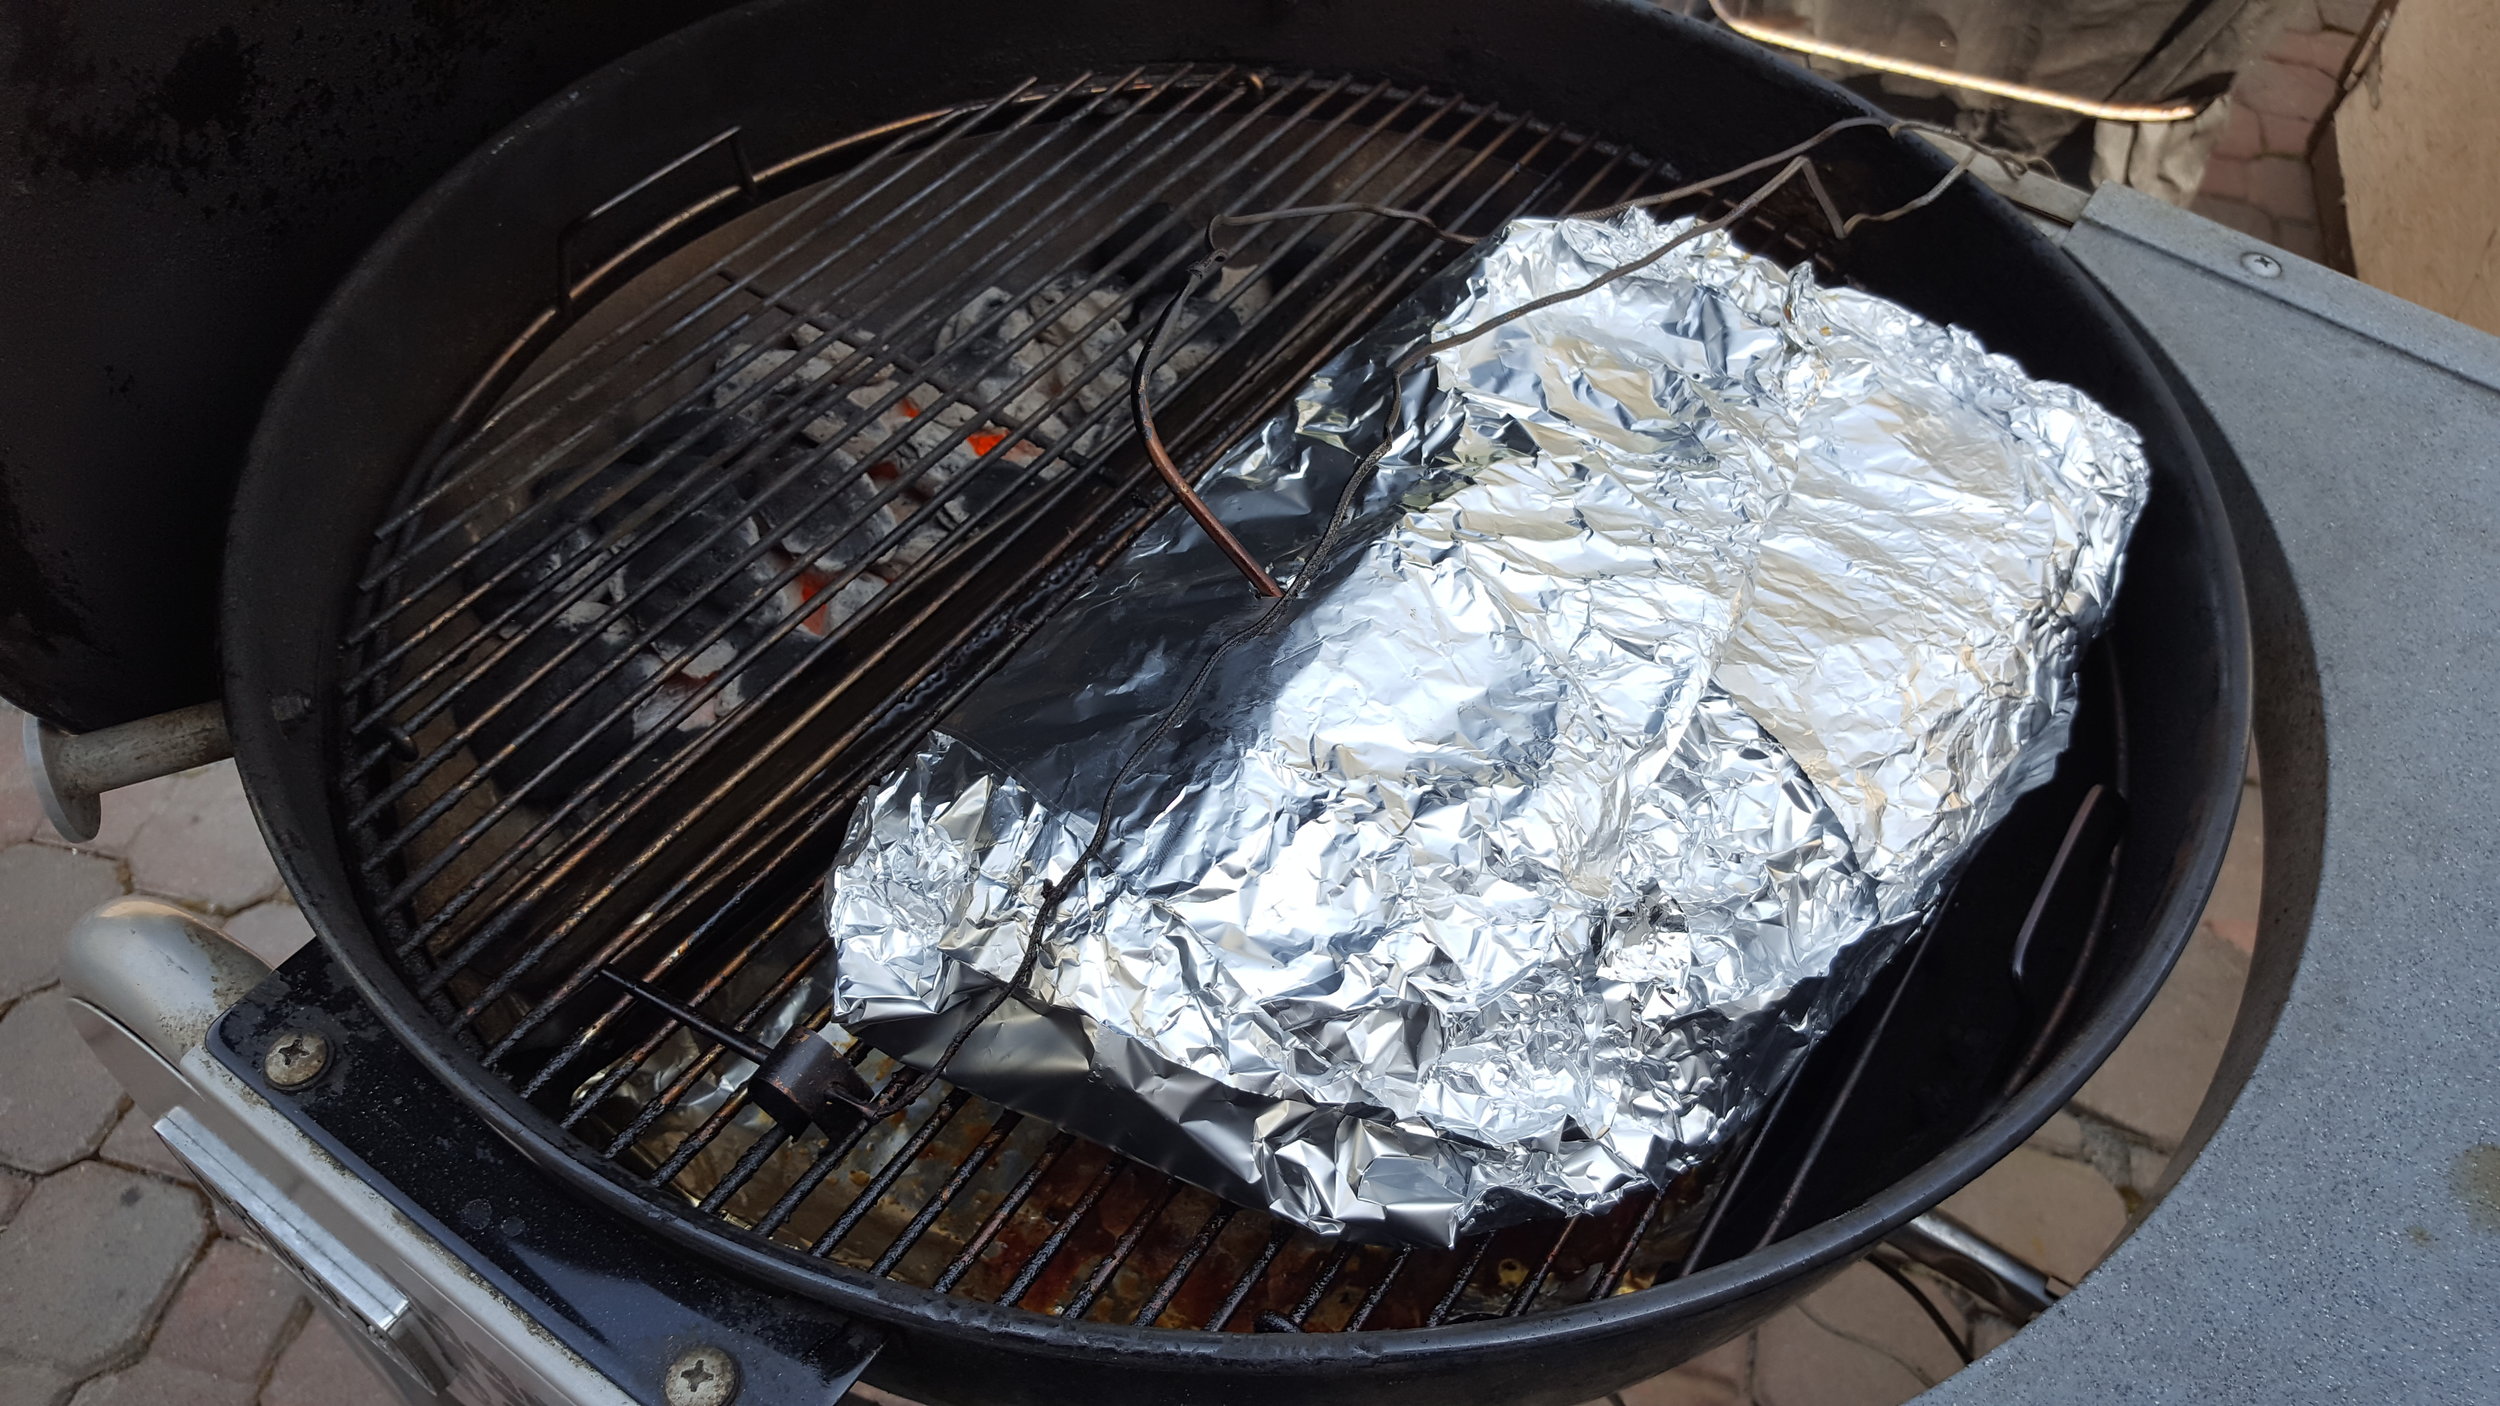
At hour 8 the brisket finally broke through the stall and I wrapped it in tinfoil with a little water & Worcestershire sauce. I also topped up the charcoal again.
At hour 9 the ambient temp inside the grill had shot up to 284F so I closed both the top and bottom vents to 25%. Temp steadily came back down to the 275F range and stayed there for the rest of the cook.
At hour 10 the internal temp of the brisket had reached 190F and I began to periodically check for tenderness. Finally, at hour 11, the internal temp reached 203F, and the brisket was showing zero resistance when being poked with the tip of a Thermapen.
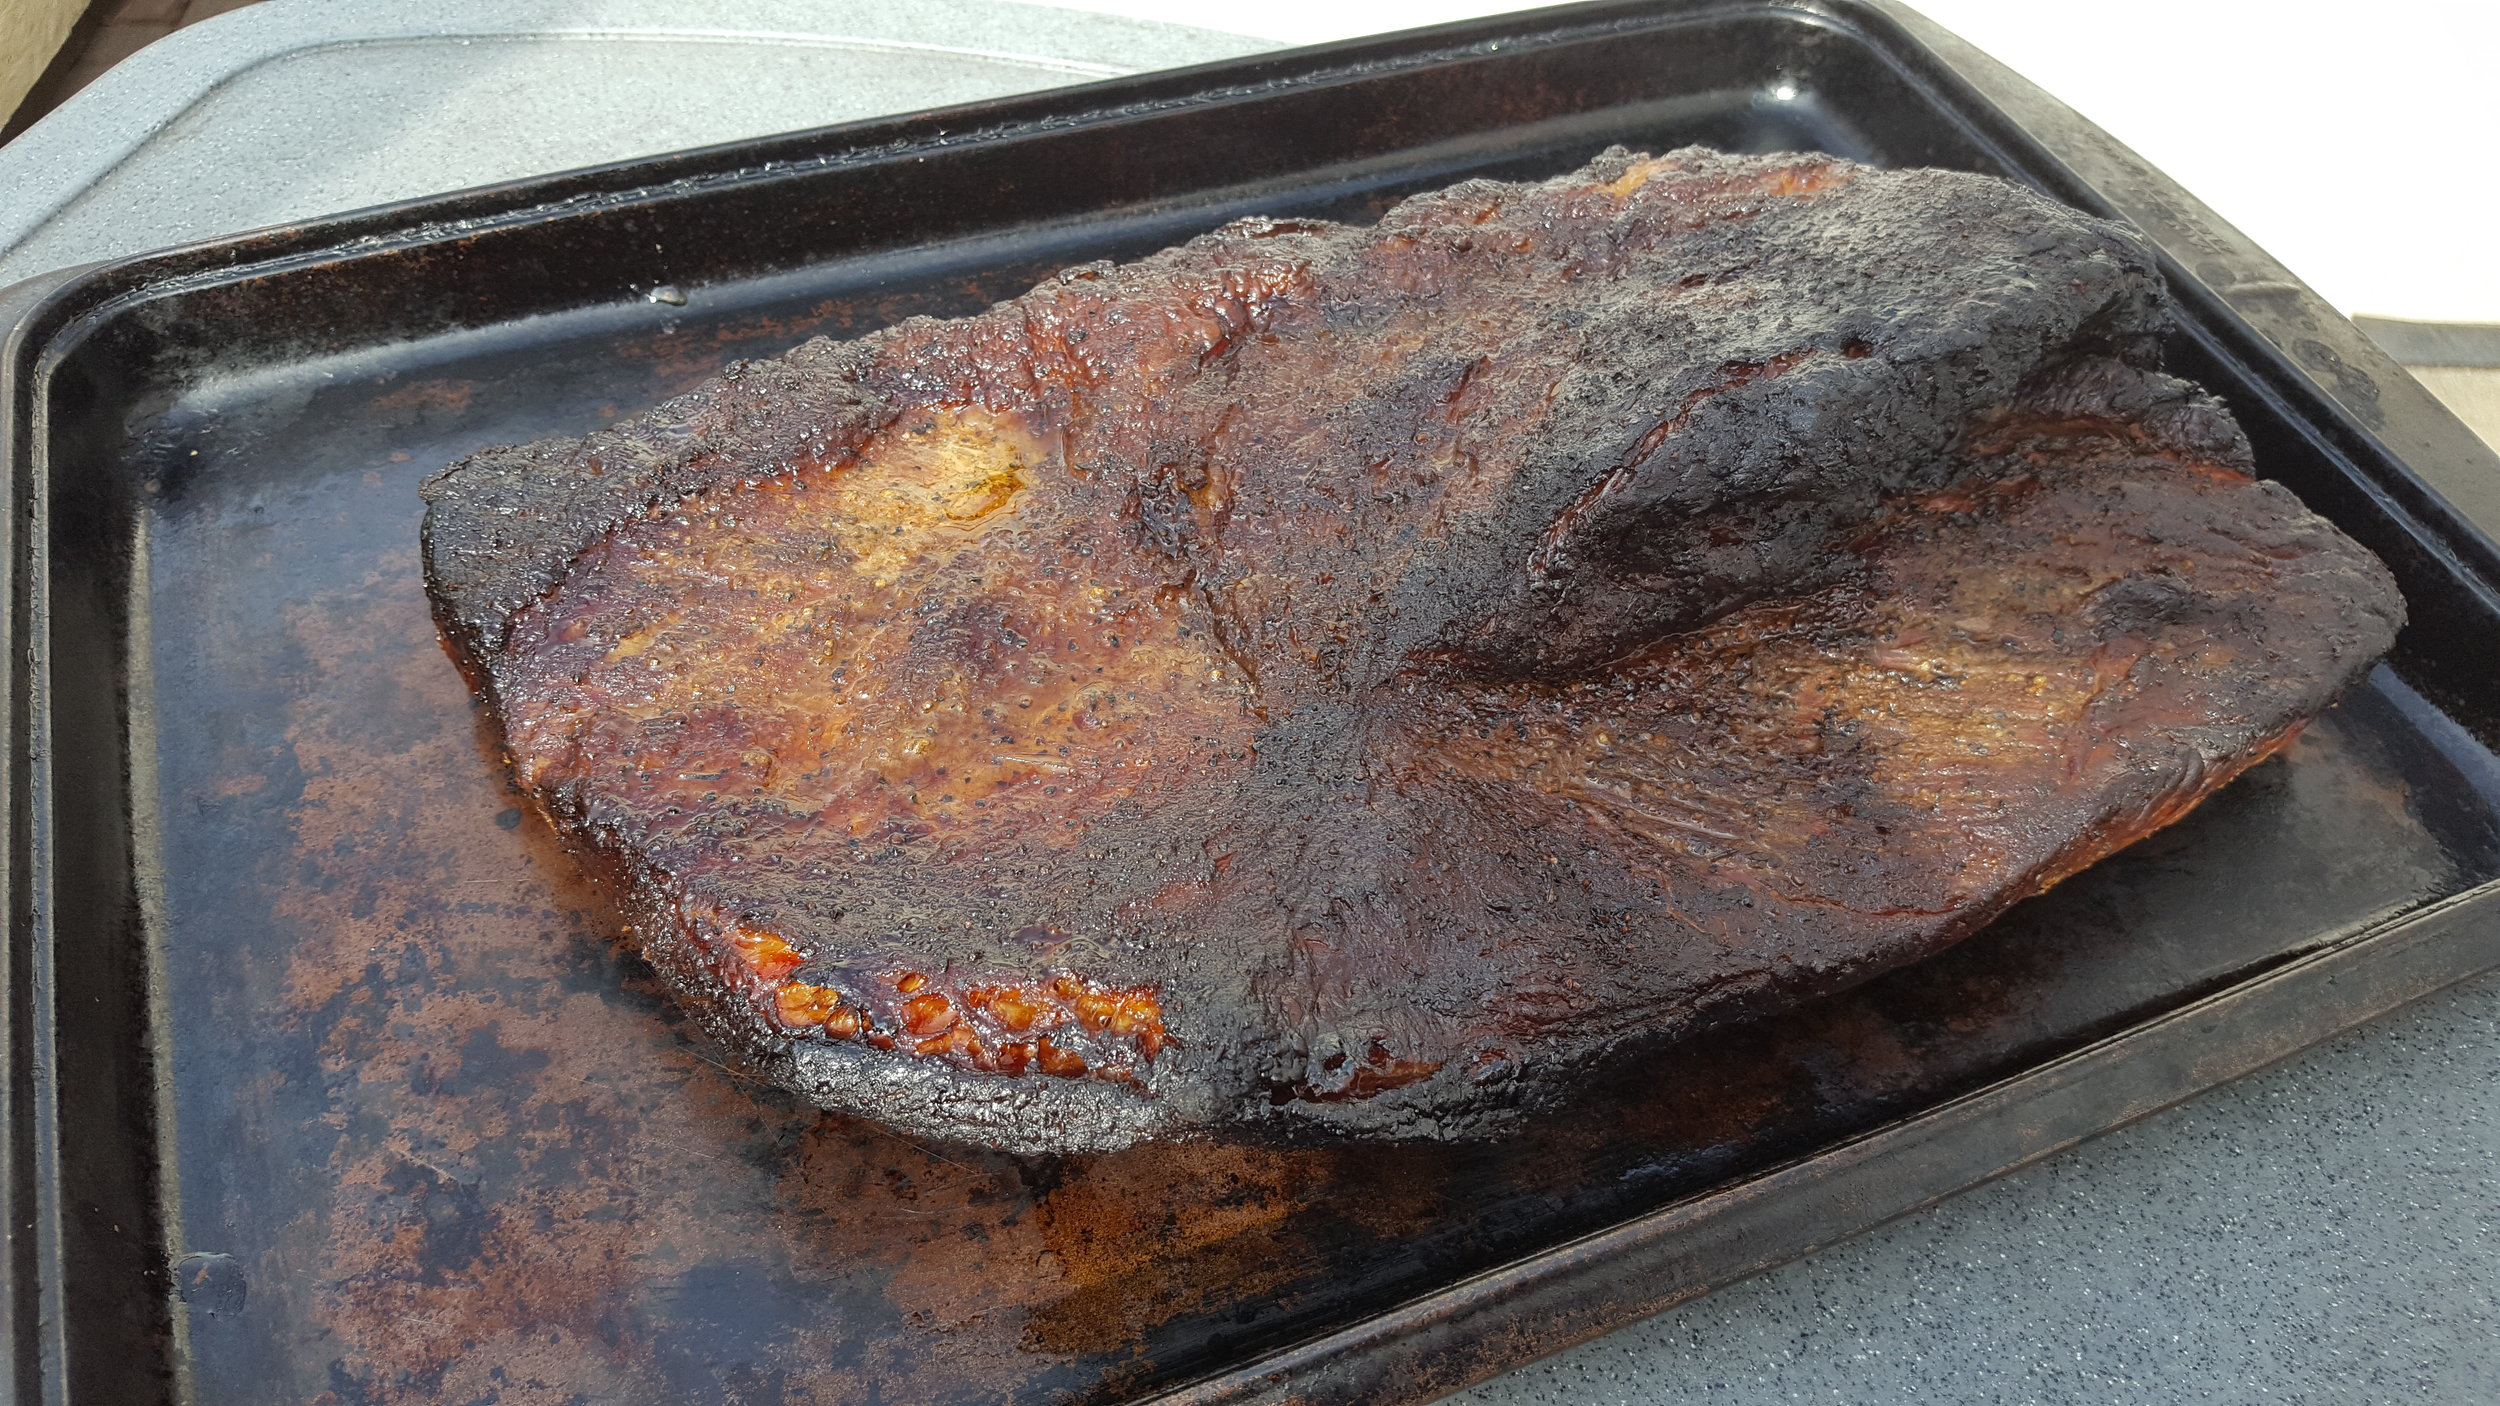
I promptly removed the wrapped brisket and placed it into a dry cooler wrapped in towels. This step isn’t necessary, but I feel is a requirement if you want to cook juicy, melt in your mouth brisket. This step allows the collagen and fats to continue rendering to give you the best results you could ever hope for.
After a two hour hold in the cooler, I removed the brisket and sliced it up. Some co-workers had come over and we sat on my back patio eating the brisket and sipping a few cold beers. While many of them had never tried brisket before, everyone was in agreement that it was tremendous eats! The brisket could have been a teensiest bit more tender (in my opinion), but it was definitely one of the better briskets I've ever cooked!
Final thoughts
I think Meathead at (Link: http://www.amazingribs.com) Amazing Ribs said it best this past Father’s Day: if Dad owns a Weber Kettle, he needs a Slow ‘N Sear!
For $89.95 it may seem like a big price, but when you factor in the quick learning curve, and the extreme ease of use, it is a no-brainer. No more babysitting the grill and no more having to run out to add charcoal every couple of hours! Not to mention, they're handmade in the US of A.
In short, yes, if you own a Weber Kettle, you should own a Slow ‘N Sear to go with it!
Full Disclosure:
Since I first began writing this 3-part review, I’ve been contacted by Adrenaline Barbecue Company (Manufacturer of the Slow ‘N Sear) to help them create and edit some of the content on their web page. In no way does this change my opinions I’ve shared with you. I’ve loved this thing since the first time I cooked on it!