Blog

A Little BBQ on the Side

I know walking into this blog that many of you cook entire family feats on your cooker. When it comes to holiday's like Thanksgiving, your families anticipate and expect your smoked Turkey the way mine expects normal mash potatoes. But I am sure there are just as many of you out there like me. Yes, you cook a mean BBQ, but you don't host holiday parties and simply get to go eat someone else's turkey. 

On one hand, it is great you can attend a family get-together being responsible for nothing more than drinking. At the same time seeing the online BBQ conversations light up with everyone preparing their massive cooks might make you feel a little left out too.

This is where I found myself this year. I have never hosted Thanksgiving and honestly, have no desire to. I host my fair share of family parties throughout the year and Thanksgiving becomes a very nice one to attend. But this year it started bothering me to see all of you prepping these massive cooks creating a BBQ Thanksgiving.

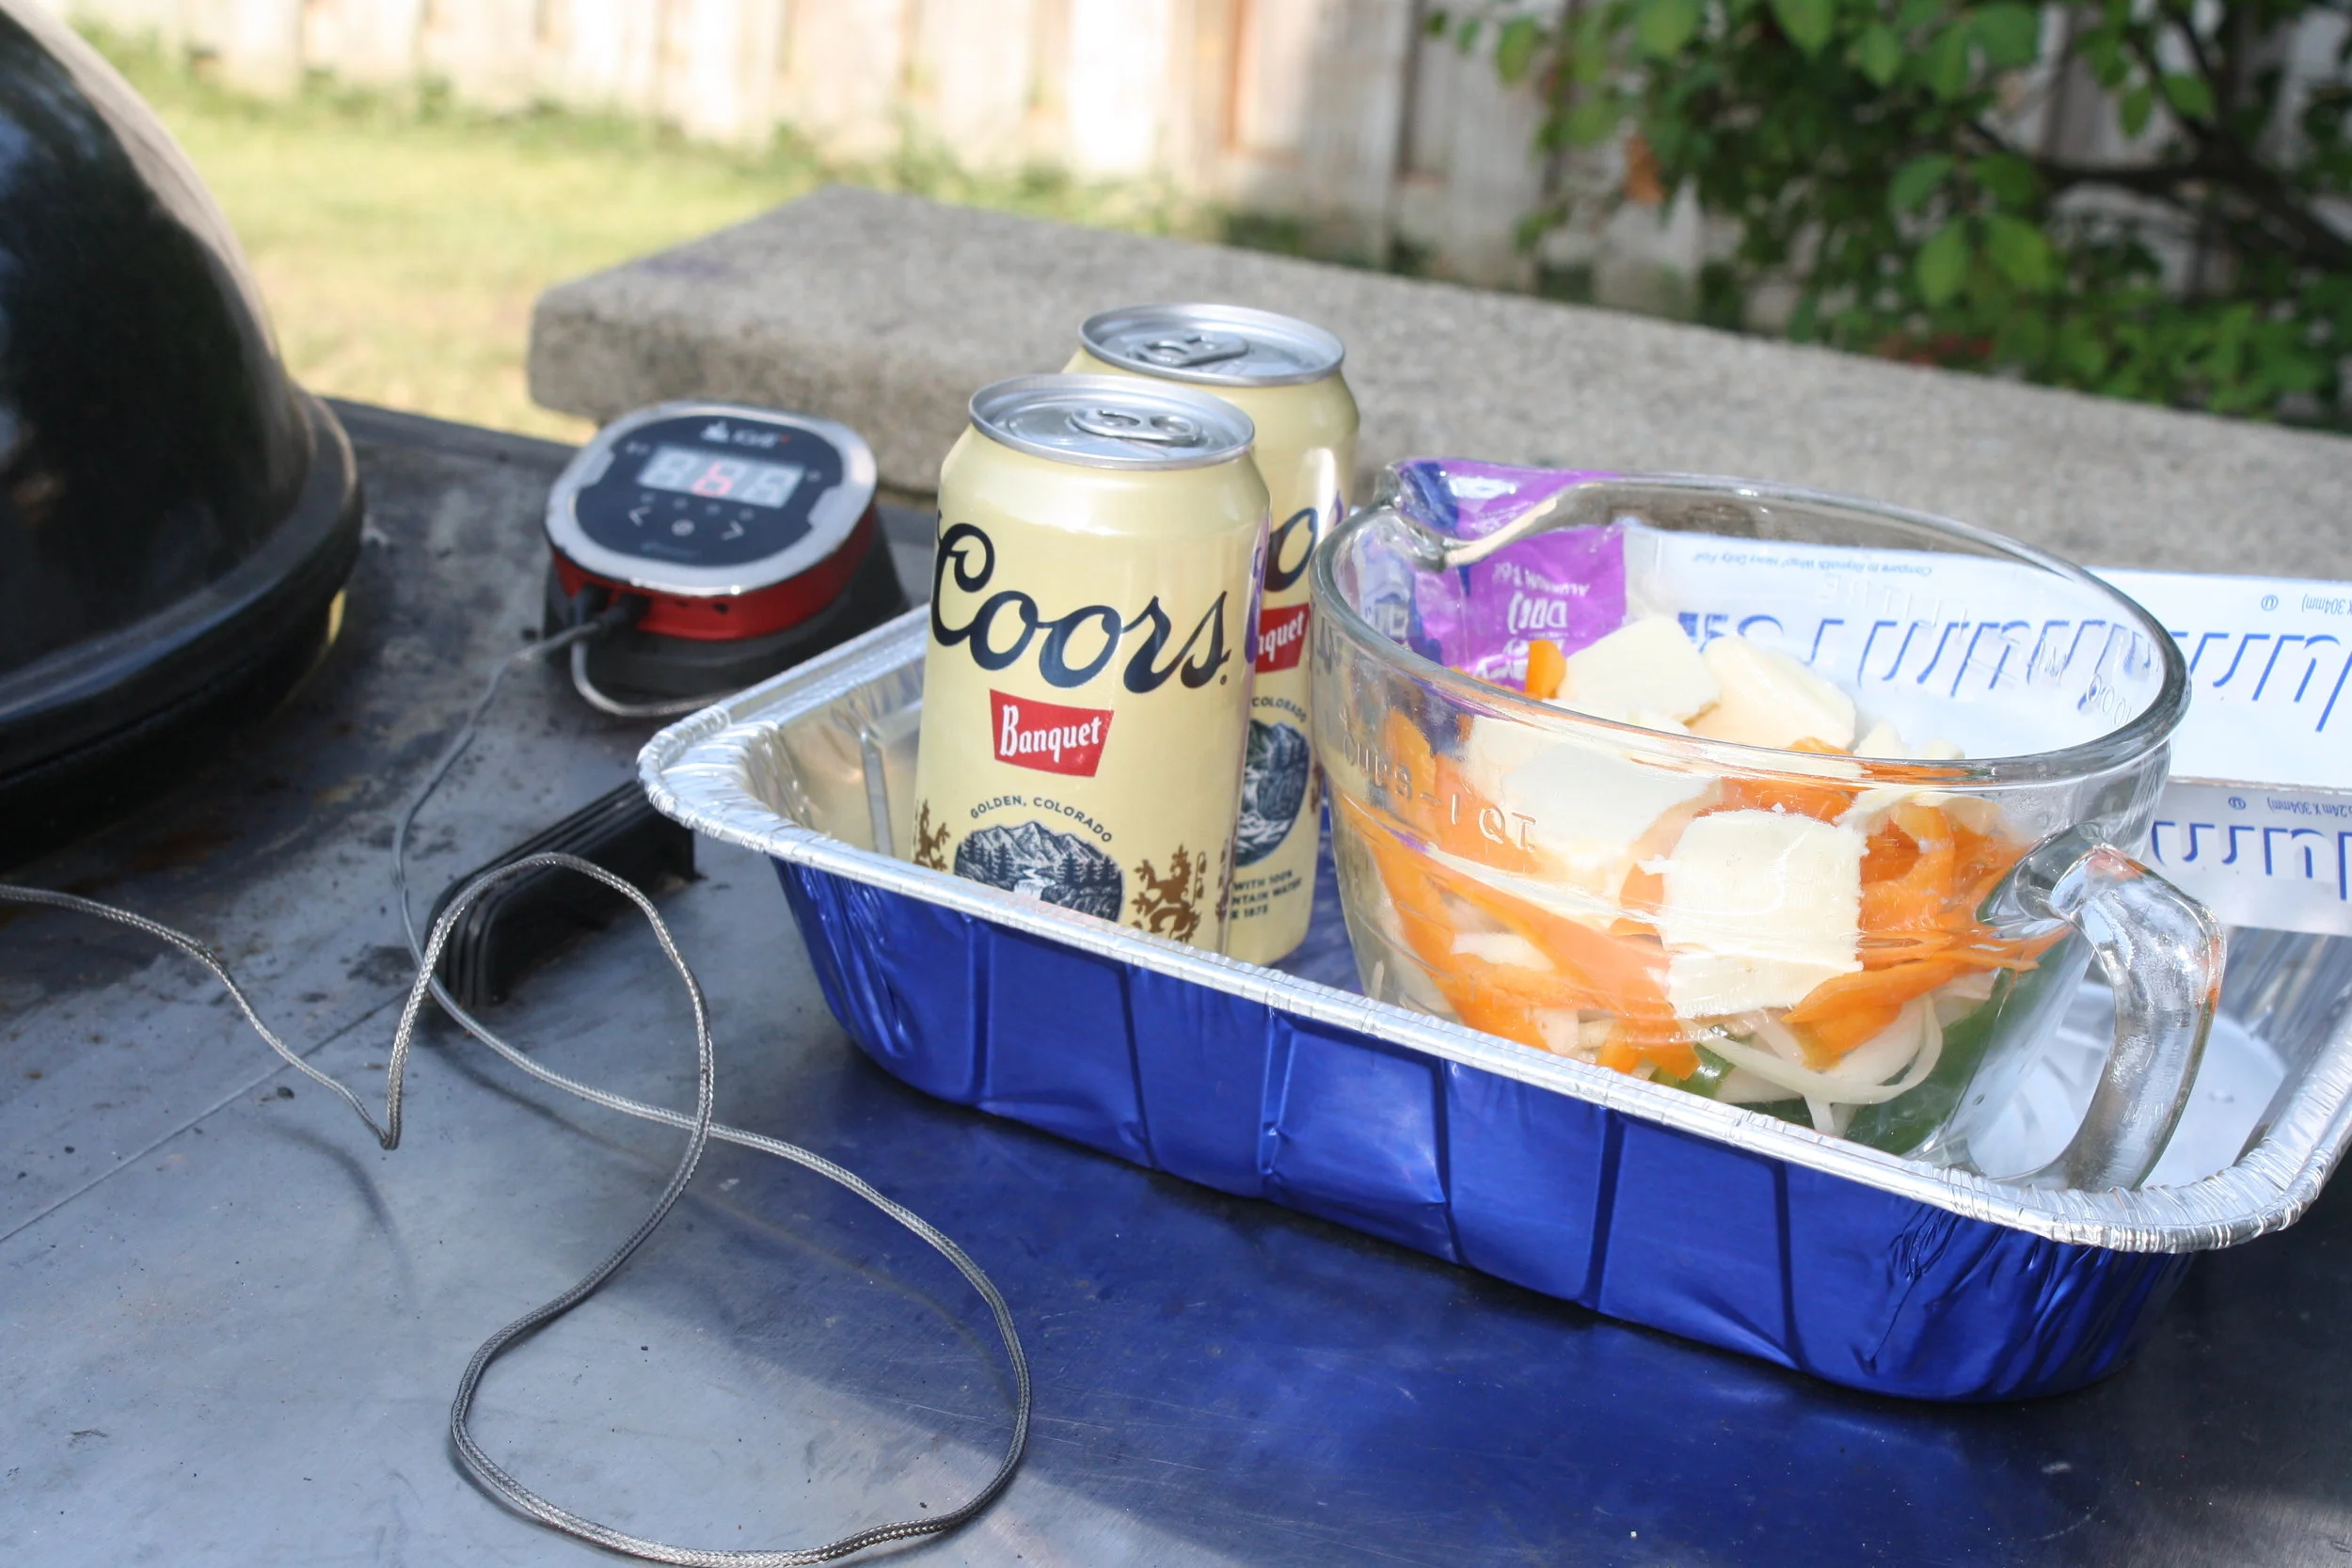
This was around the time when I got the email from my family explaining the smaller items I had to bring...beer, chairs, and the standard sweet potato casserole. Now I don't know how your family does sweet potatoes. But at my in-laws, it is essentially sweet potatoes cooked and blended with brown sugar, then covered with marshmallows and broiled. Nothing fancy, but it is a family favorite. A family favorite that I am about to mess with, that is.

So I figure, my wife can make this age-old family recipe sweet potatoes blindfolded. So while she does that, I might just cook the same thing, on my cooker, and see what happens. That was the initial plan anyway. I started looking to see if anyone does this and I came across some great variants done on the cooker with a cast iron skillet. 

Then I found a variant I really liked. On one hand, it let me use the family recipe for the majority of it, but I got to change the topping. Yup, forget the marshmallows piled up and melted, here I was going to use a pecan-based crumble. I figured this way if everyone hated mine, it was no loss and they still had what they were used too. At the same time, mine would be based on what they were used to and still be completely different.

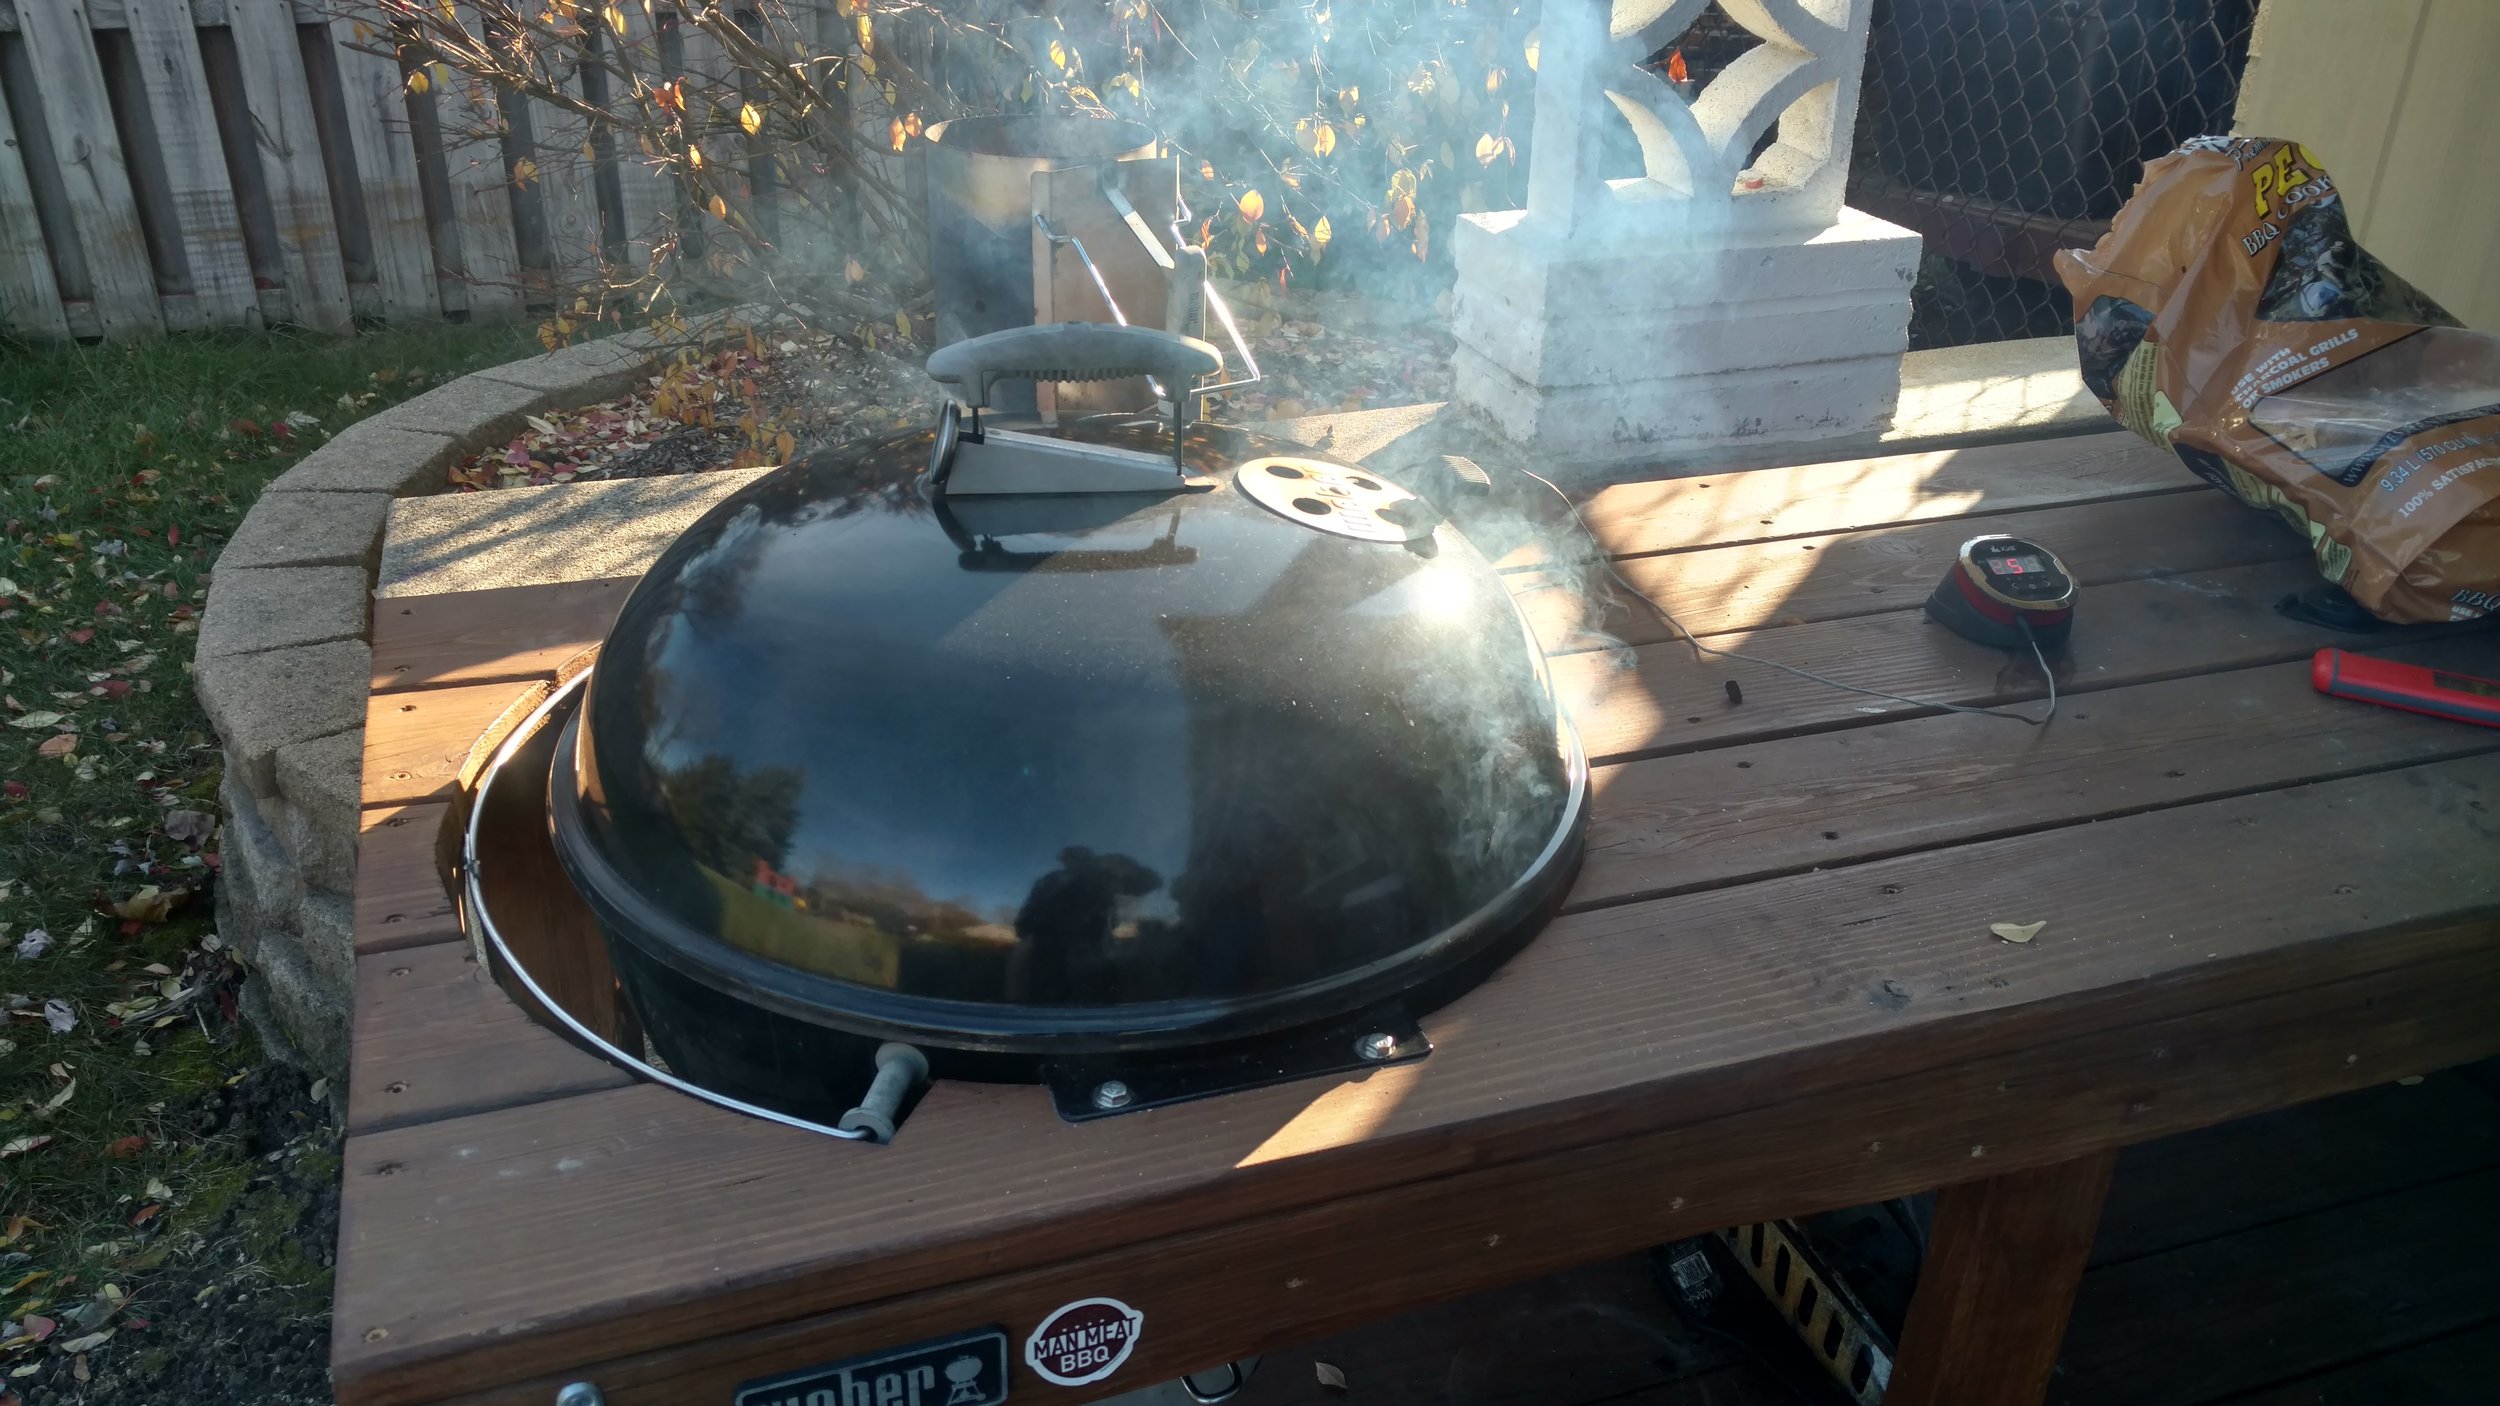
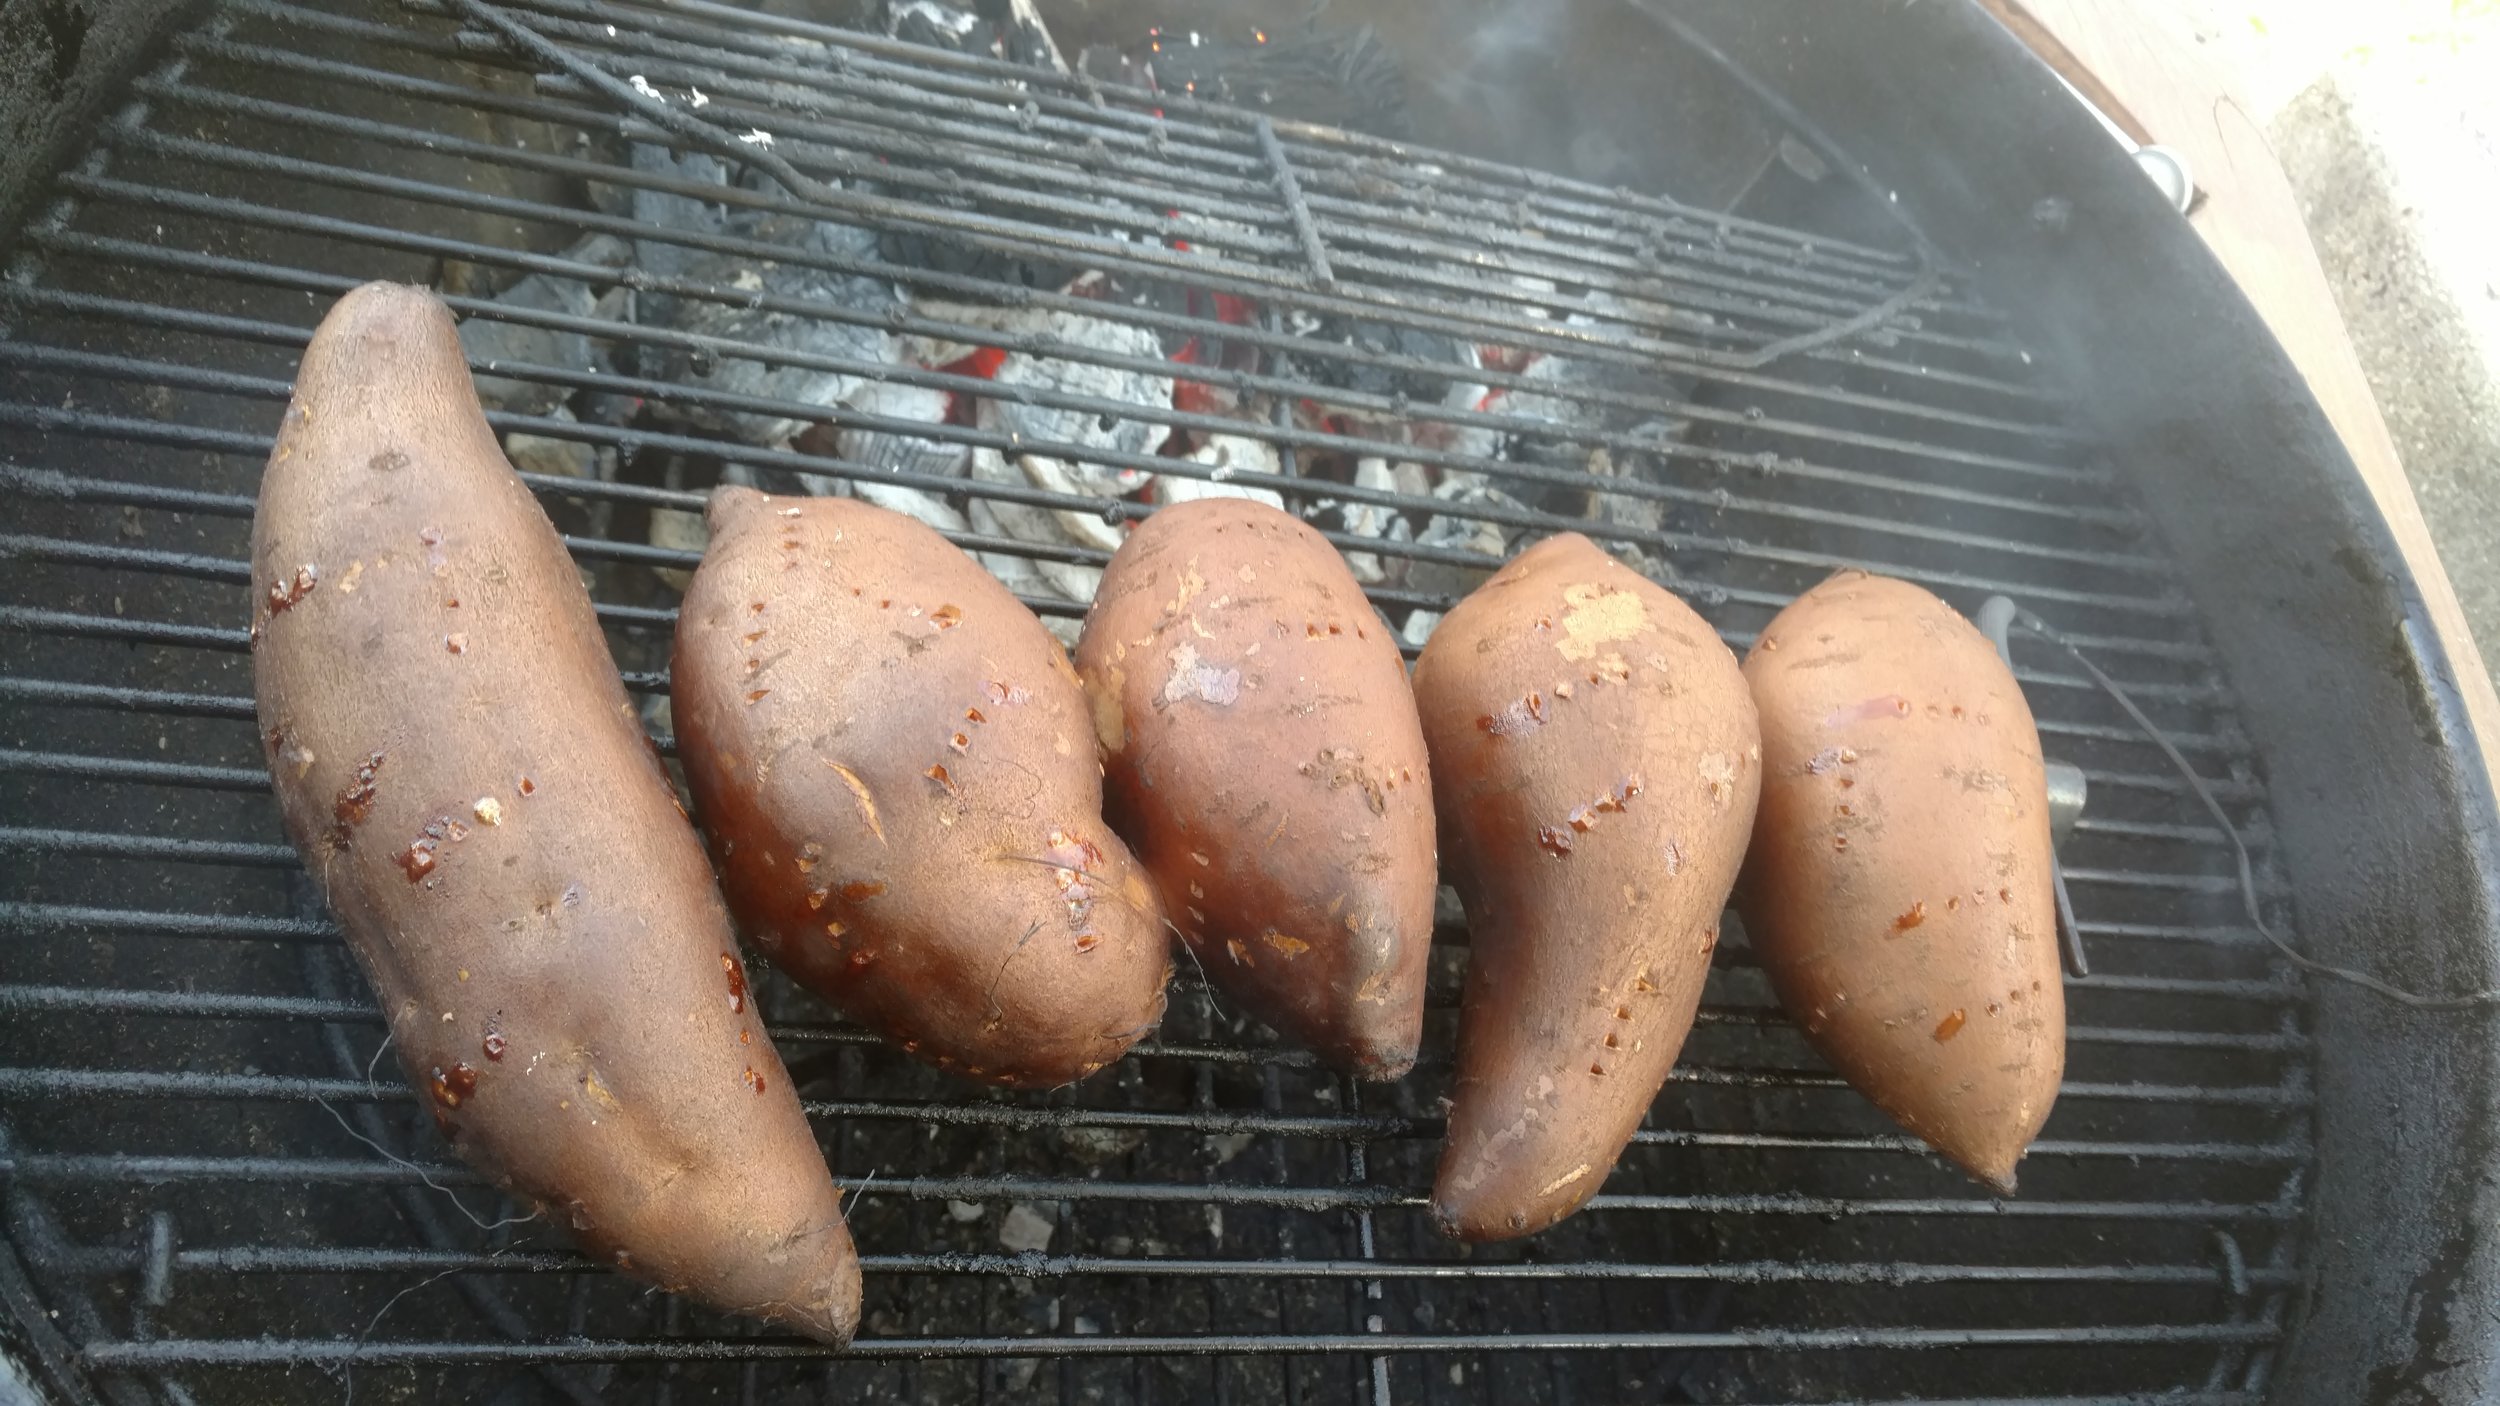
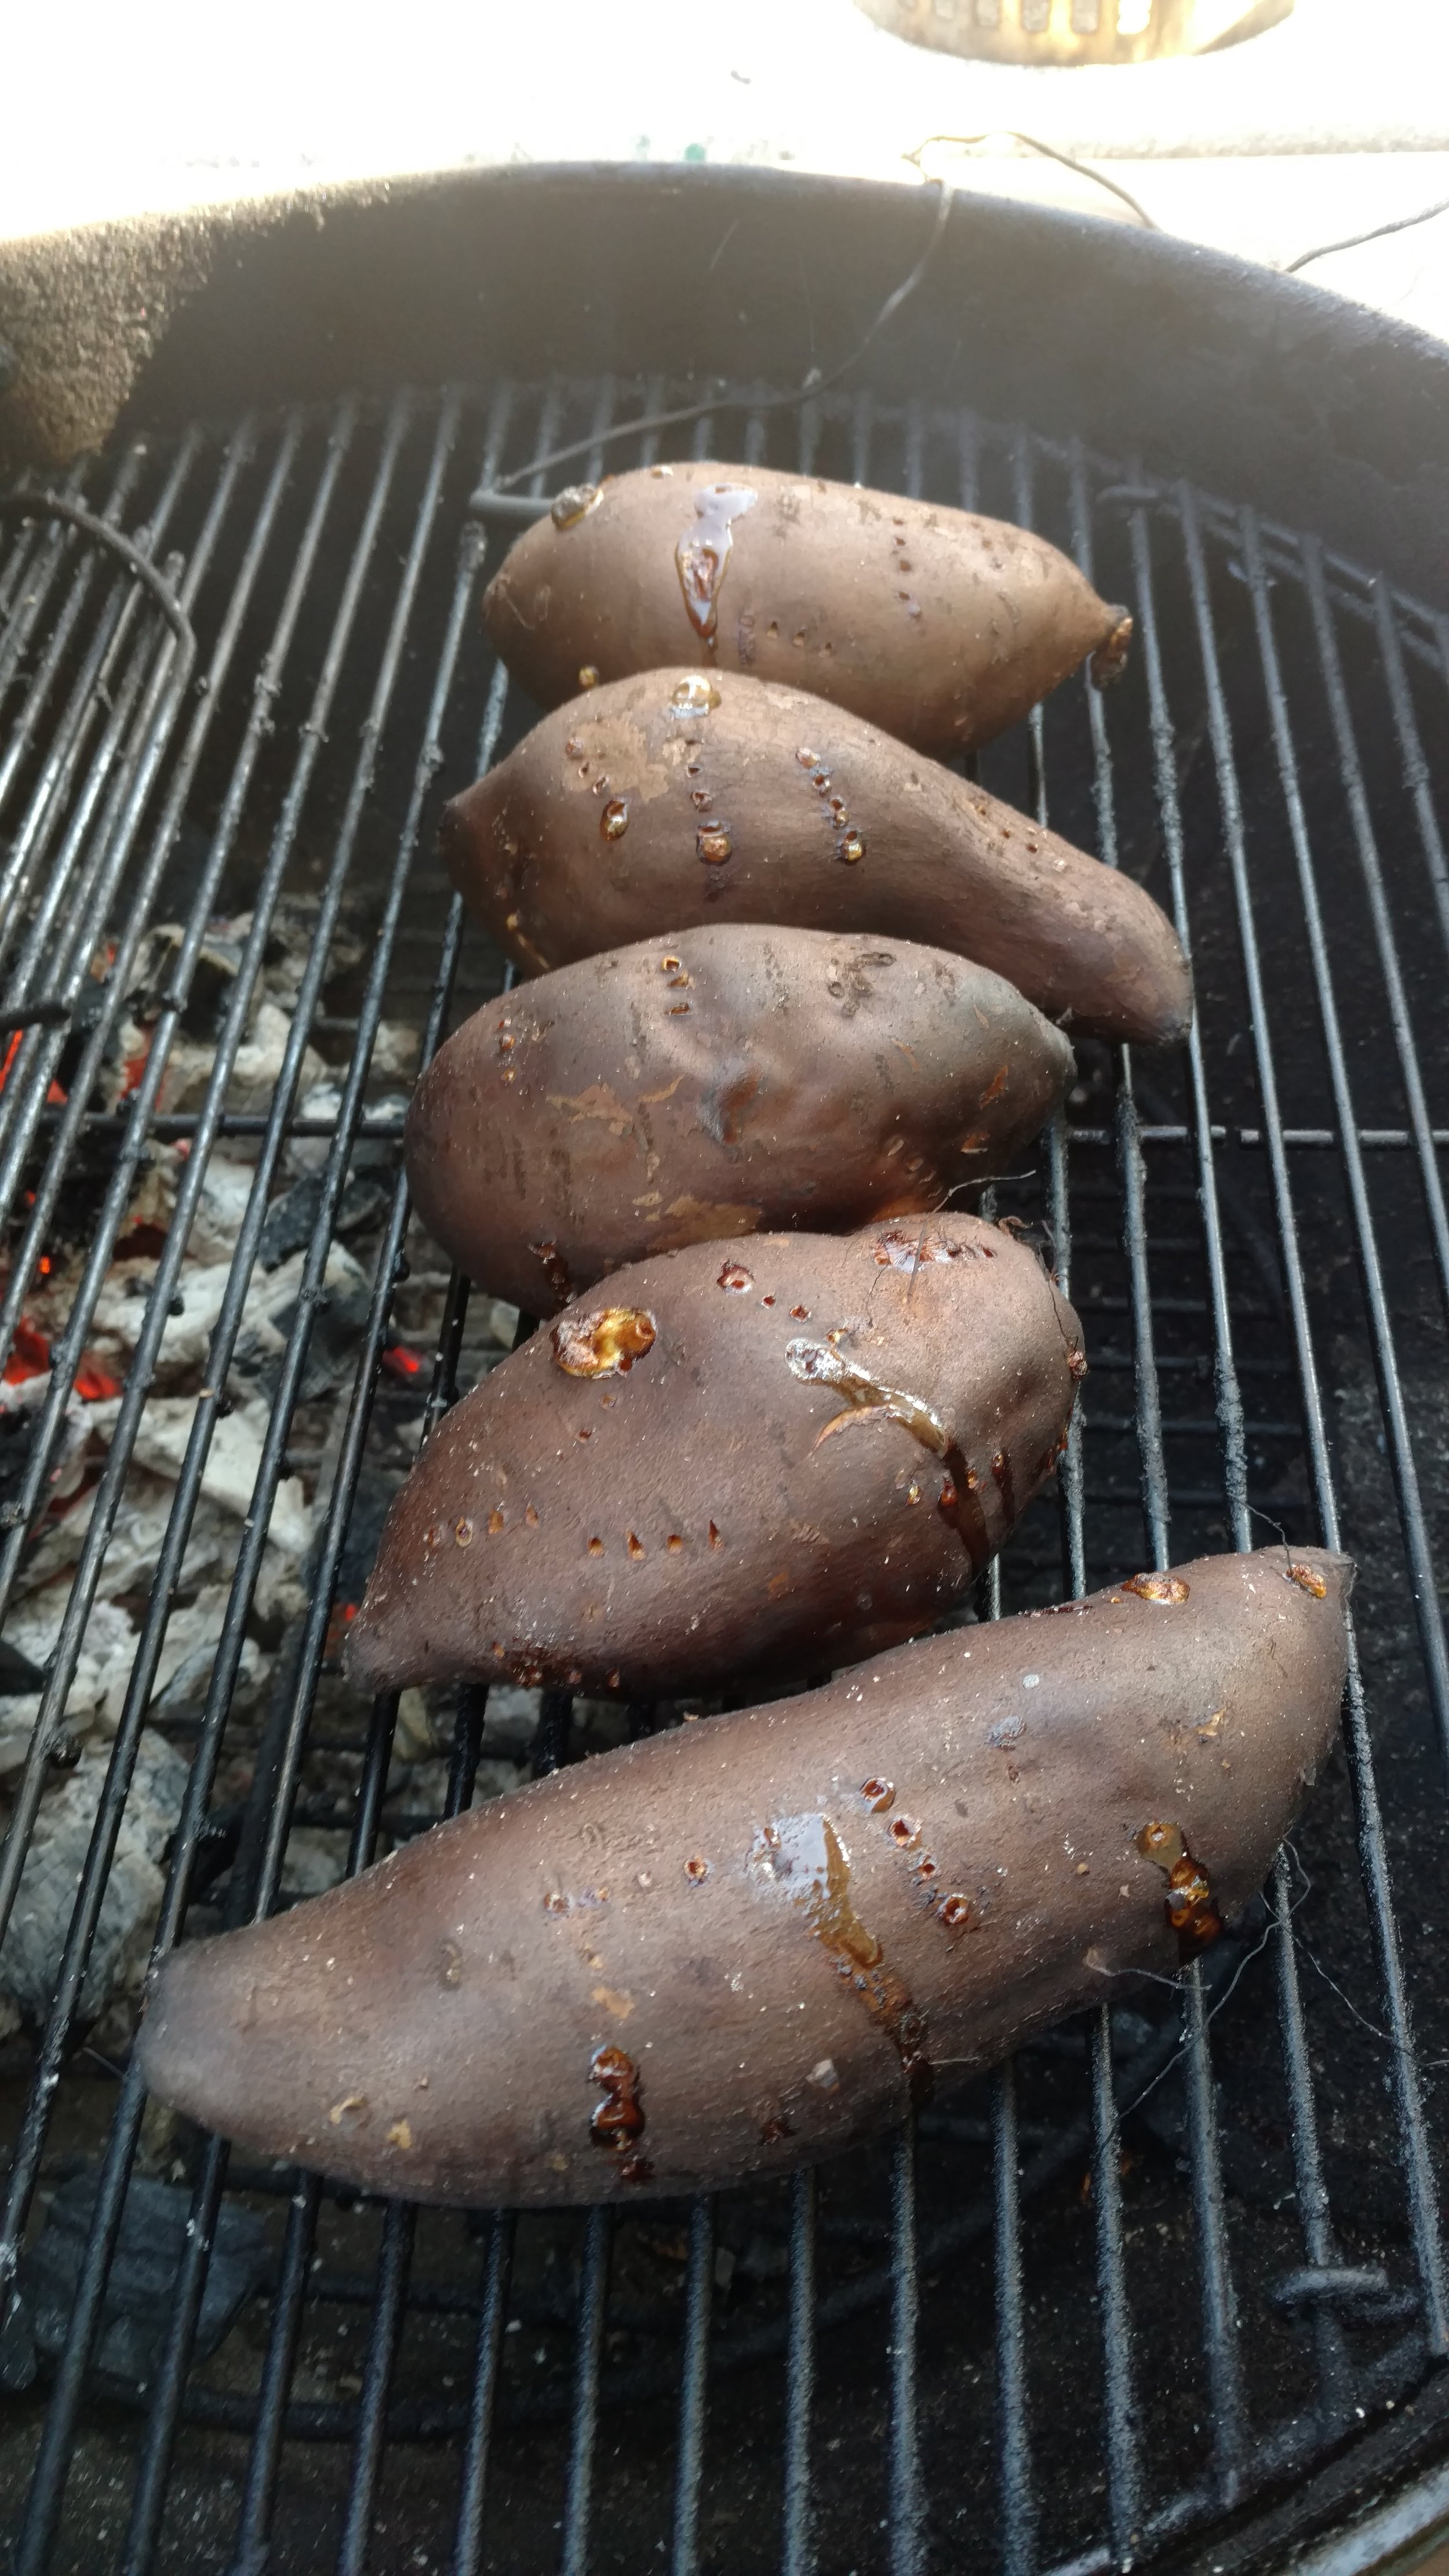
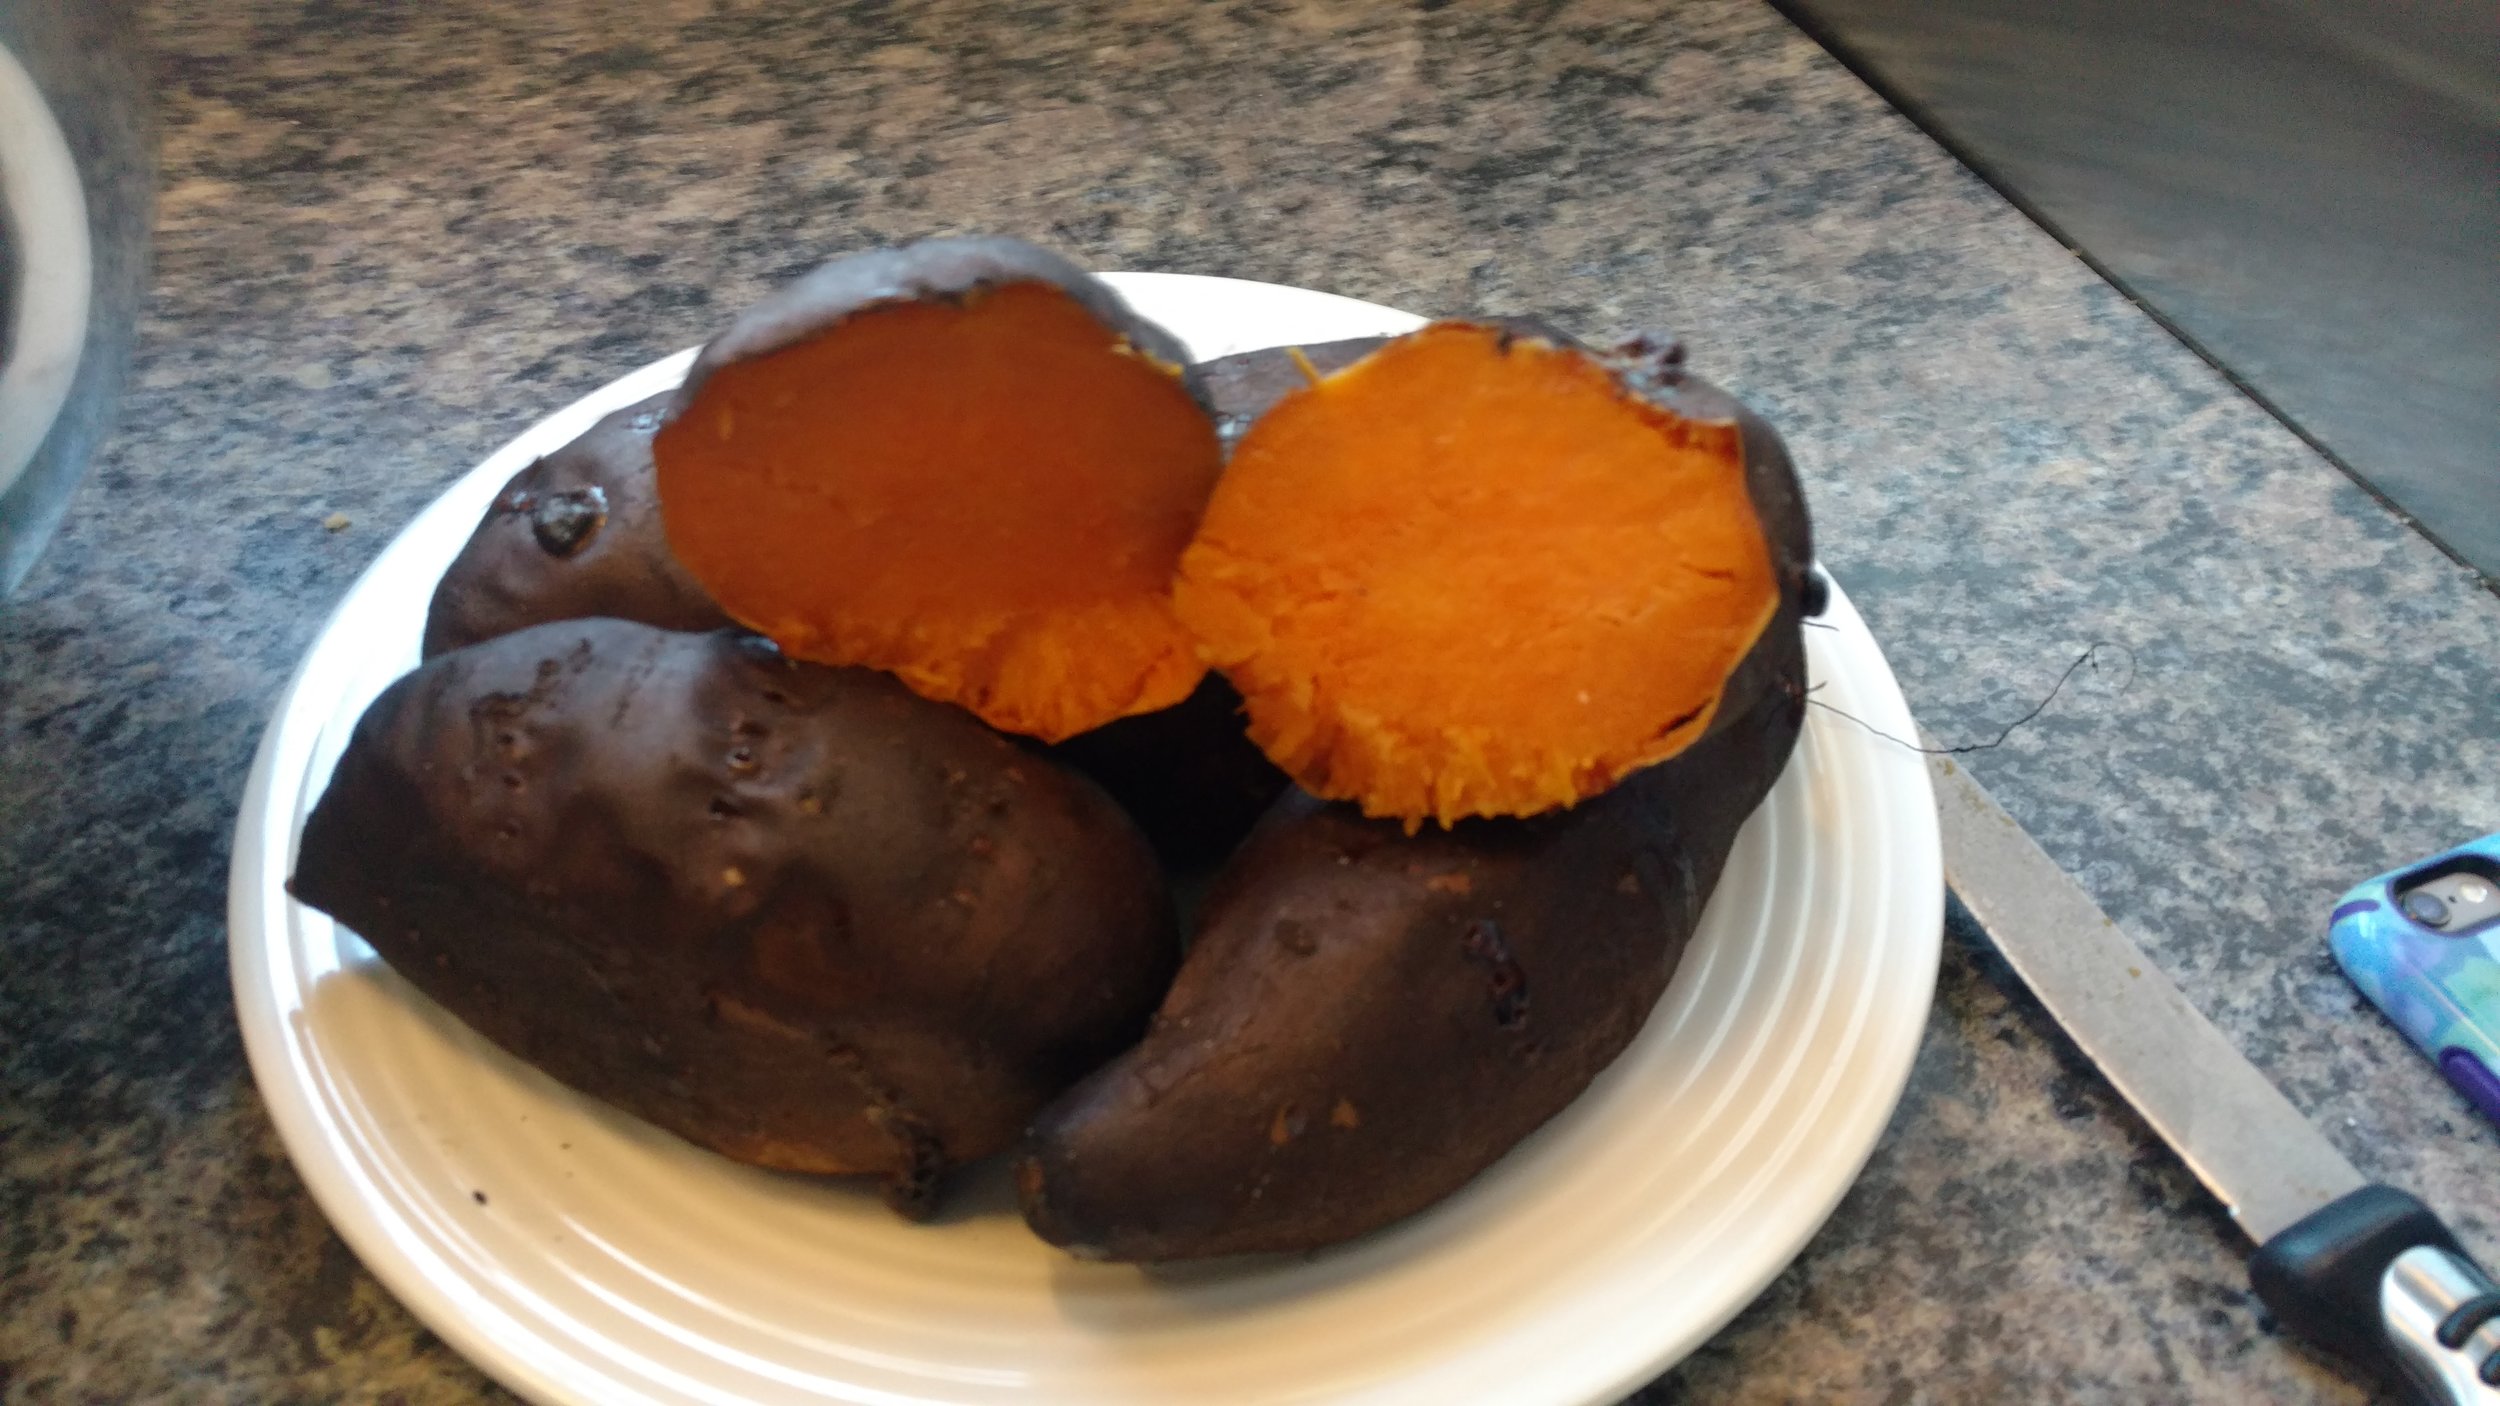
So Thanksgiving morning I fired up the kettle and cooked 5 large sweet potatoes. Actually, I smoked them. I got the temp to be running hot at about 400 degrees. I also added some pecan wood. Then I let the potatoes cook there, in their skin for about 2 hours. 

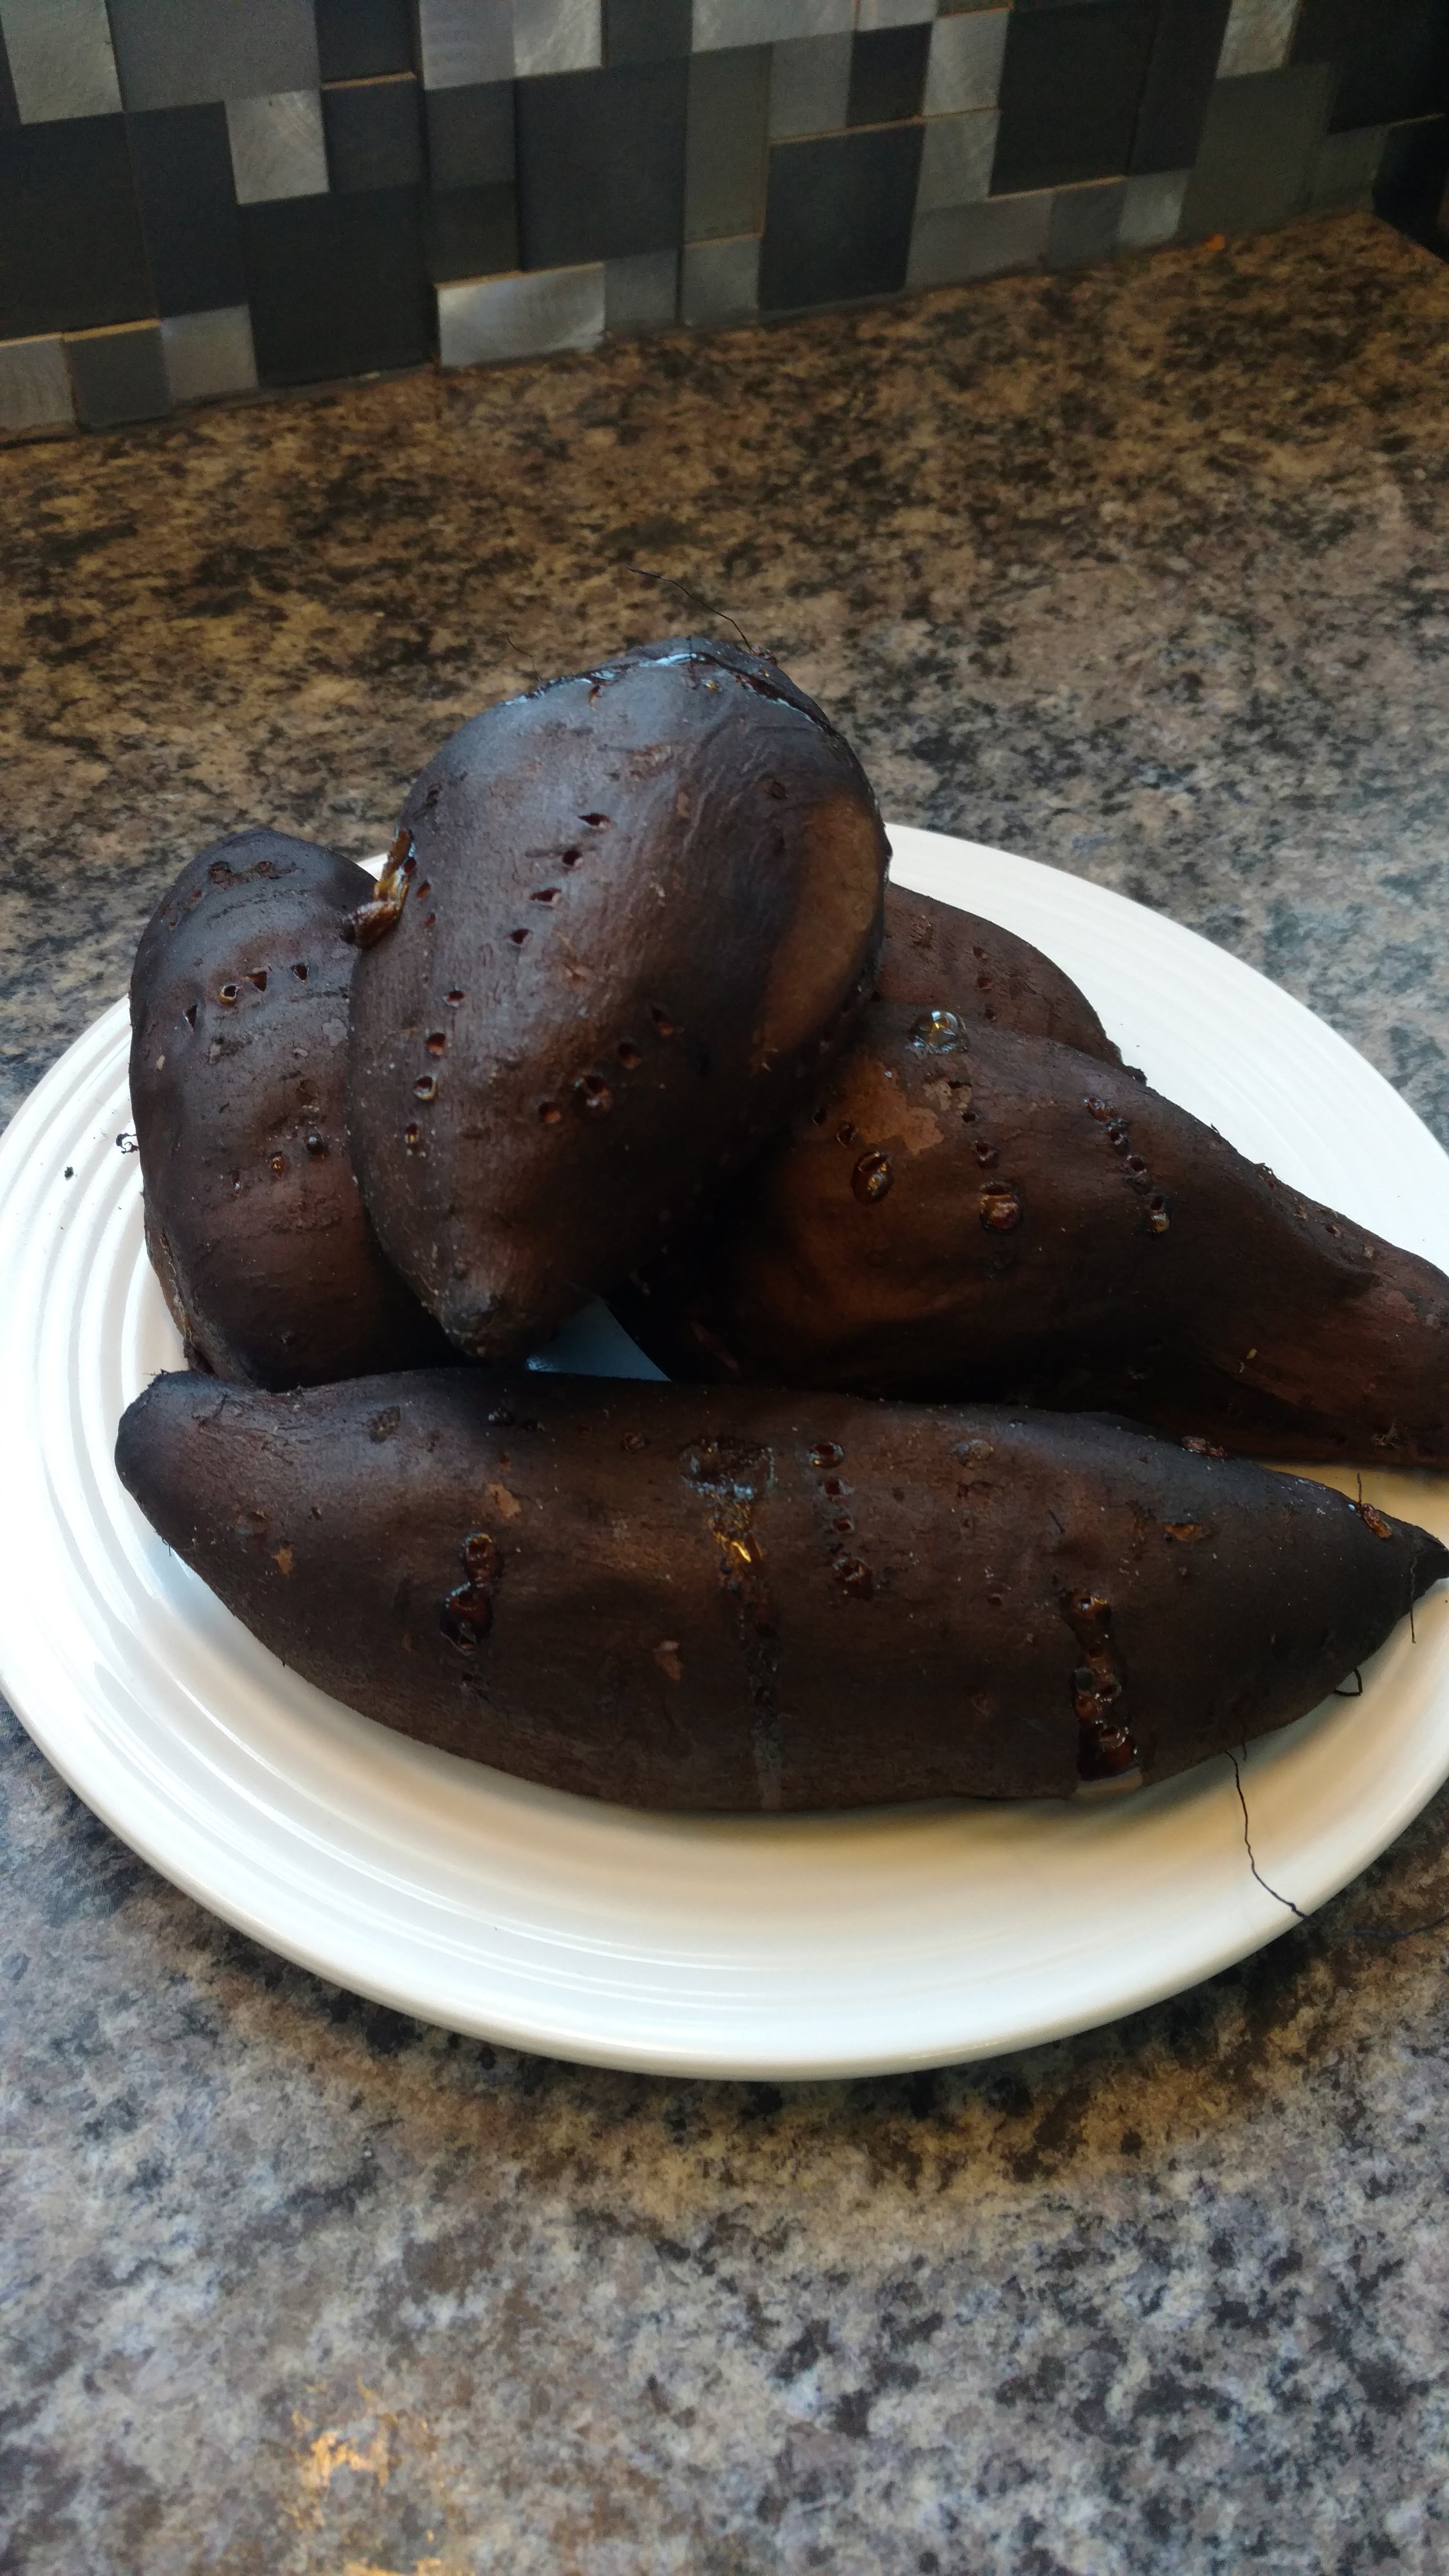
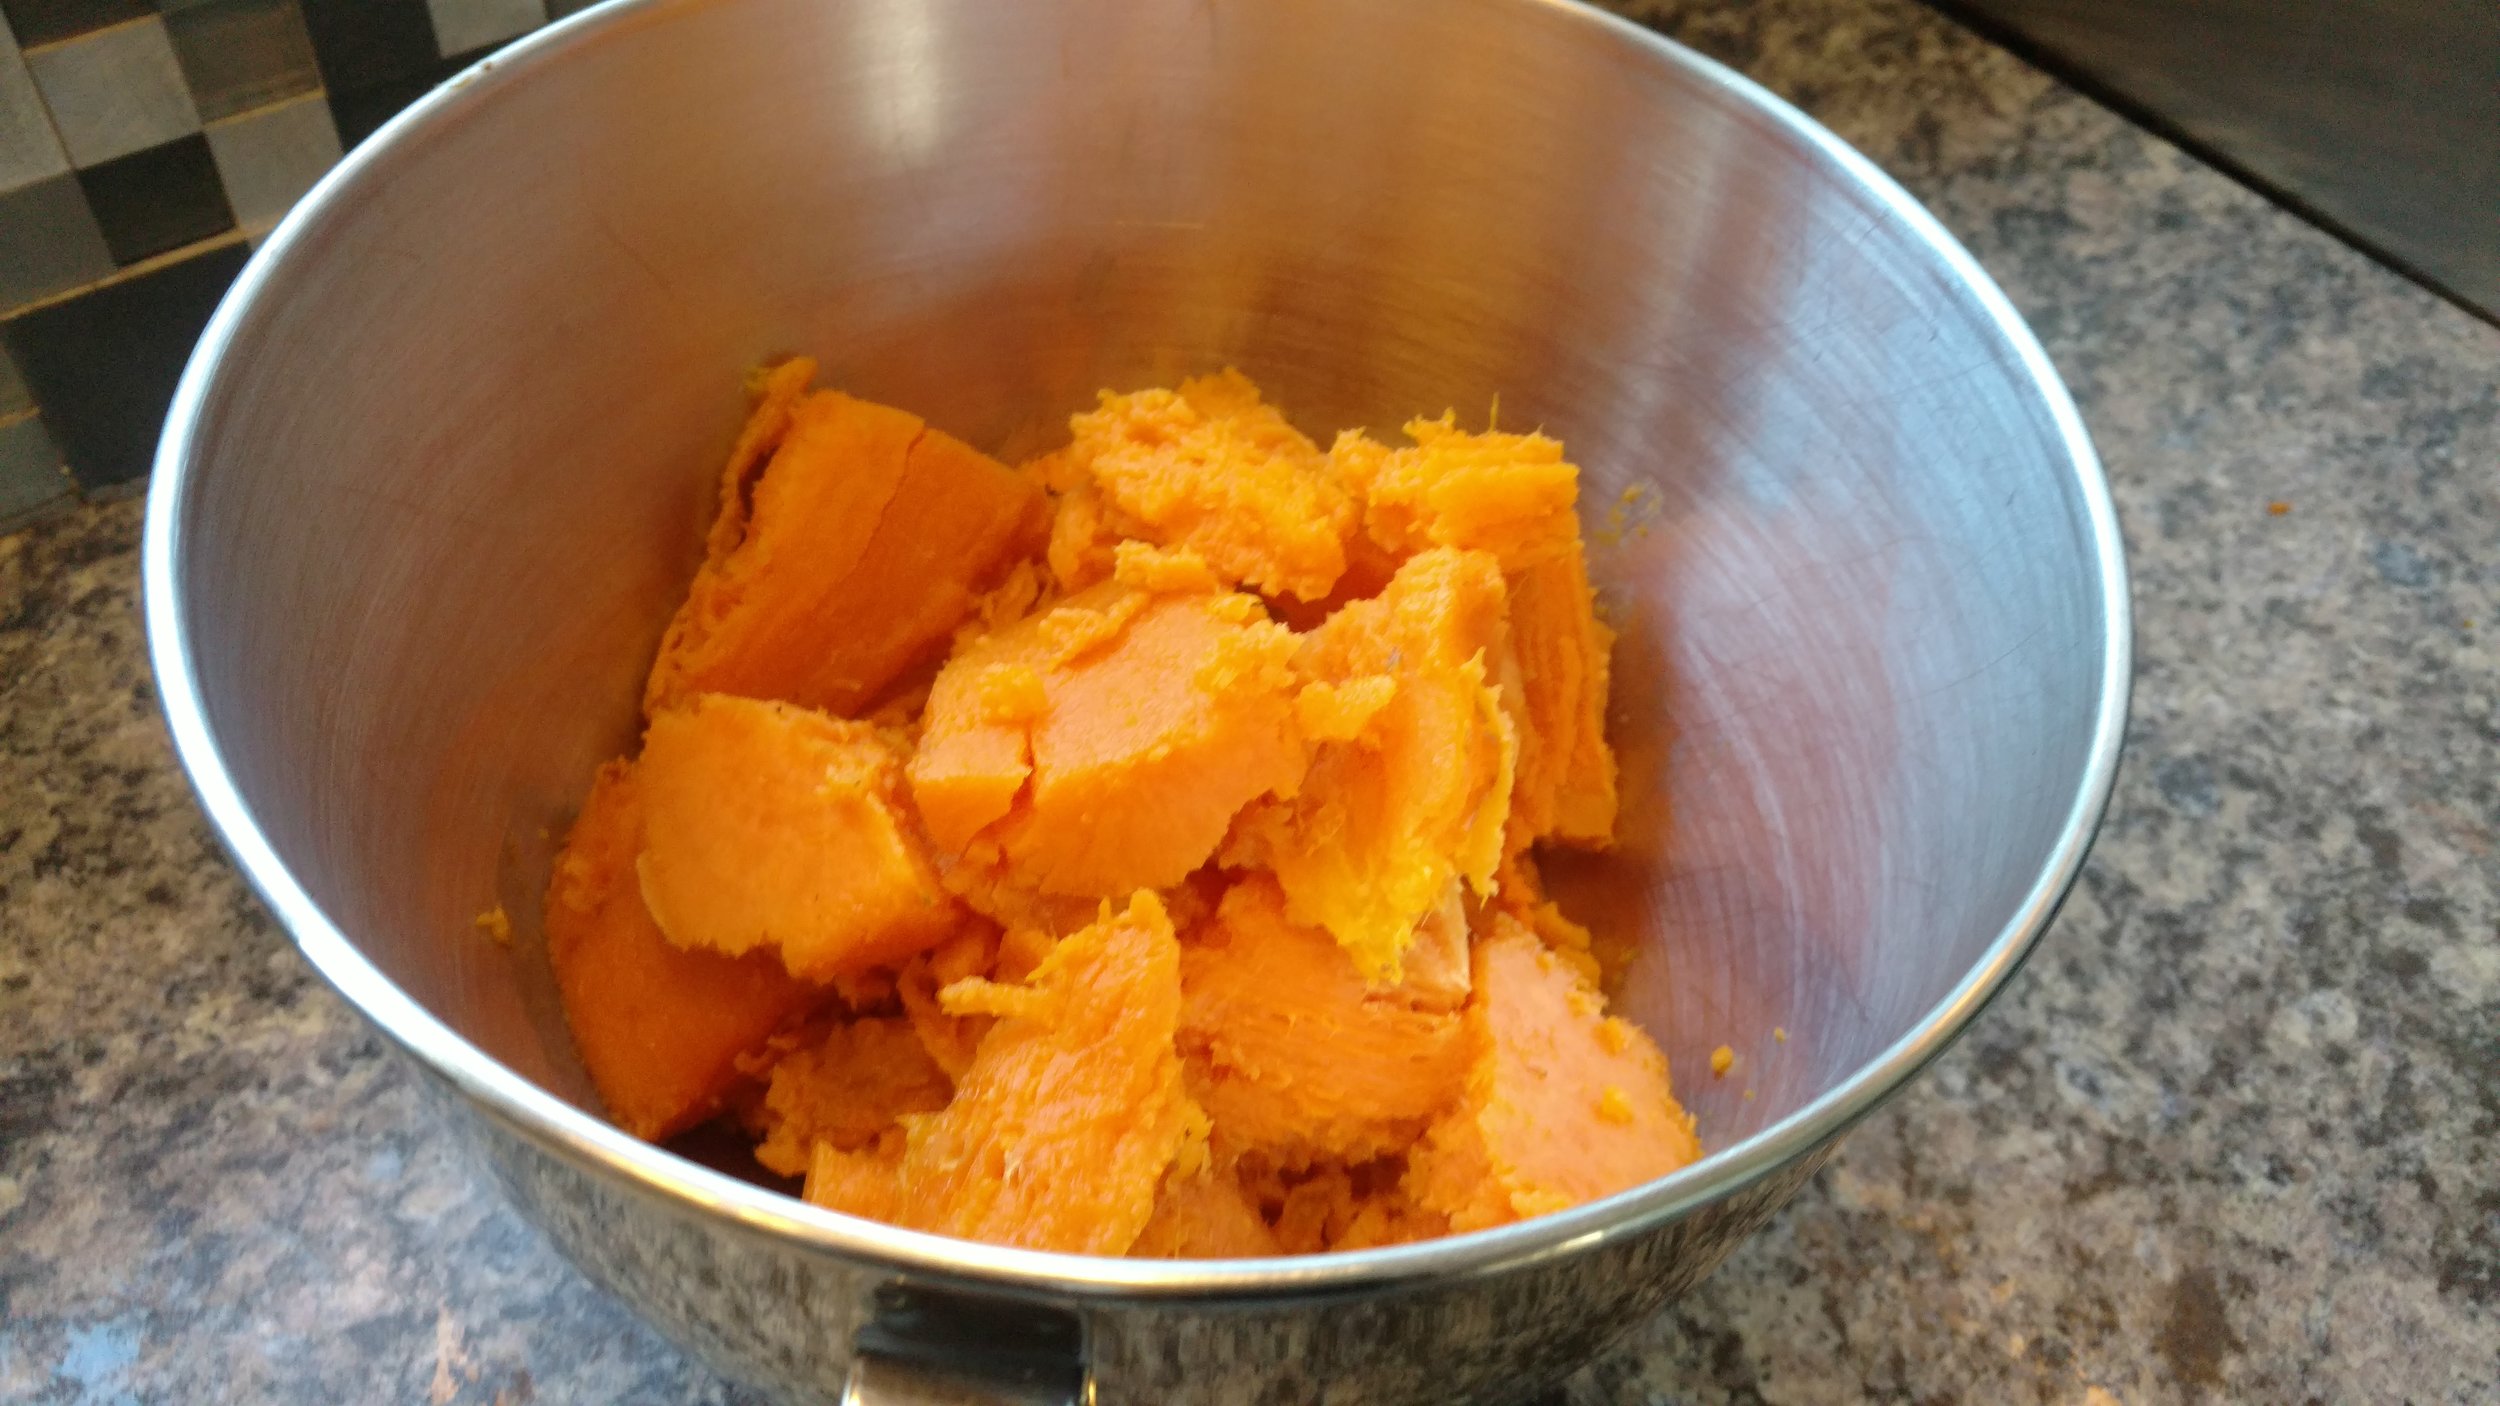
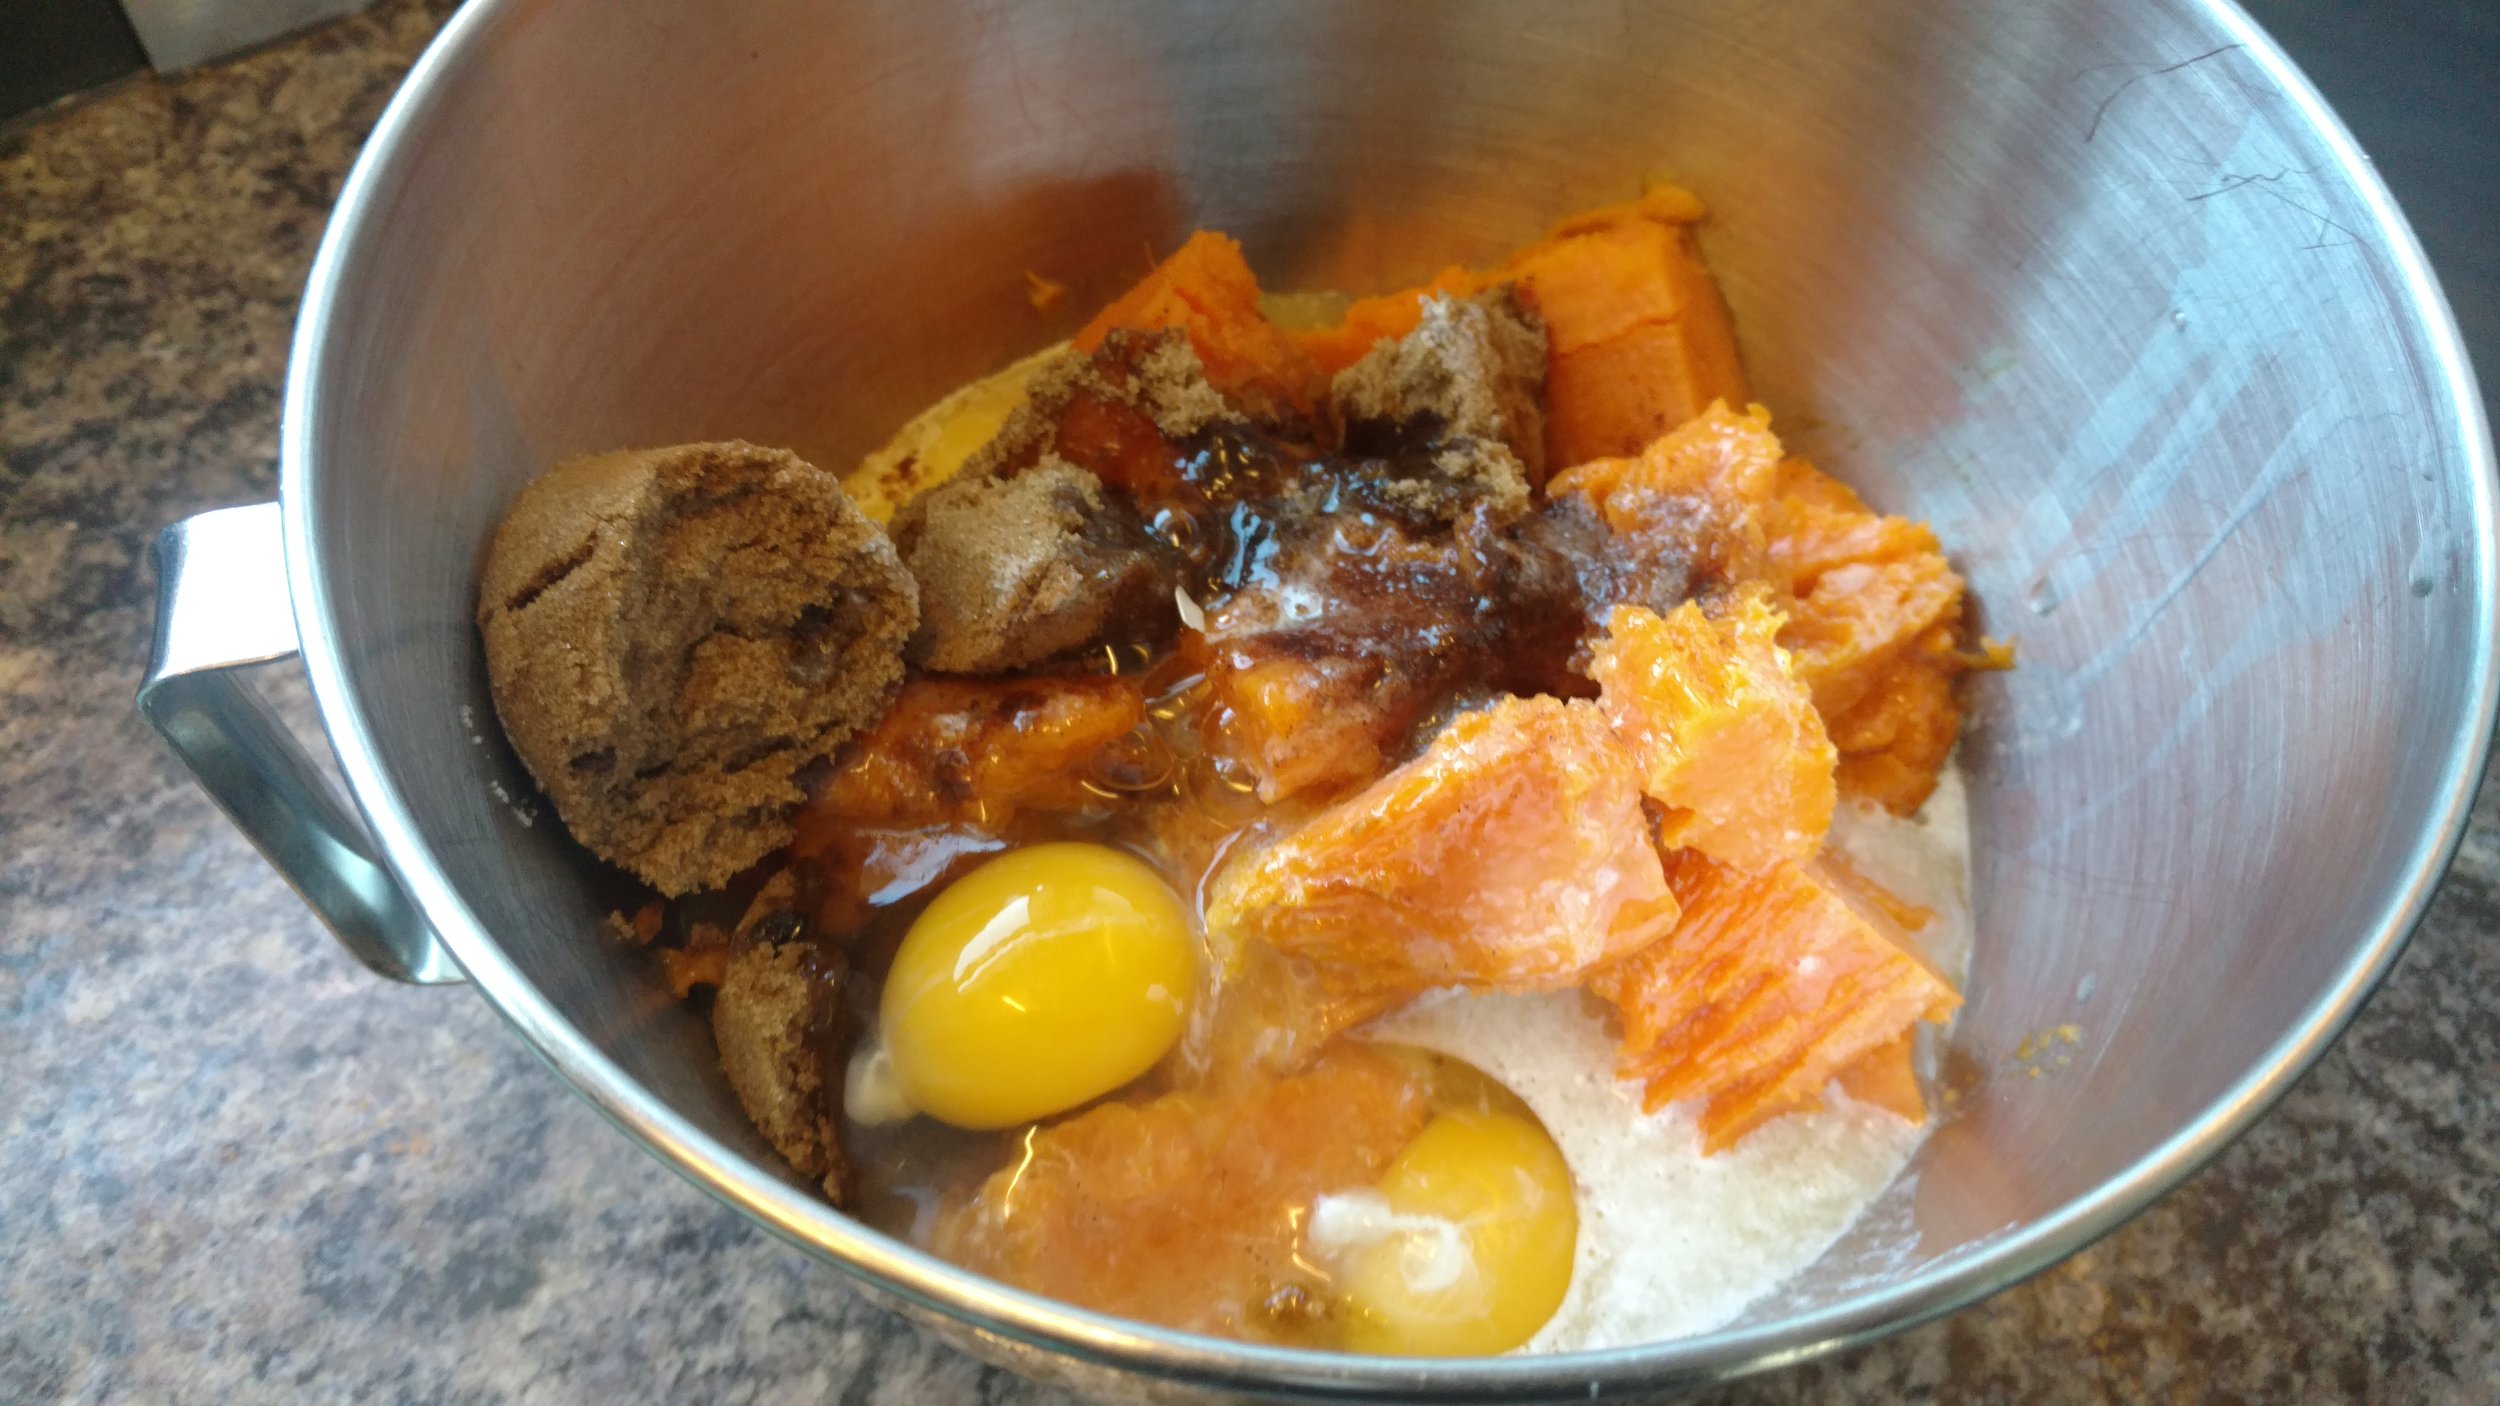
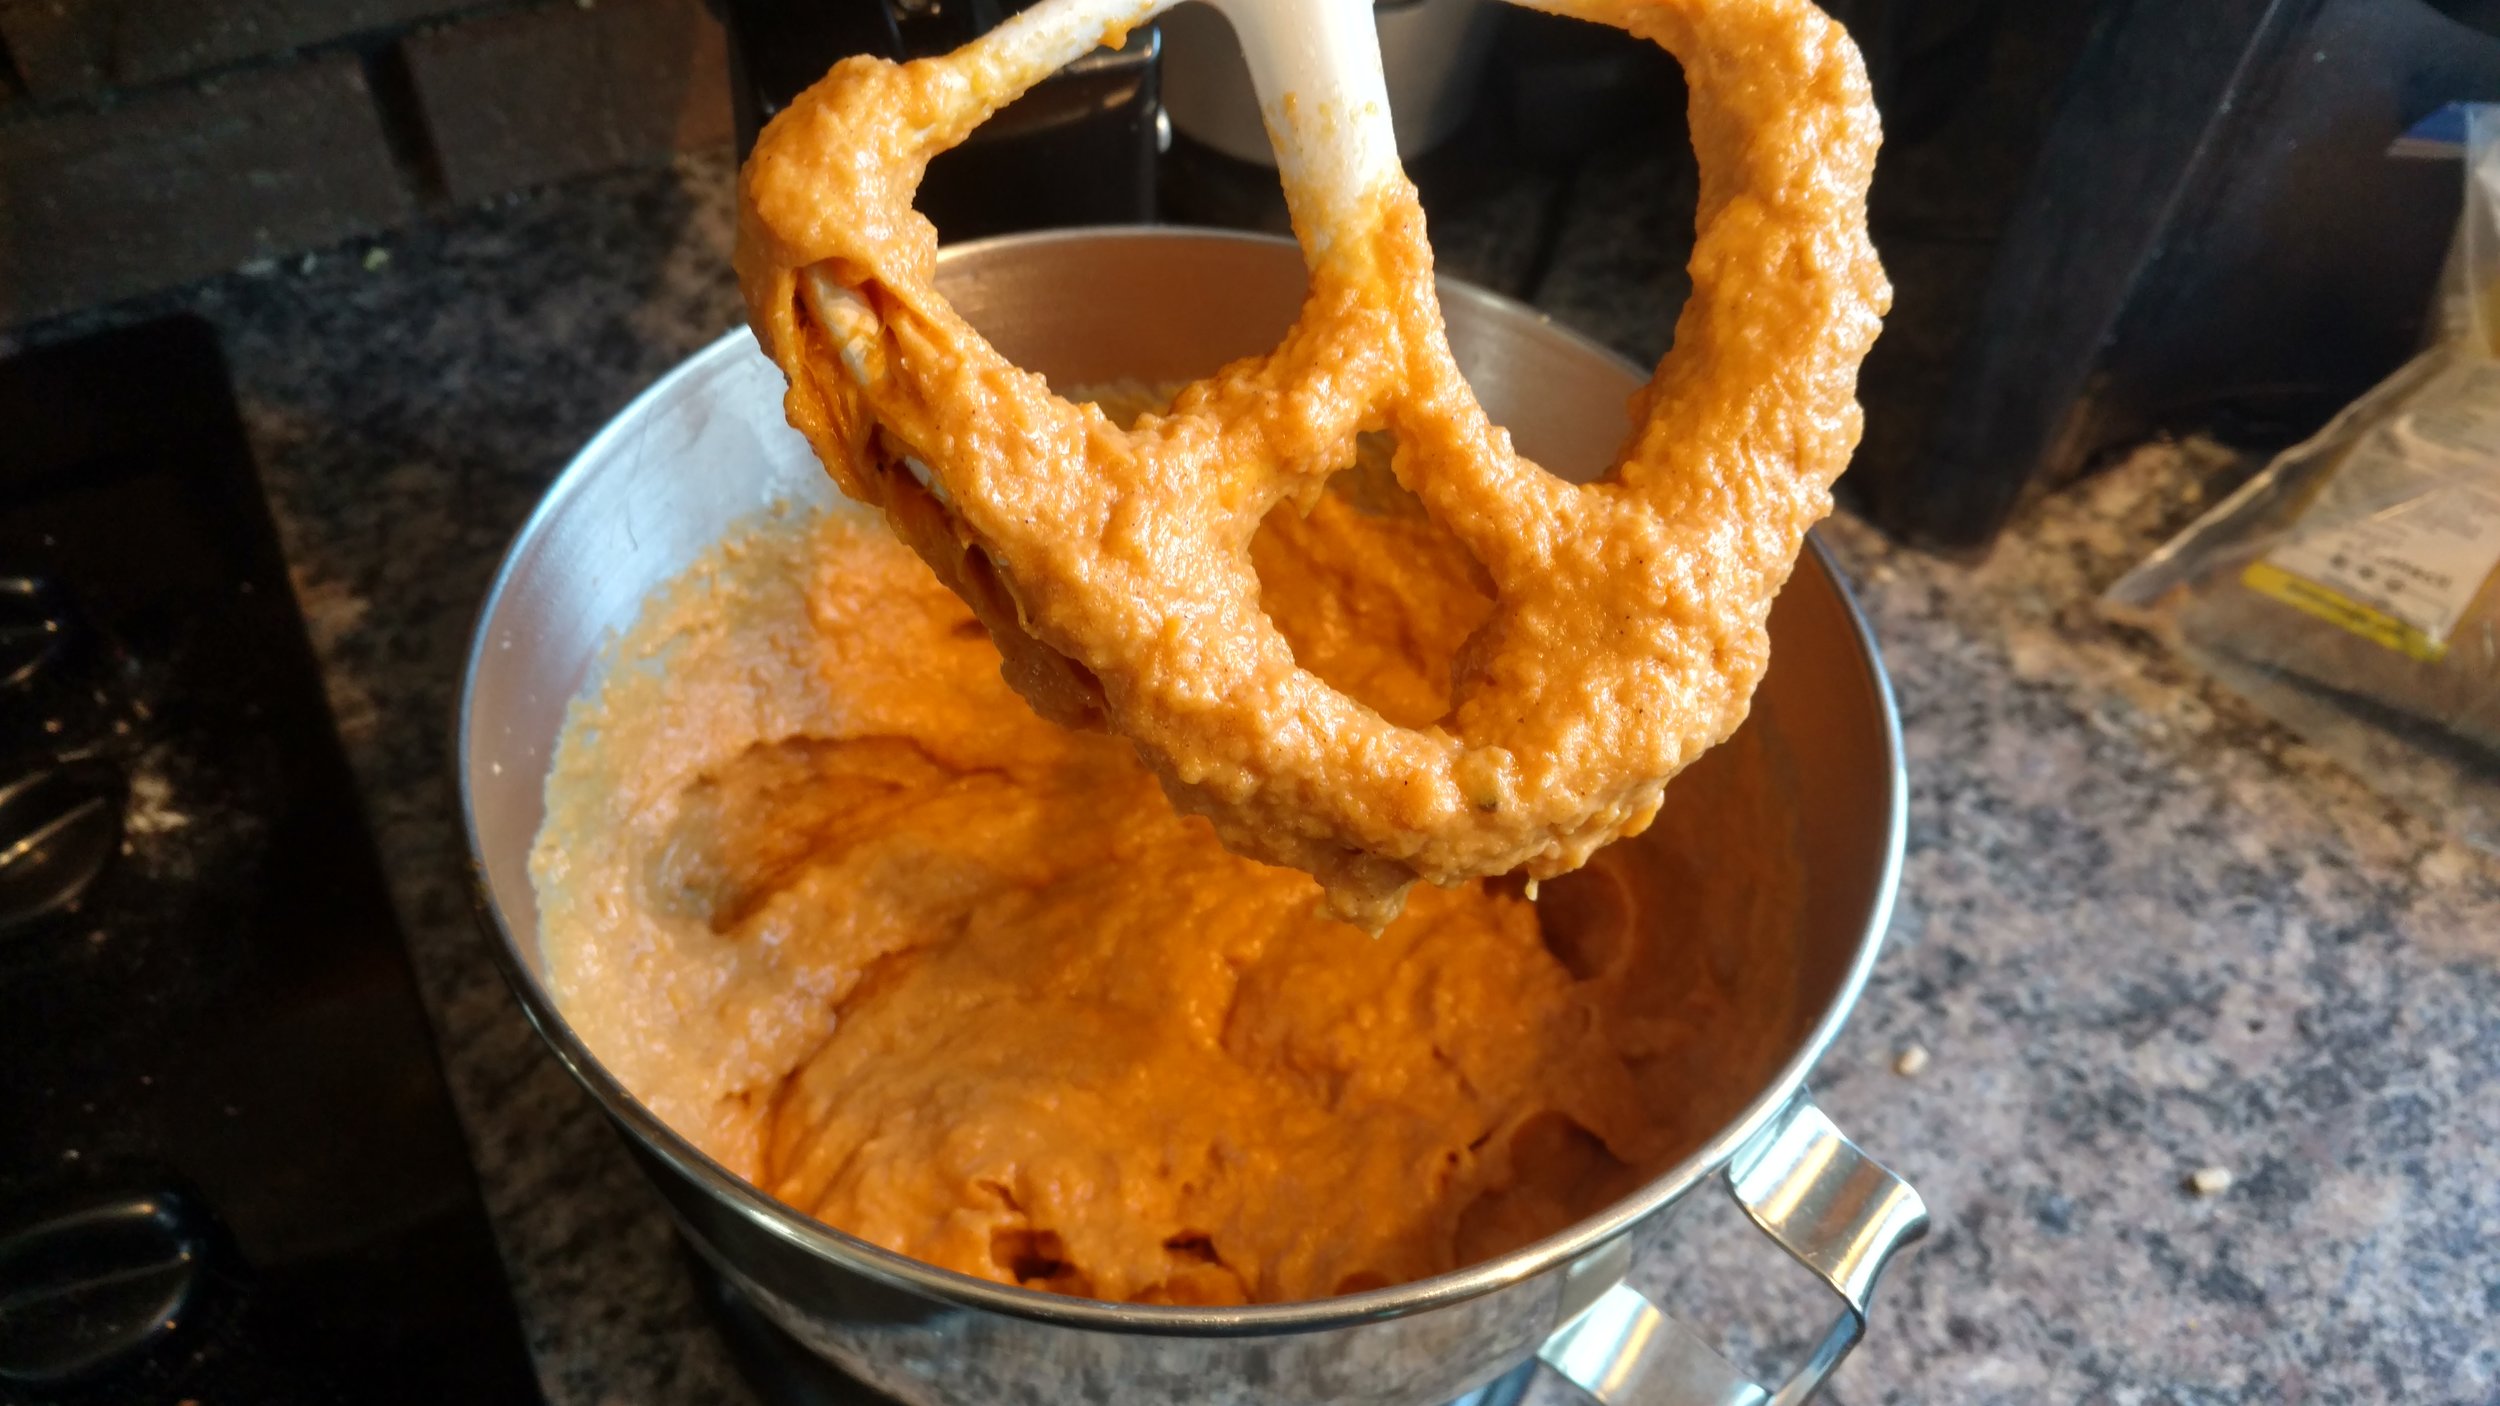
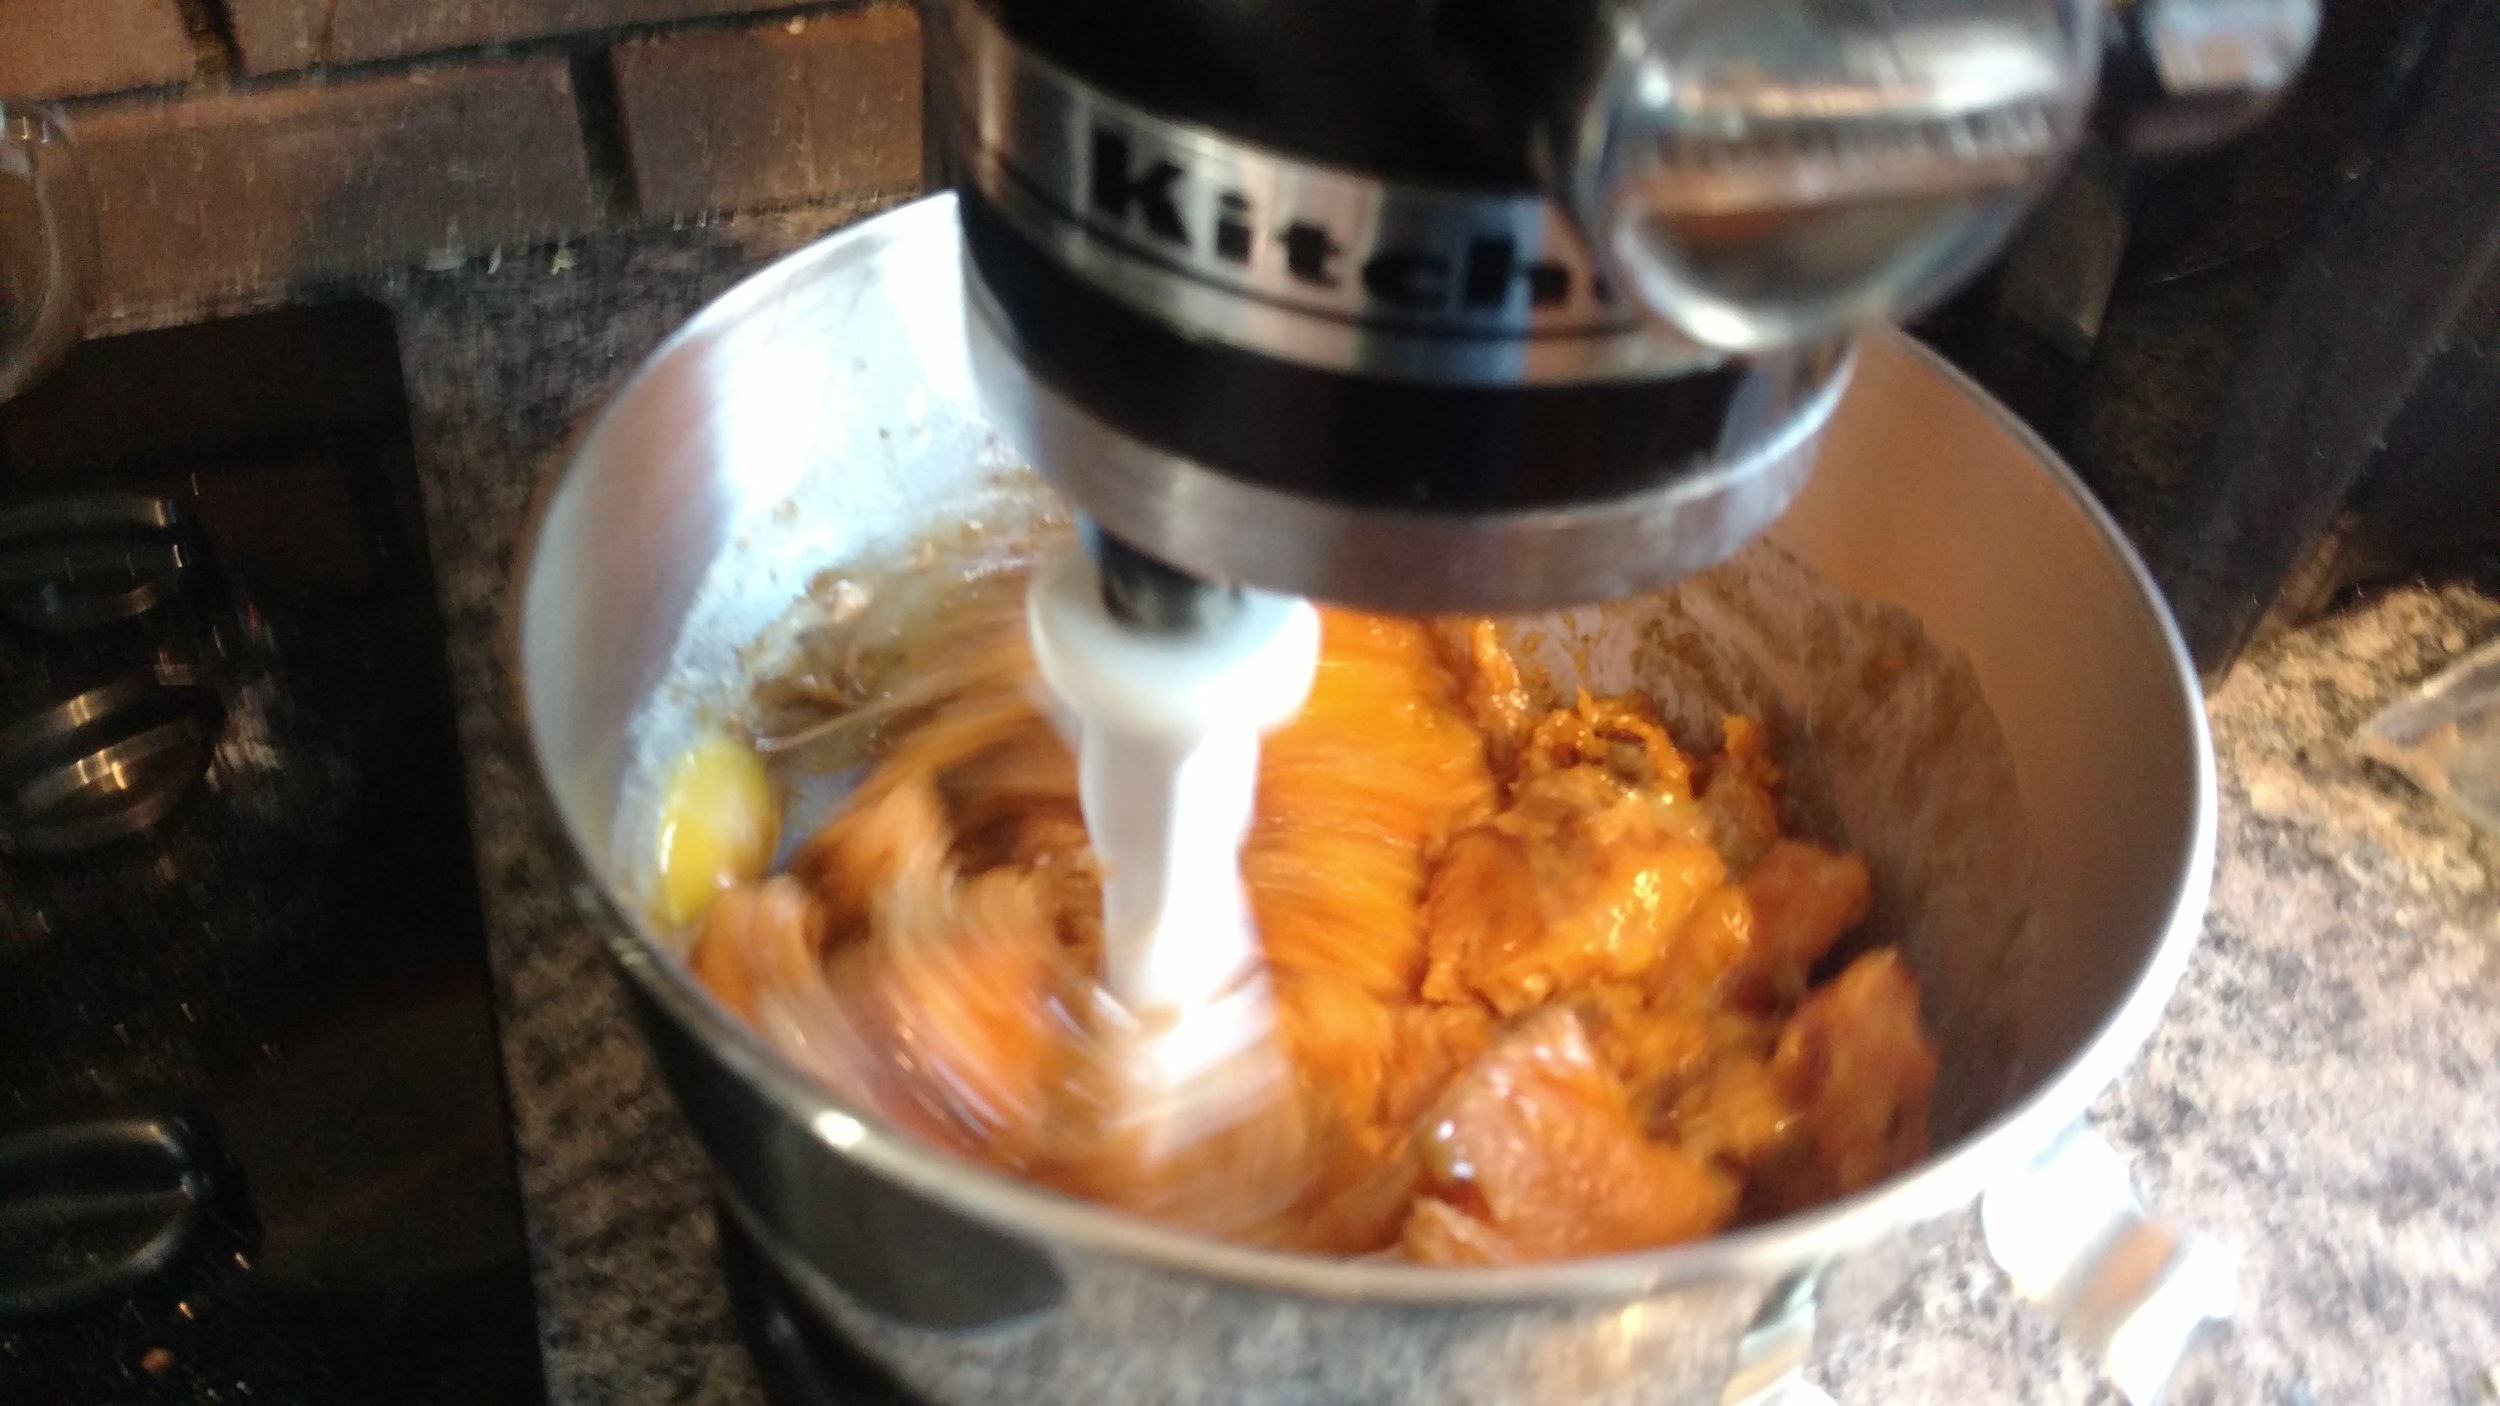
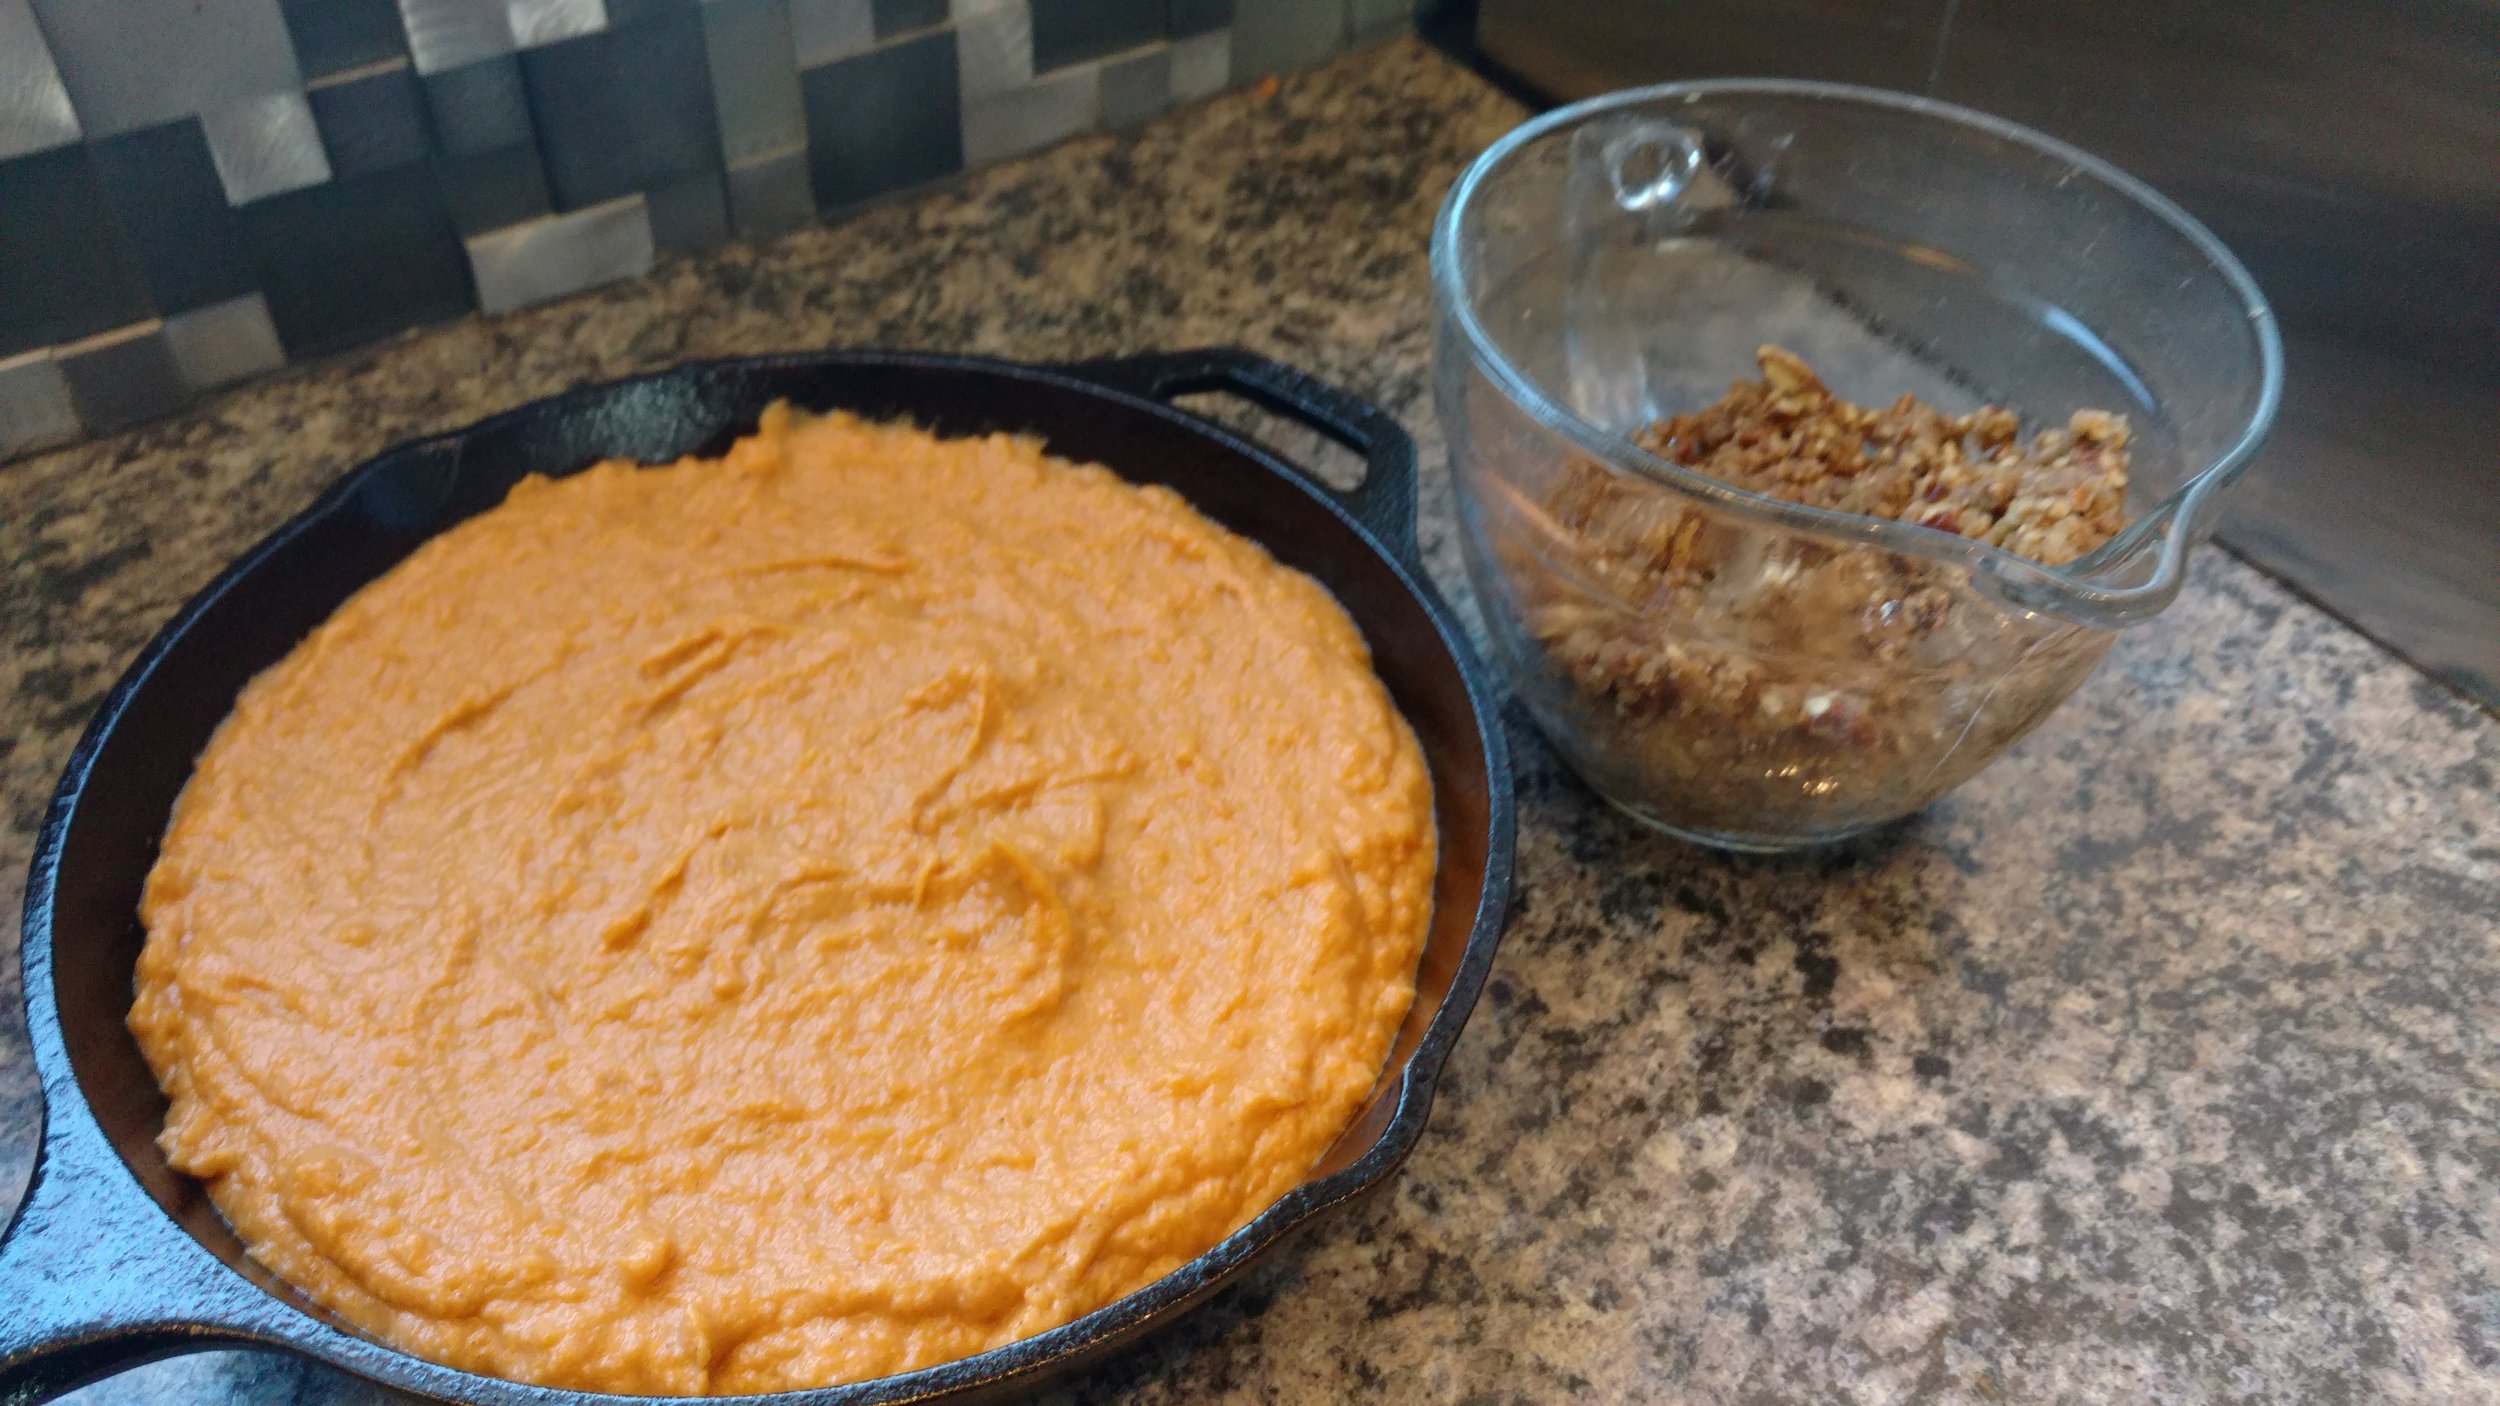
Once they were cooked completely I brought them in and entered them back into the typical family recipe. I peeled them and added some cream, brown sugar, cinnamon, etc. and let the KitchenAid mixer do its thing. While the mixer was turning the smoked sweet potatoes into a soup, I started making the topping. 

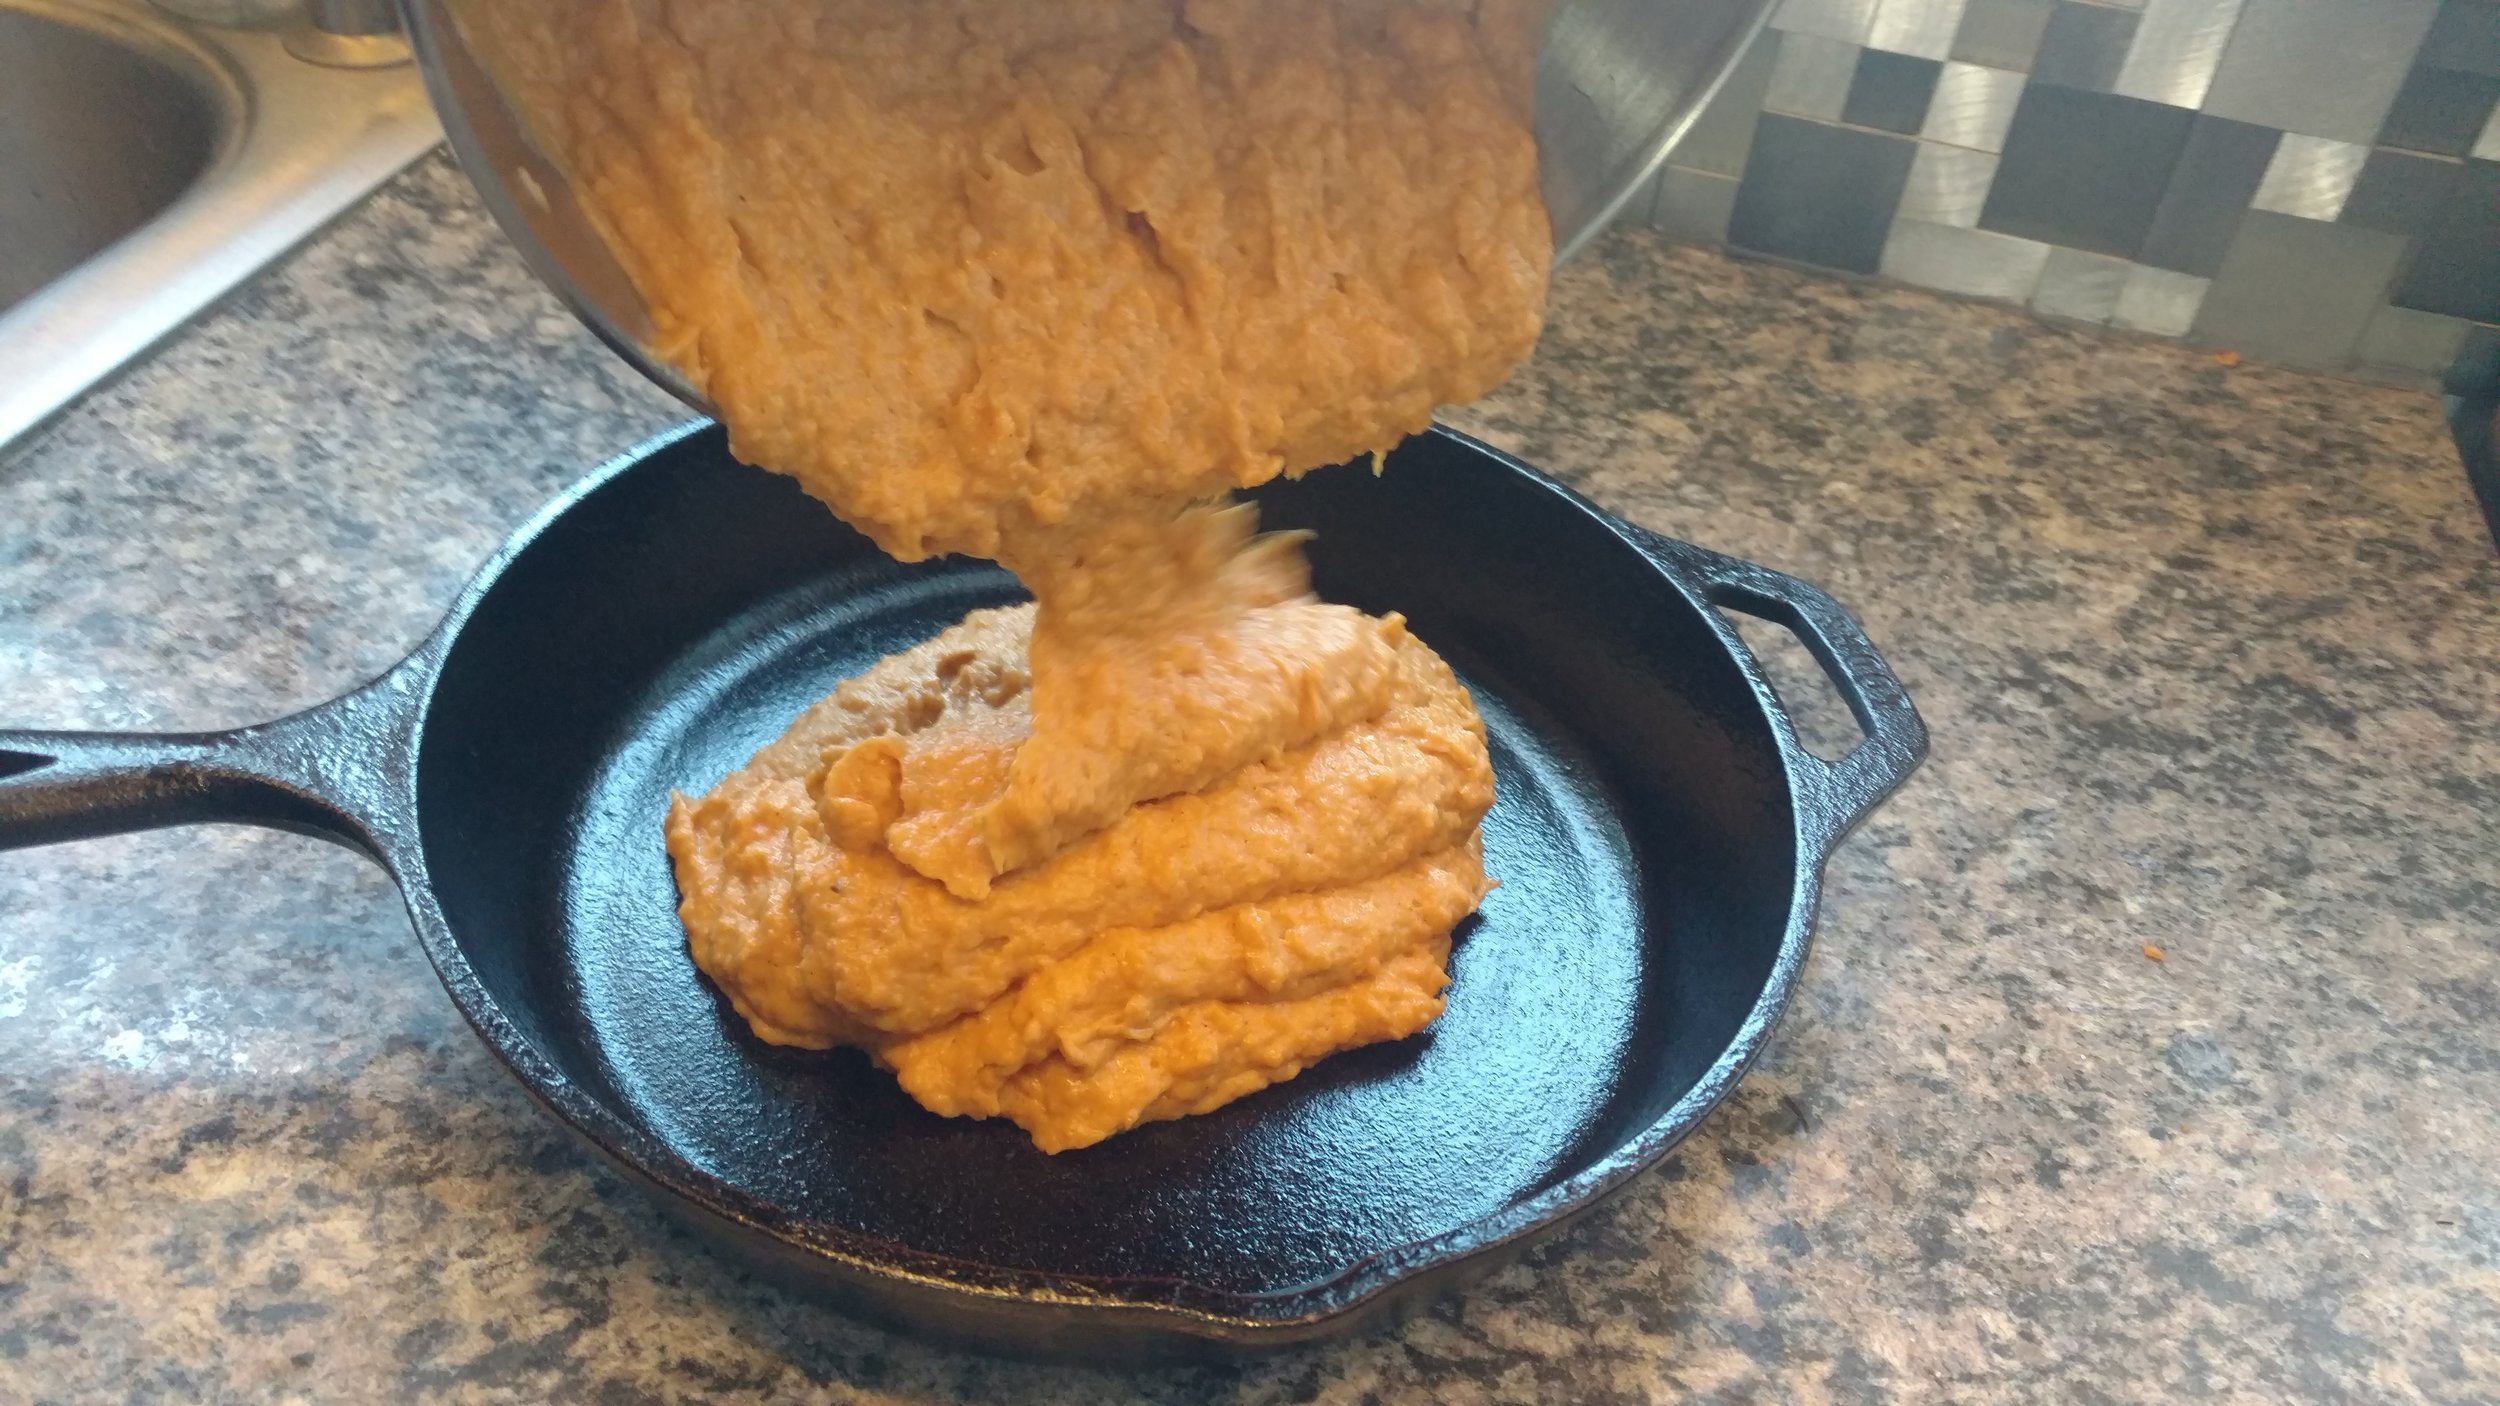
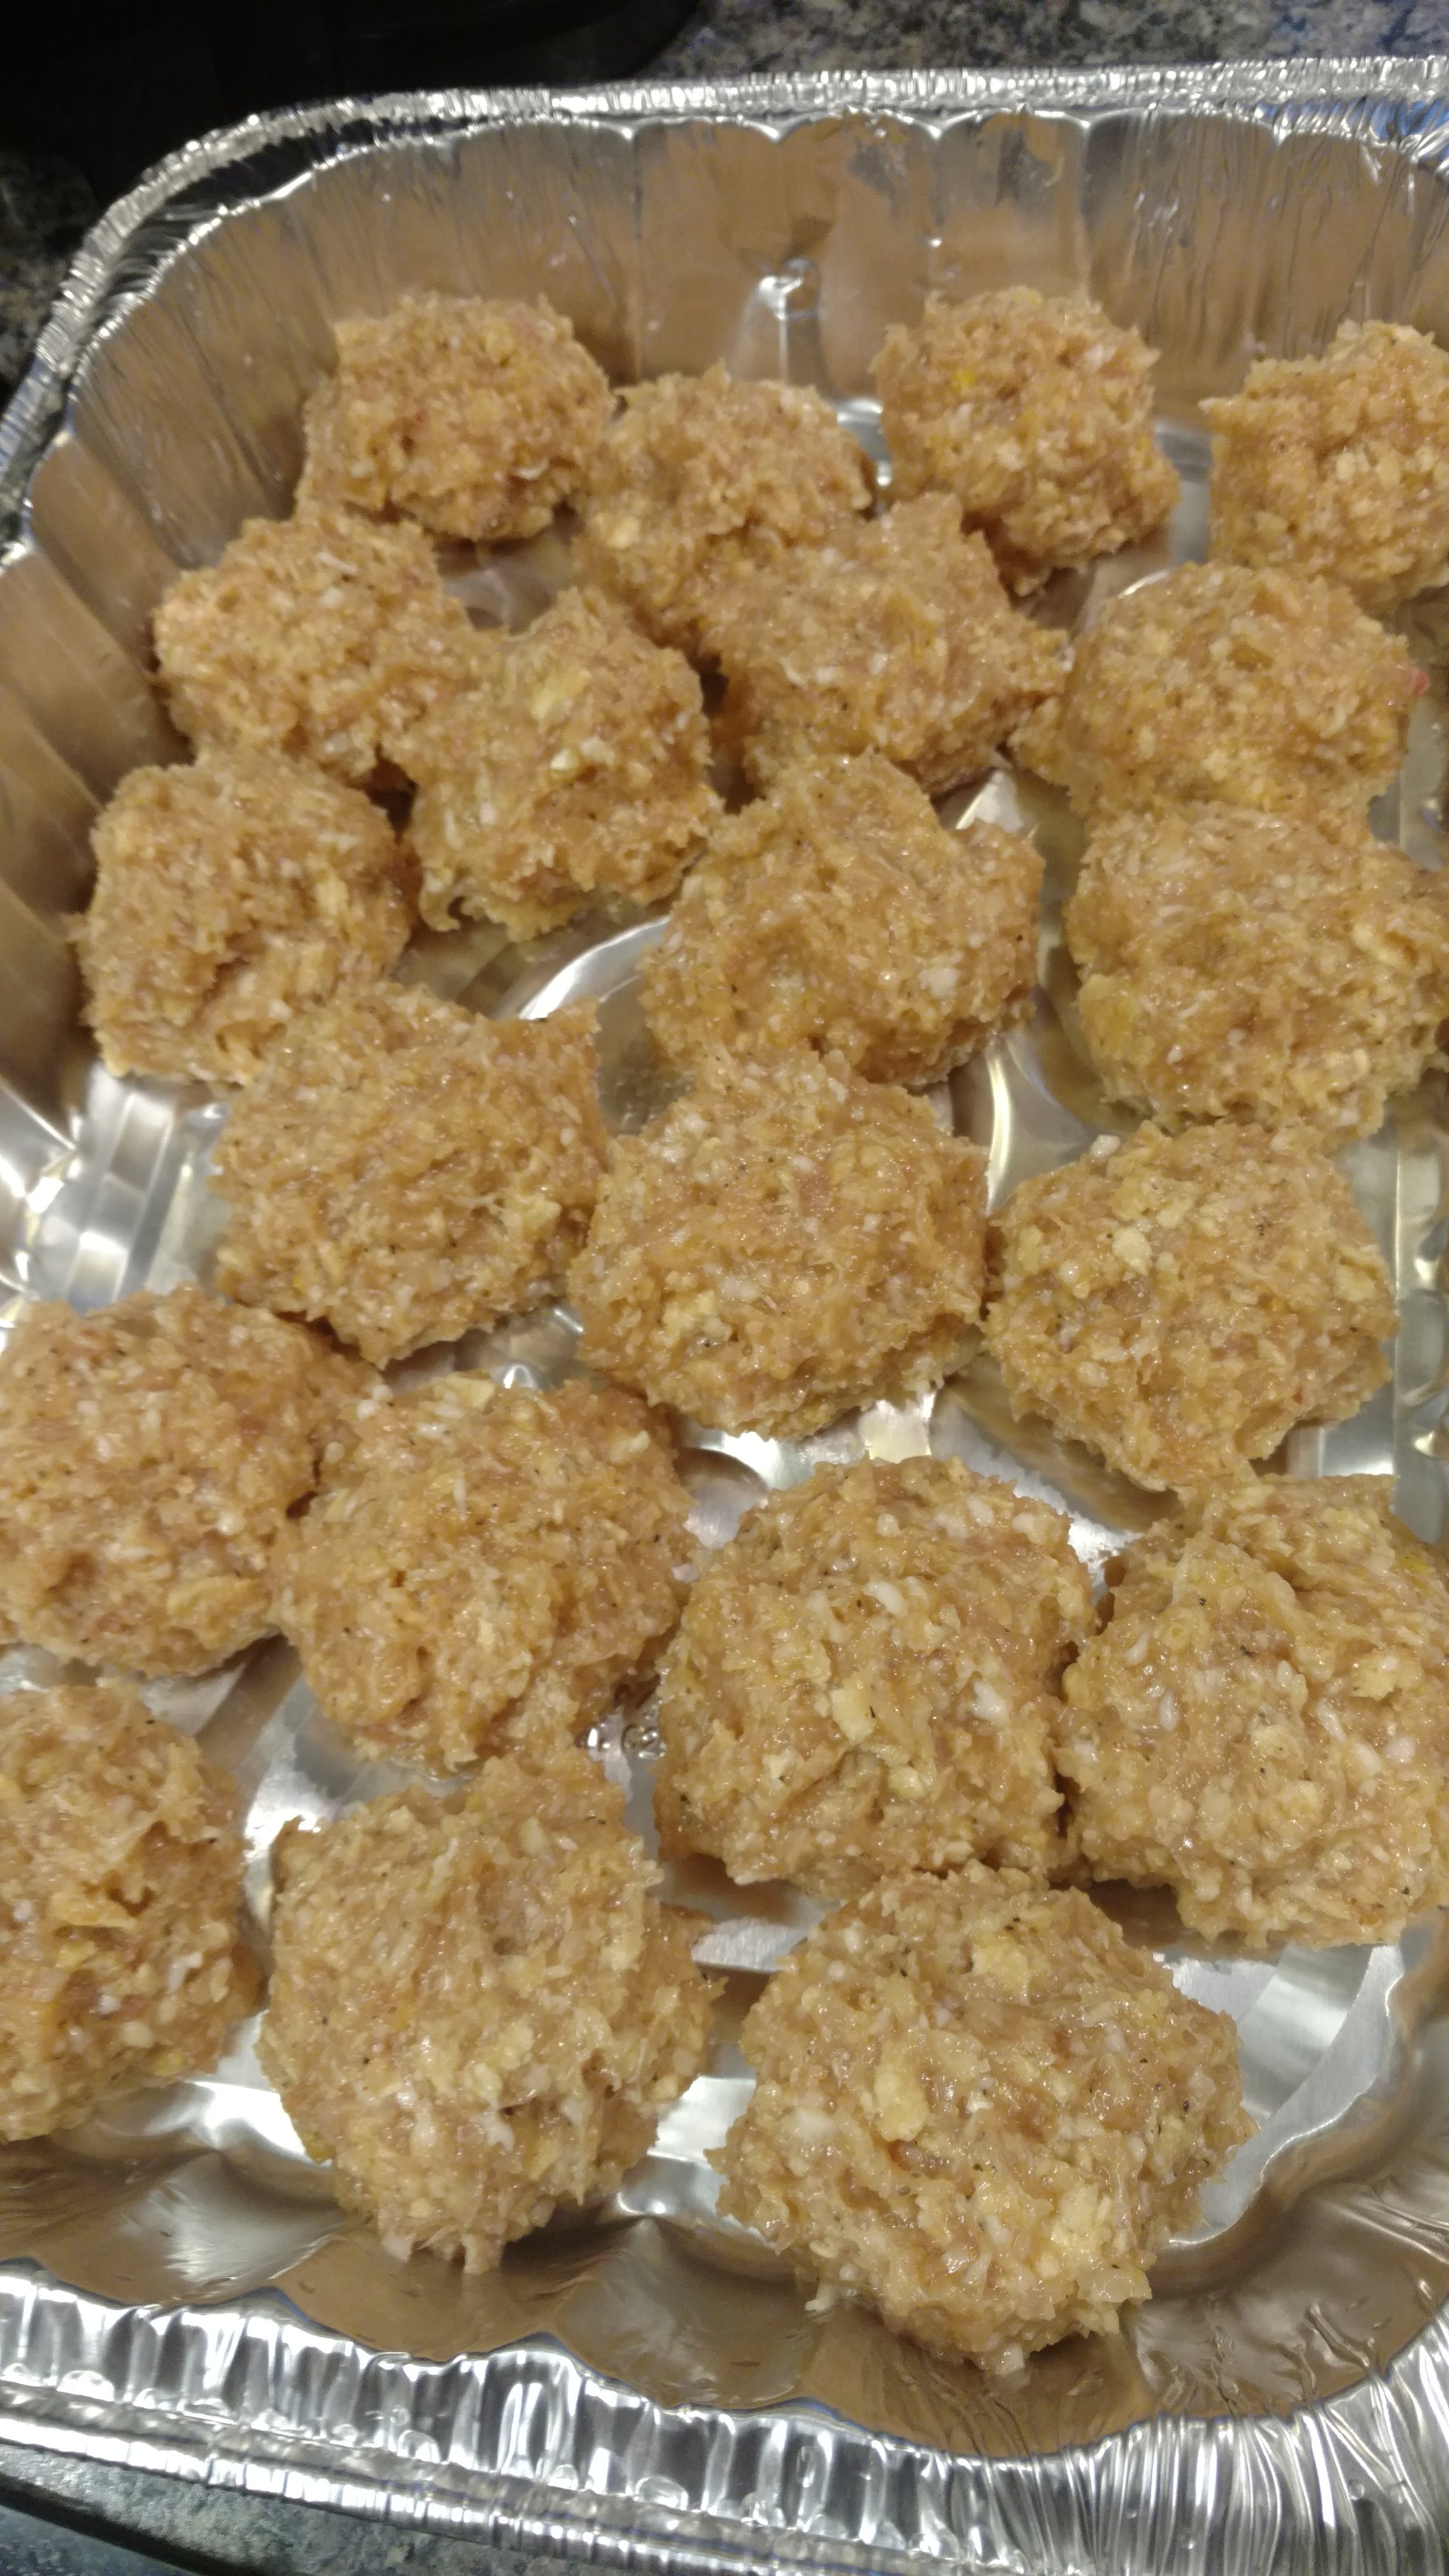
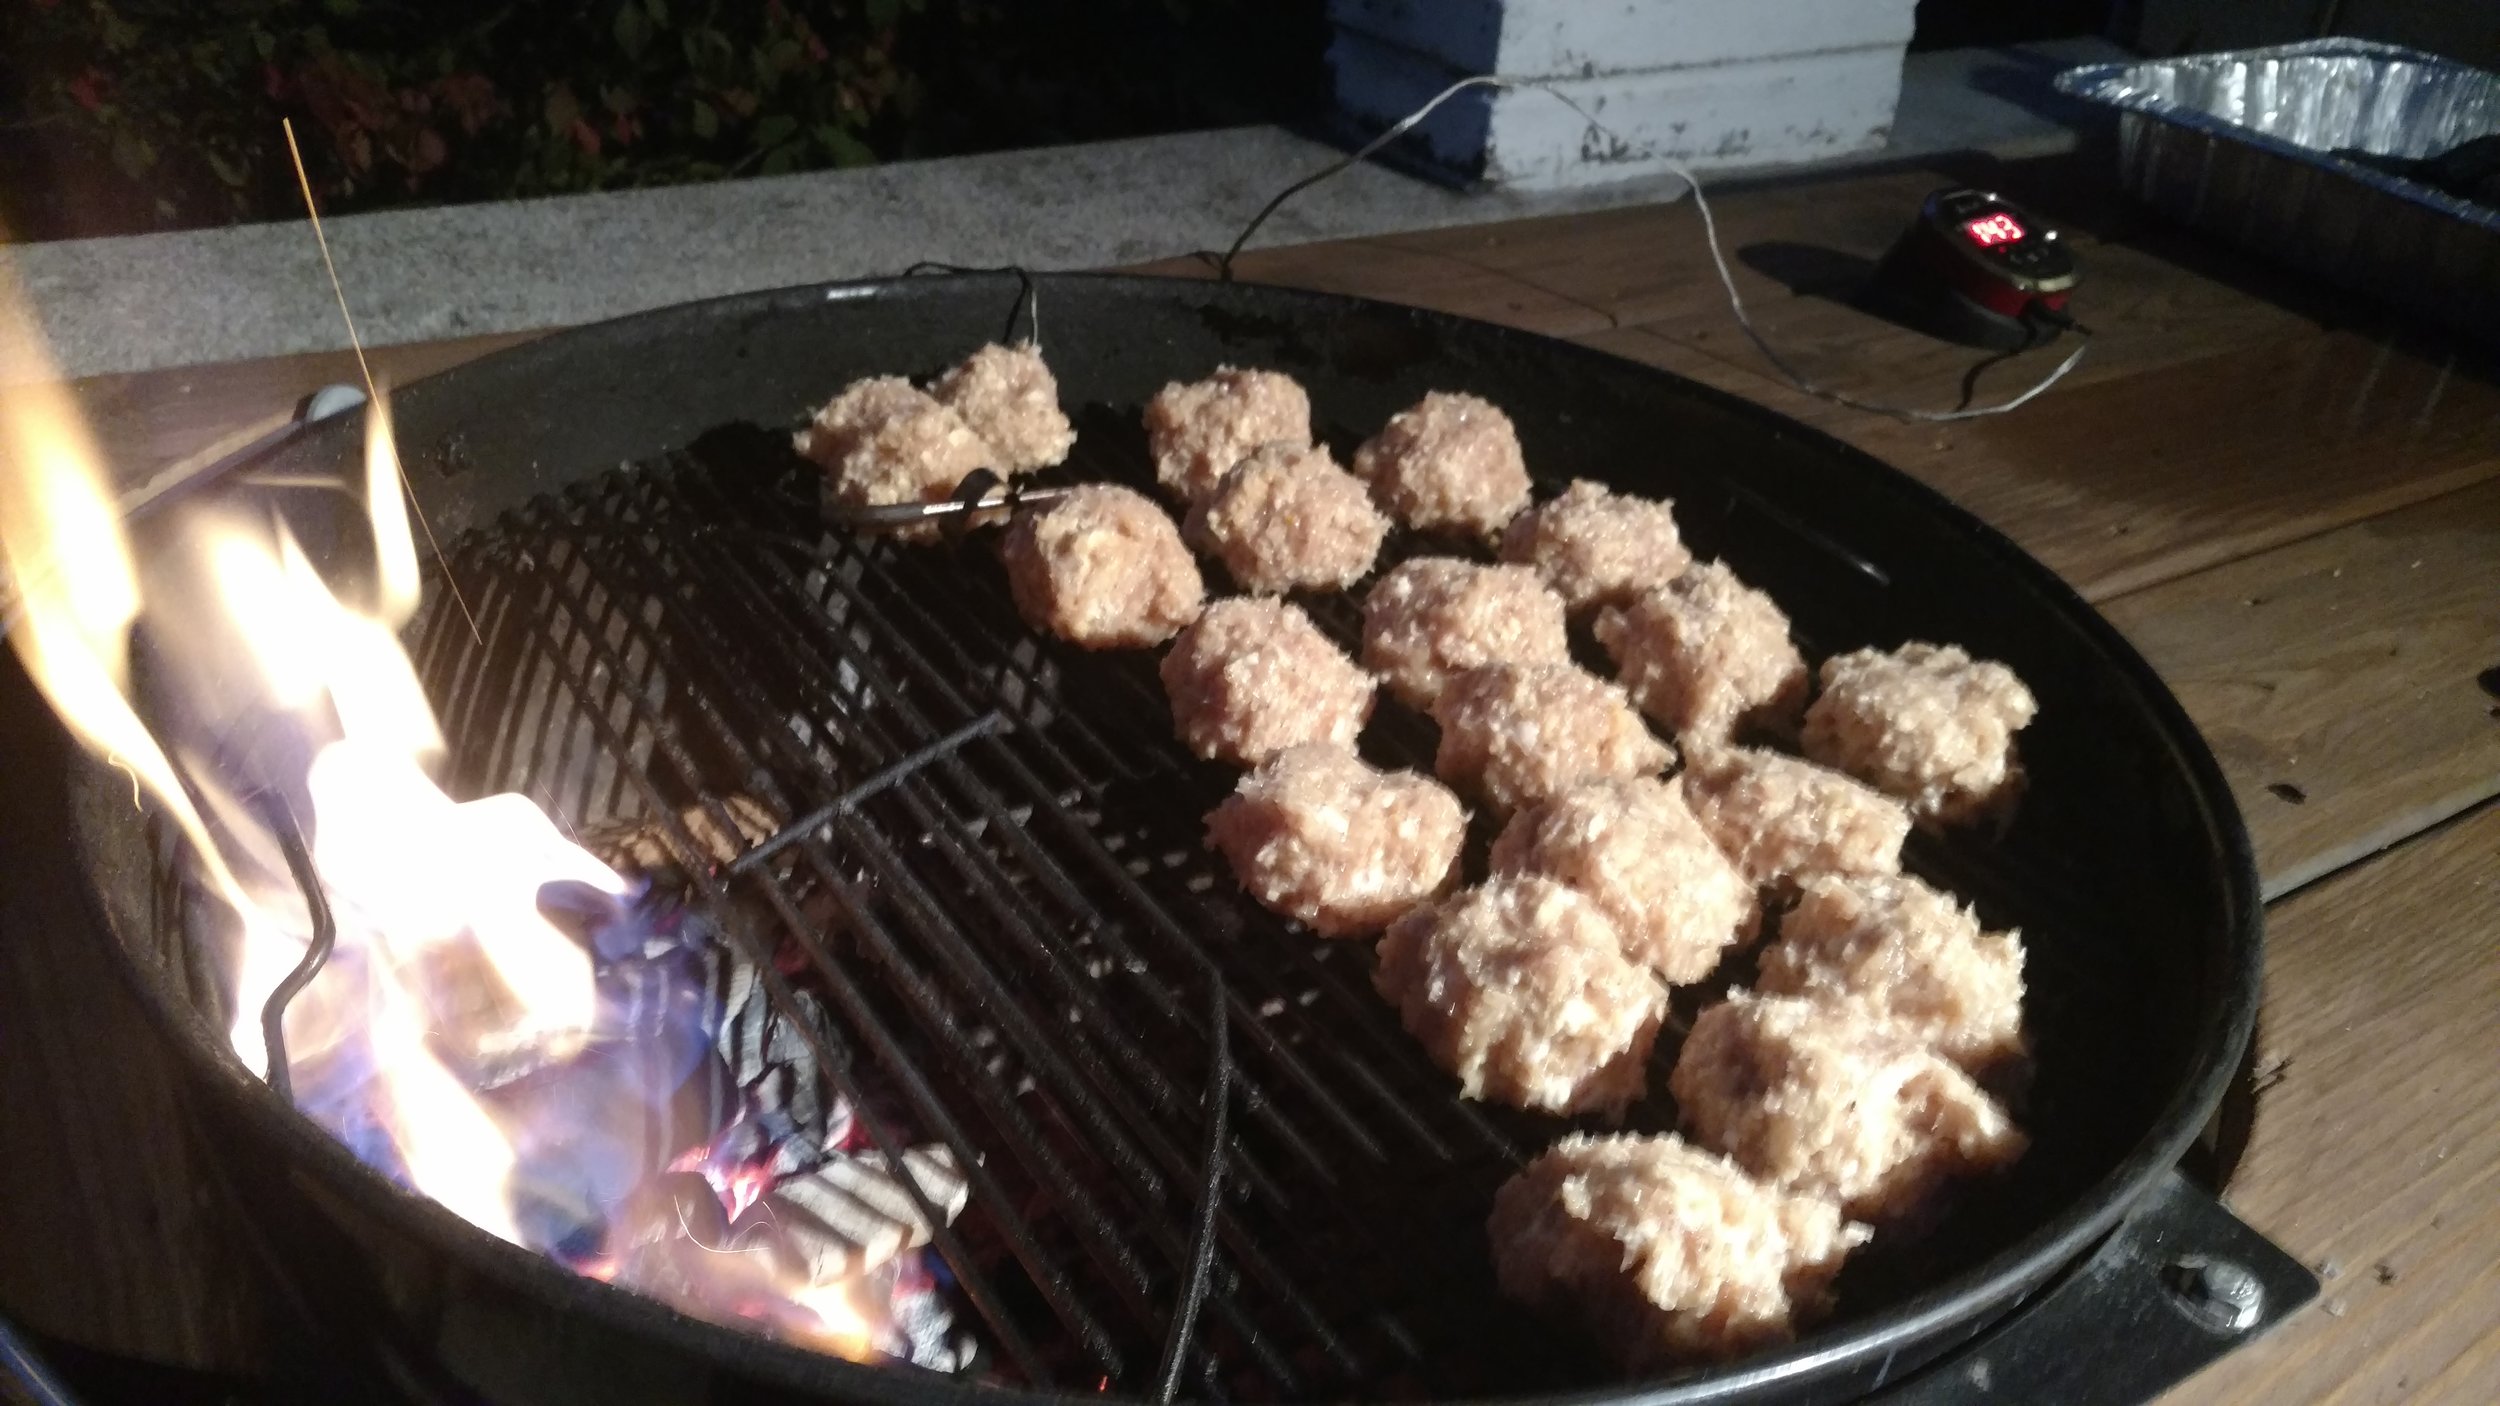
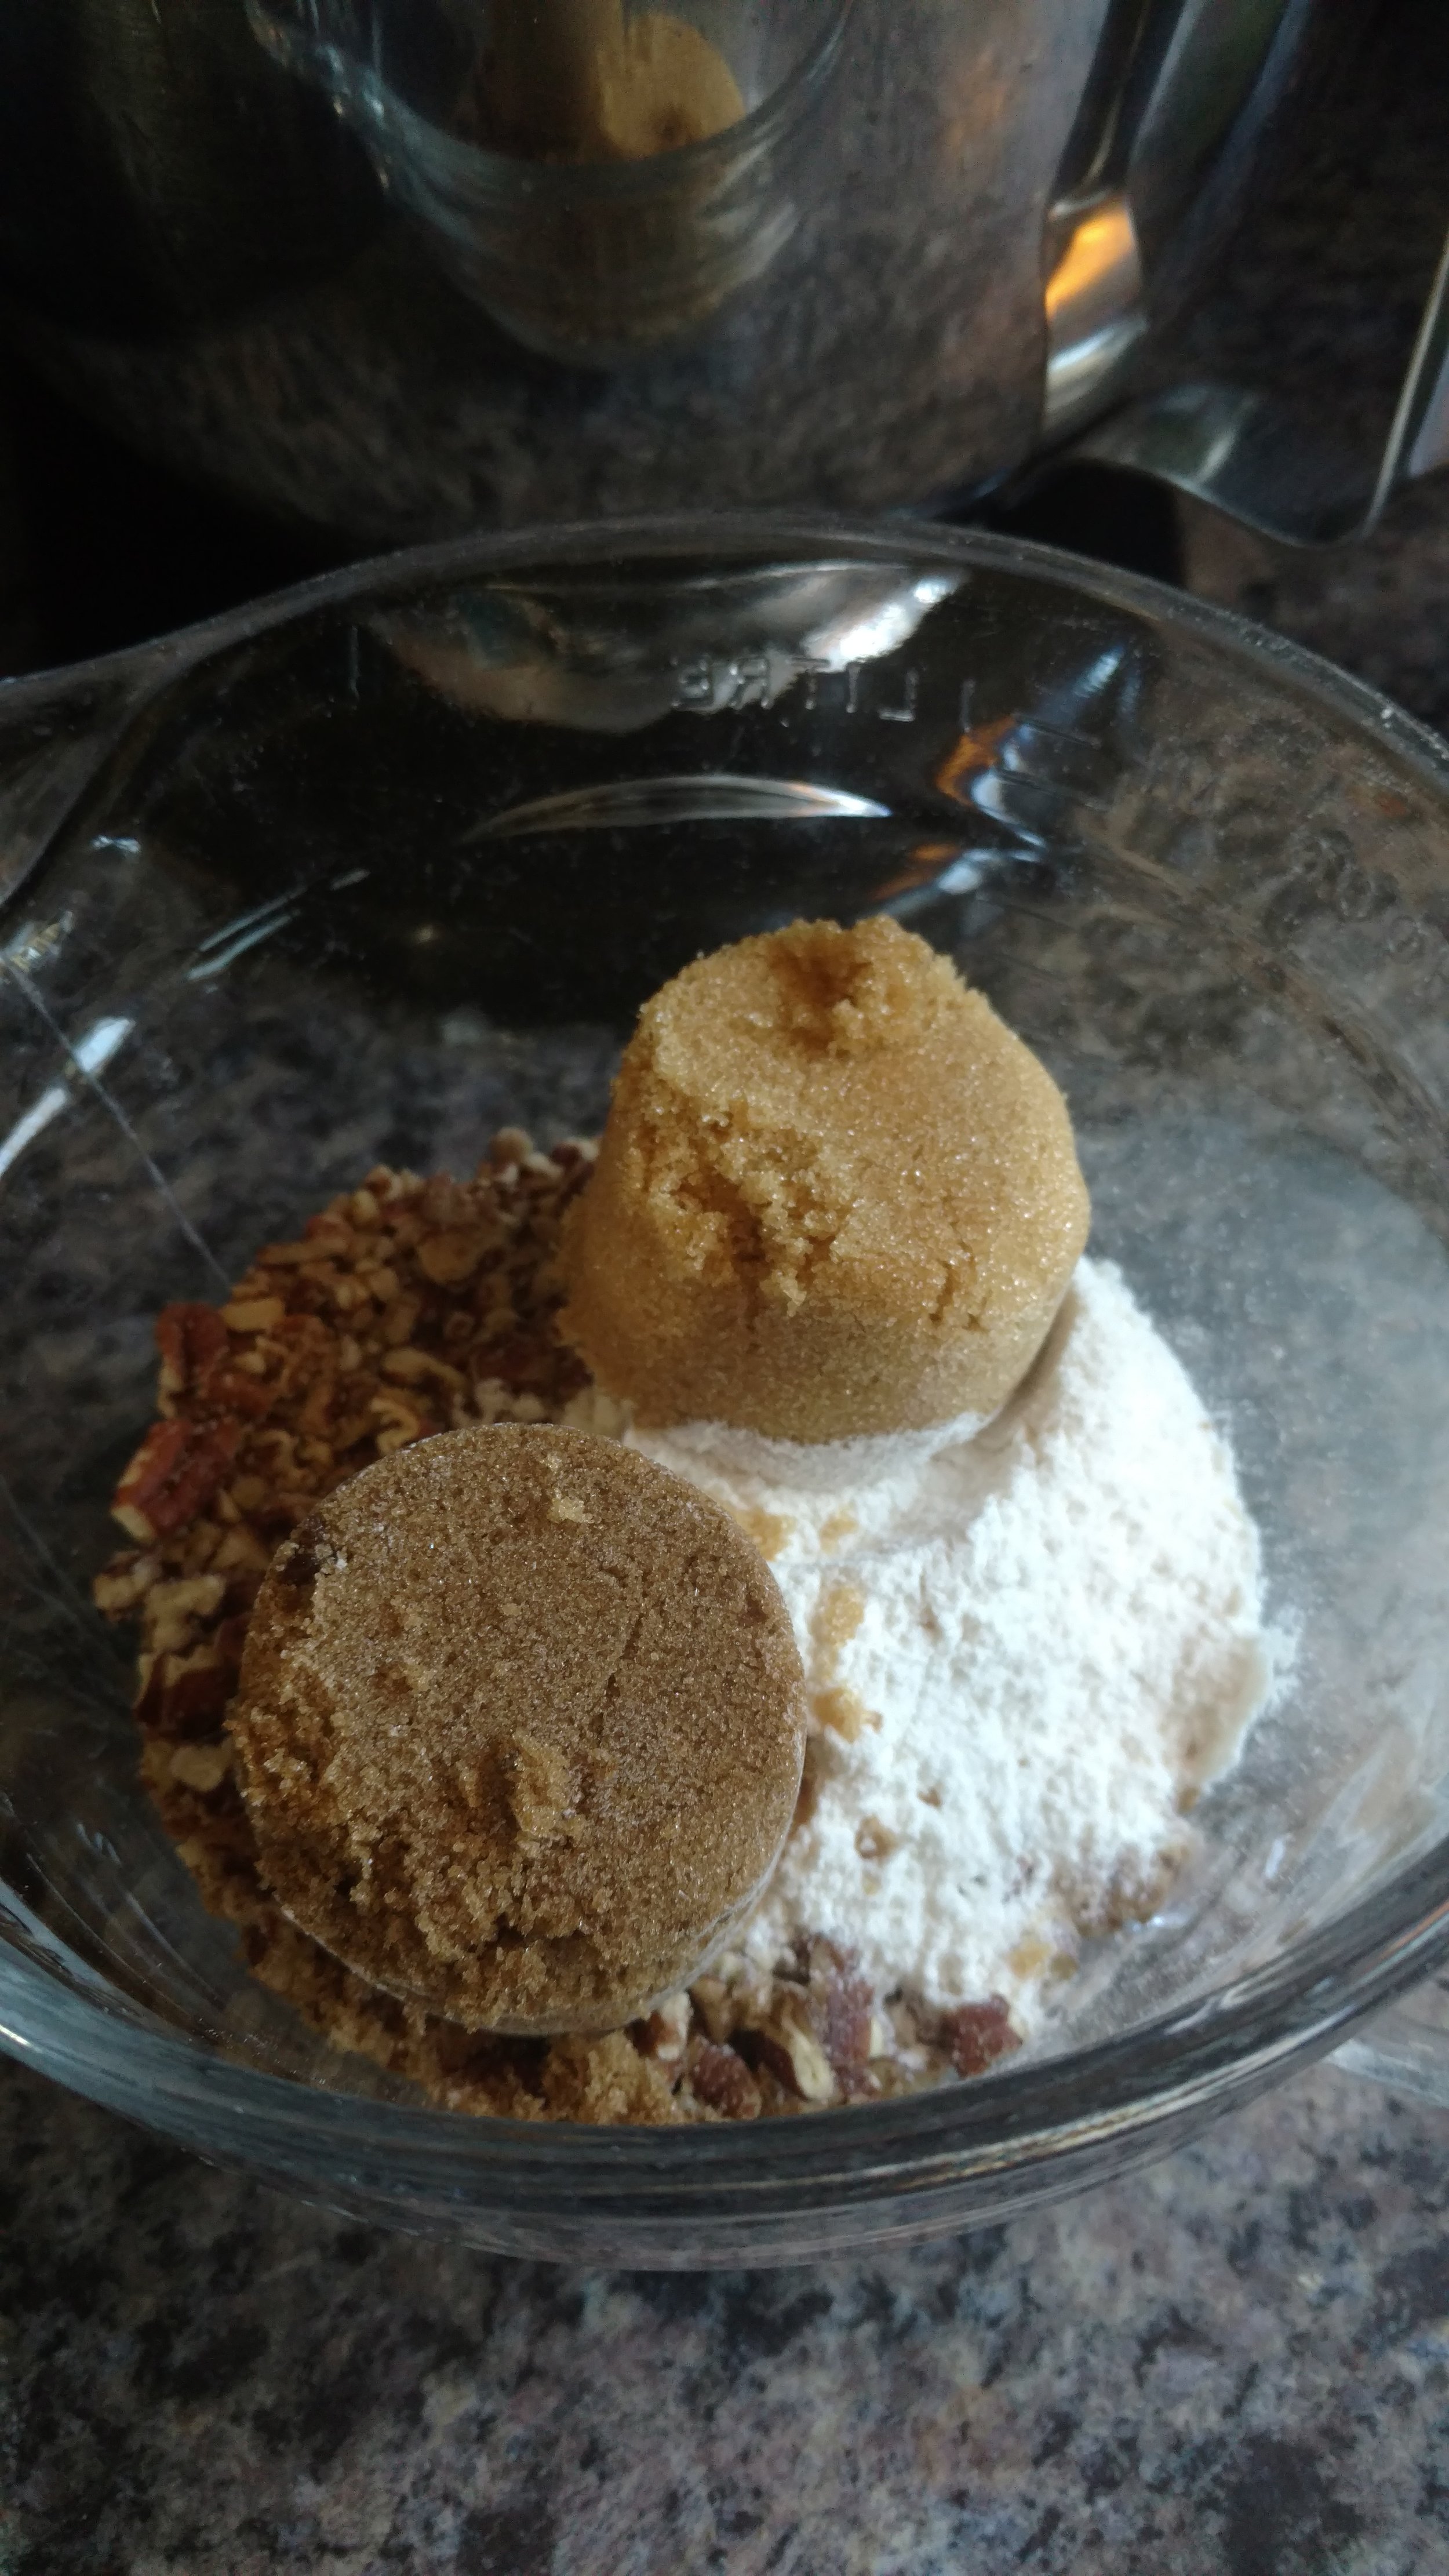
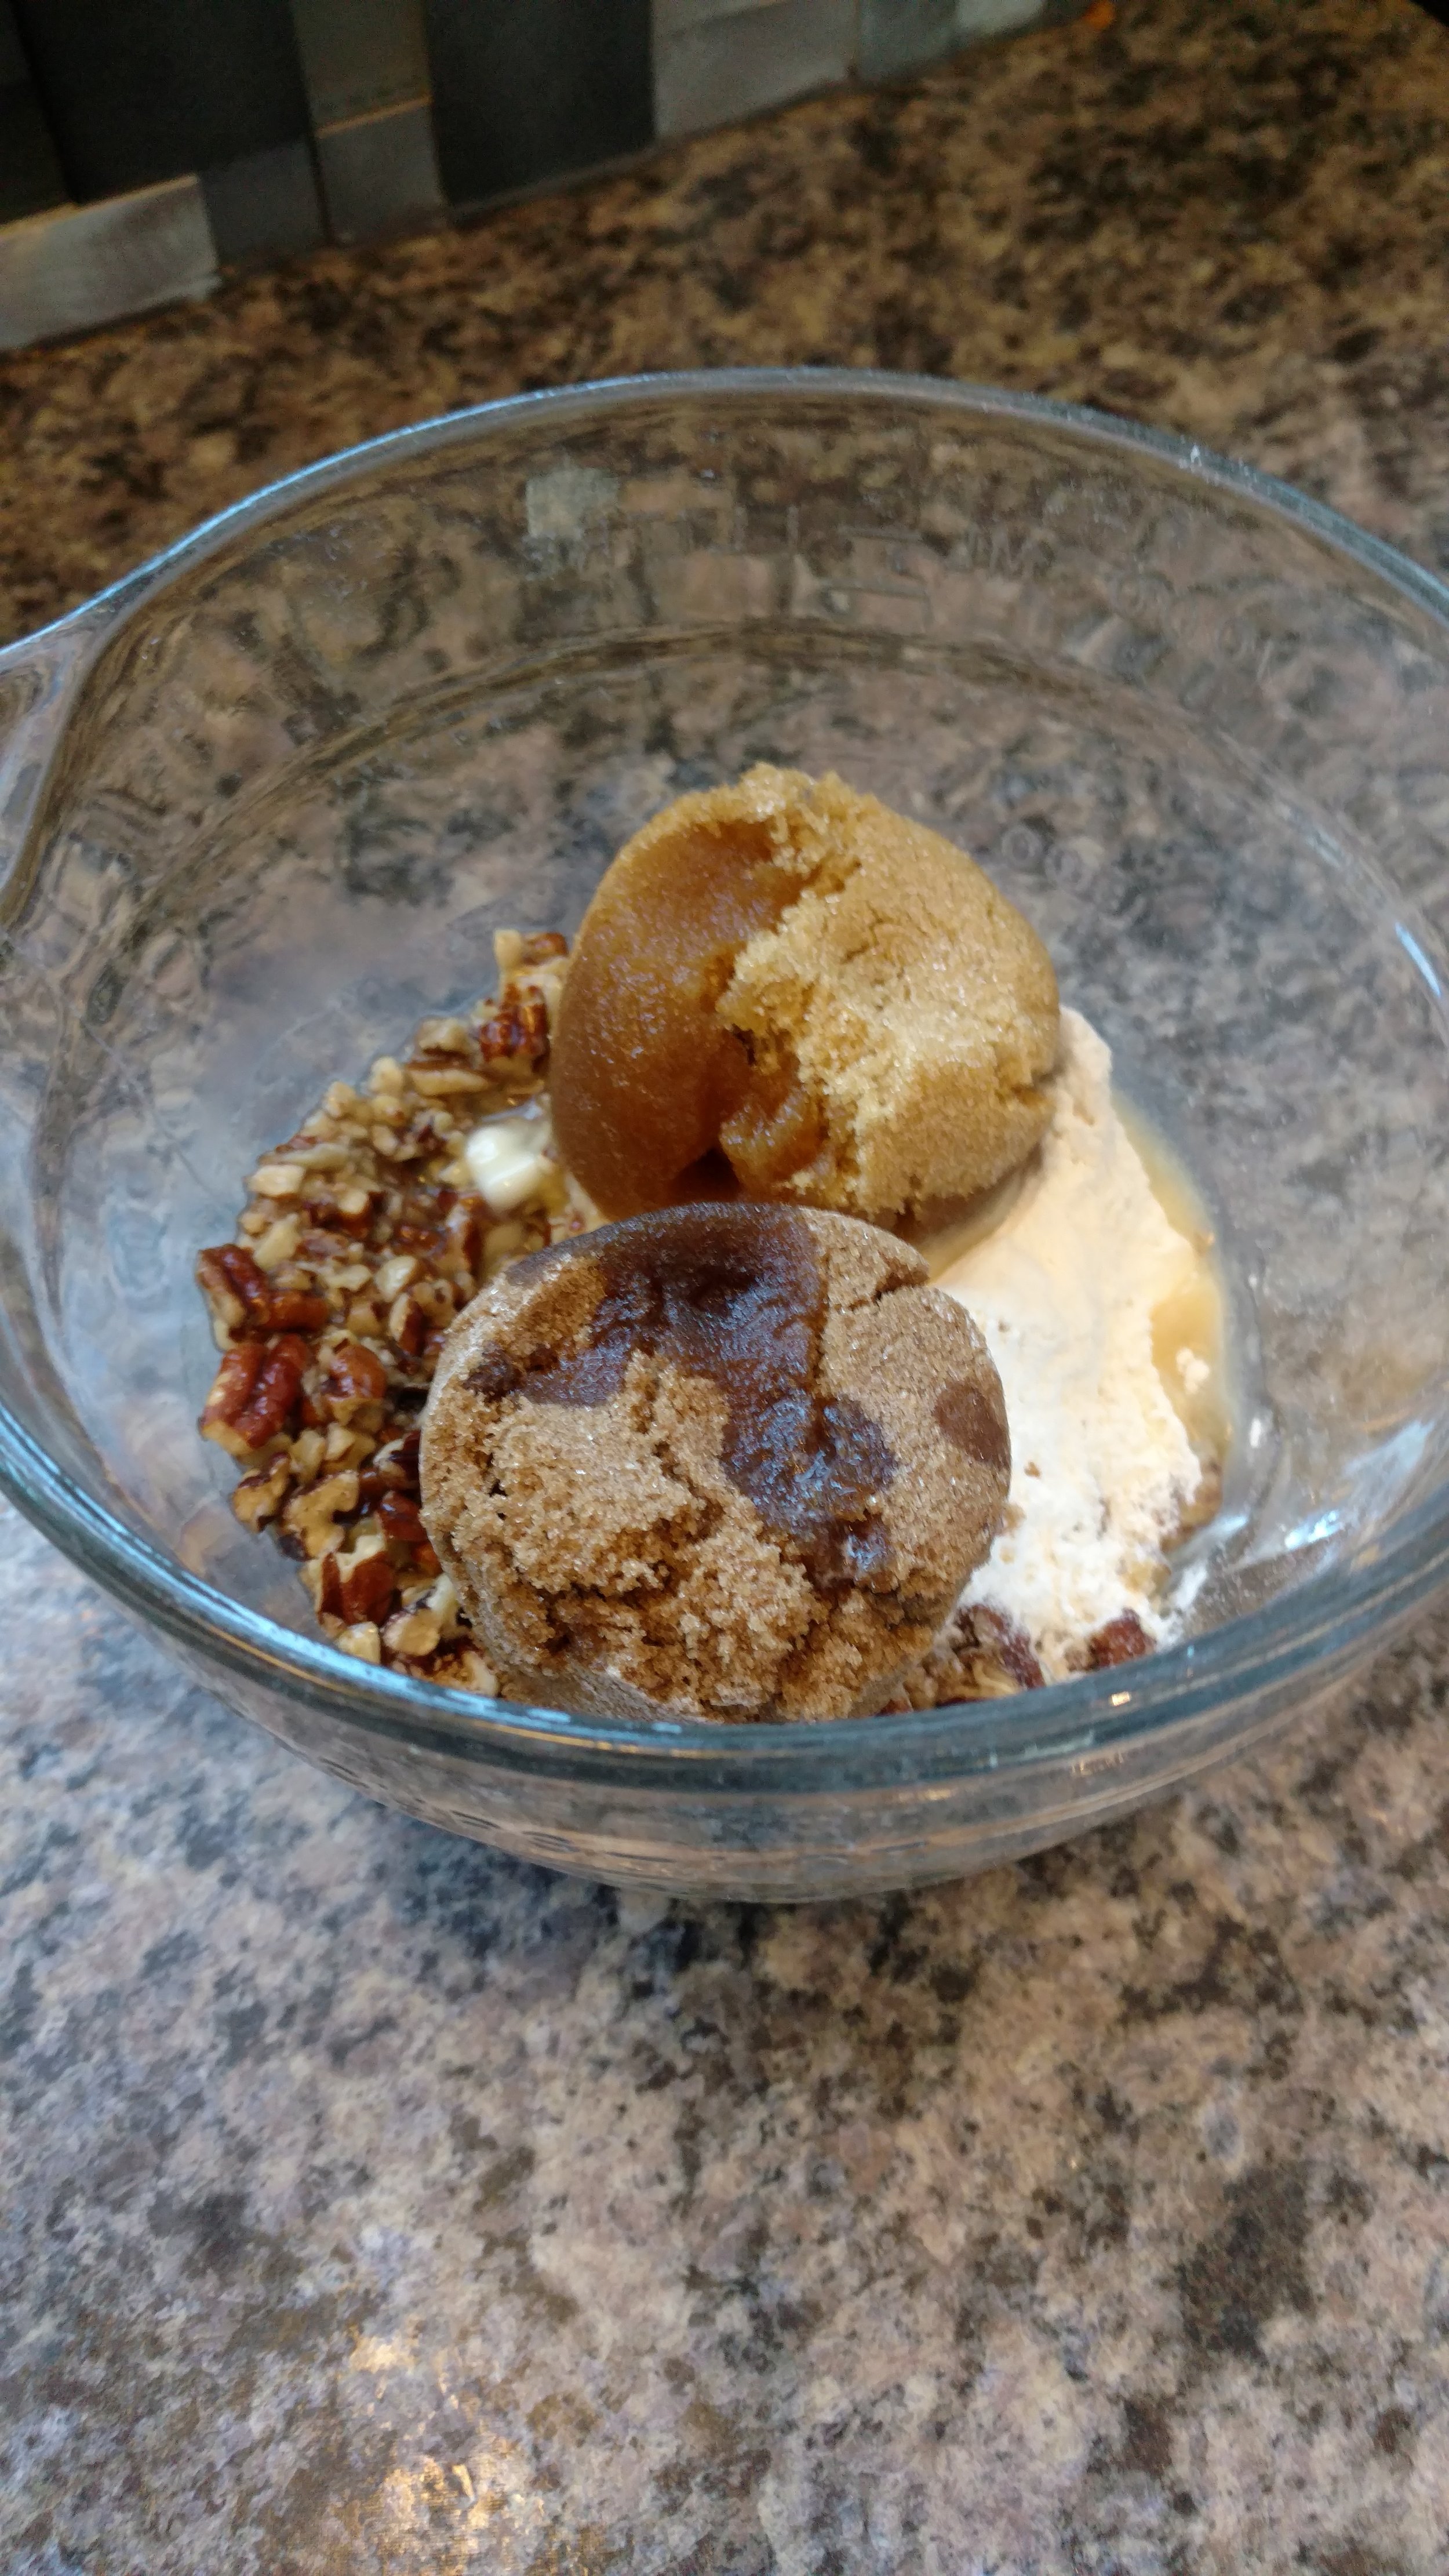
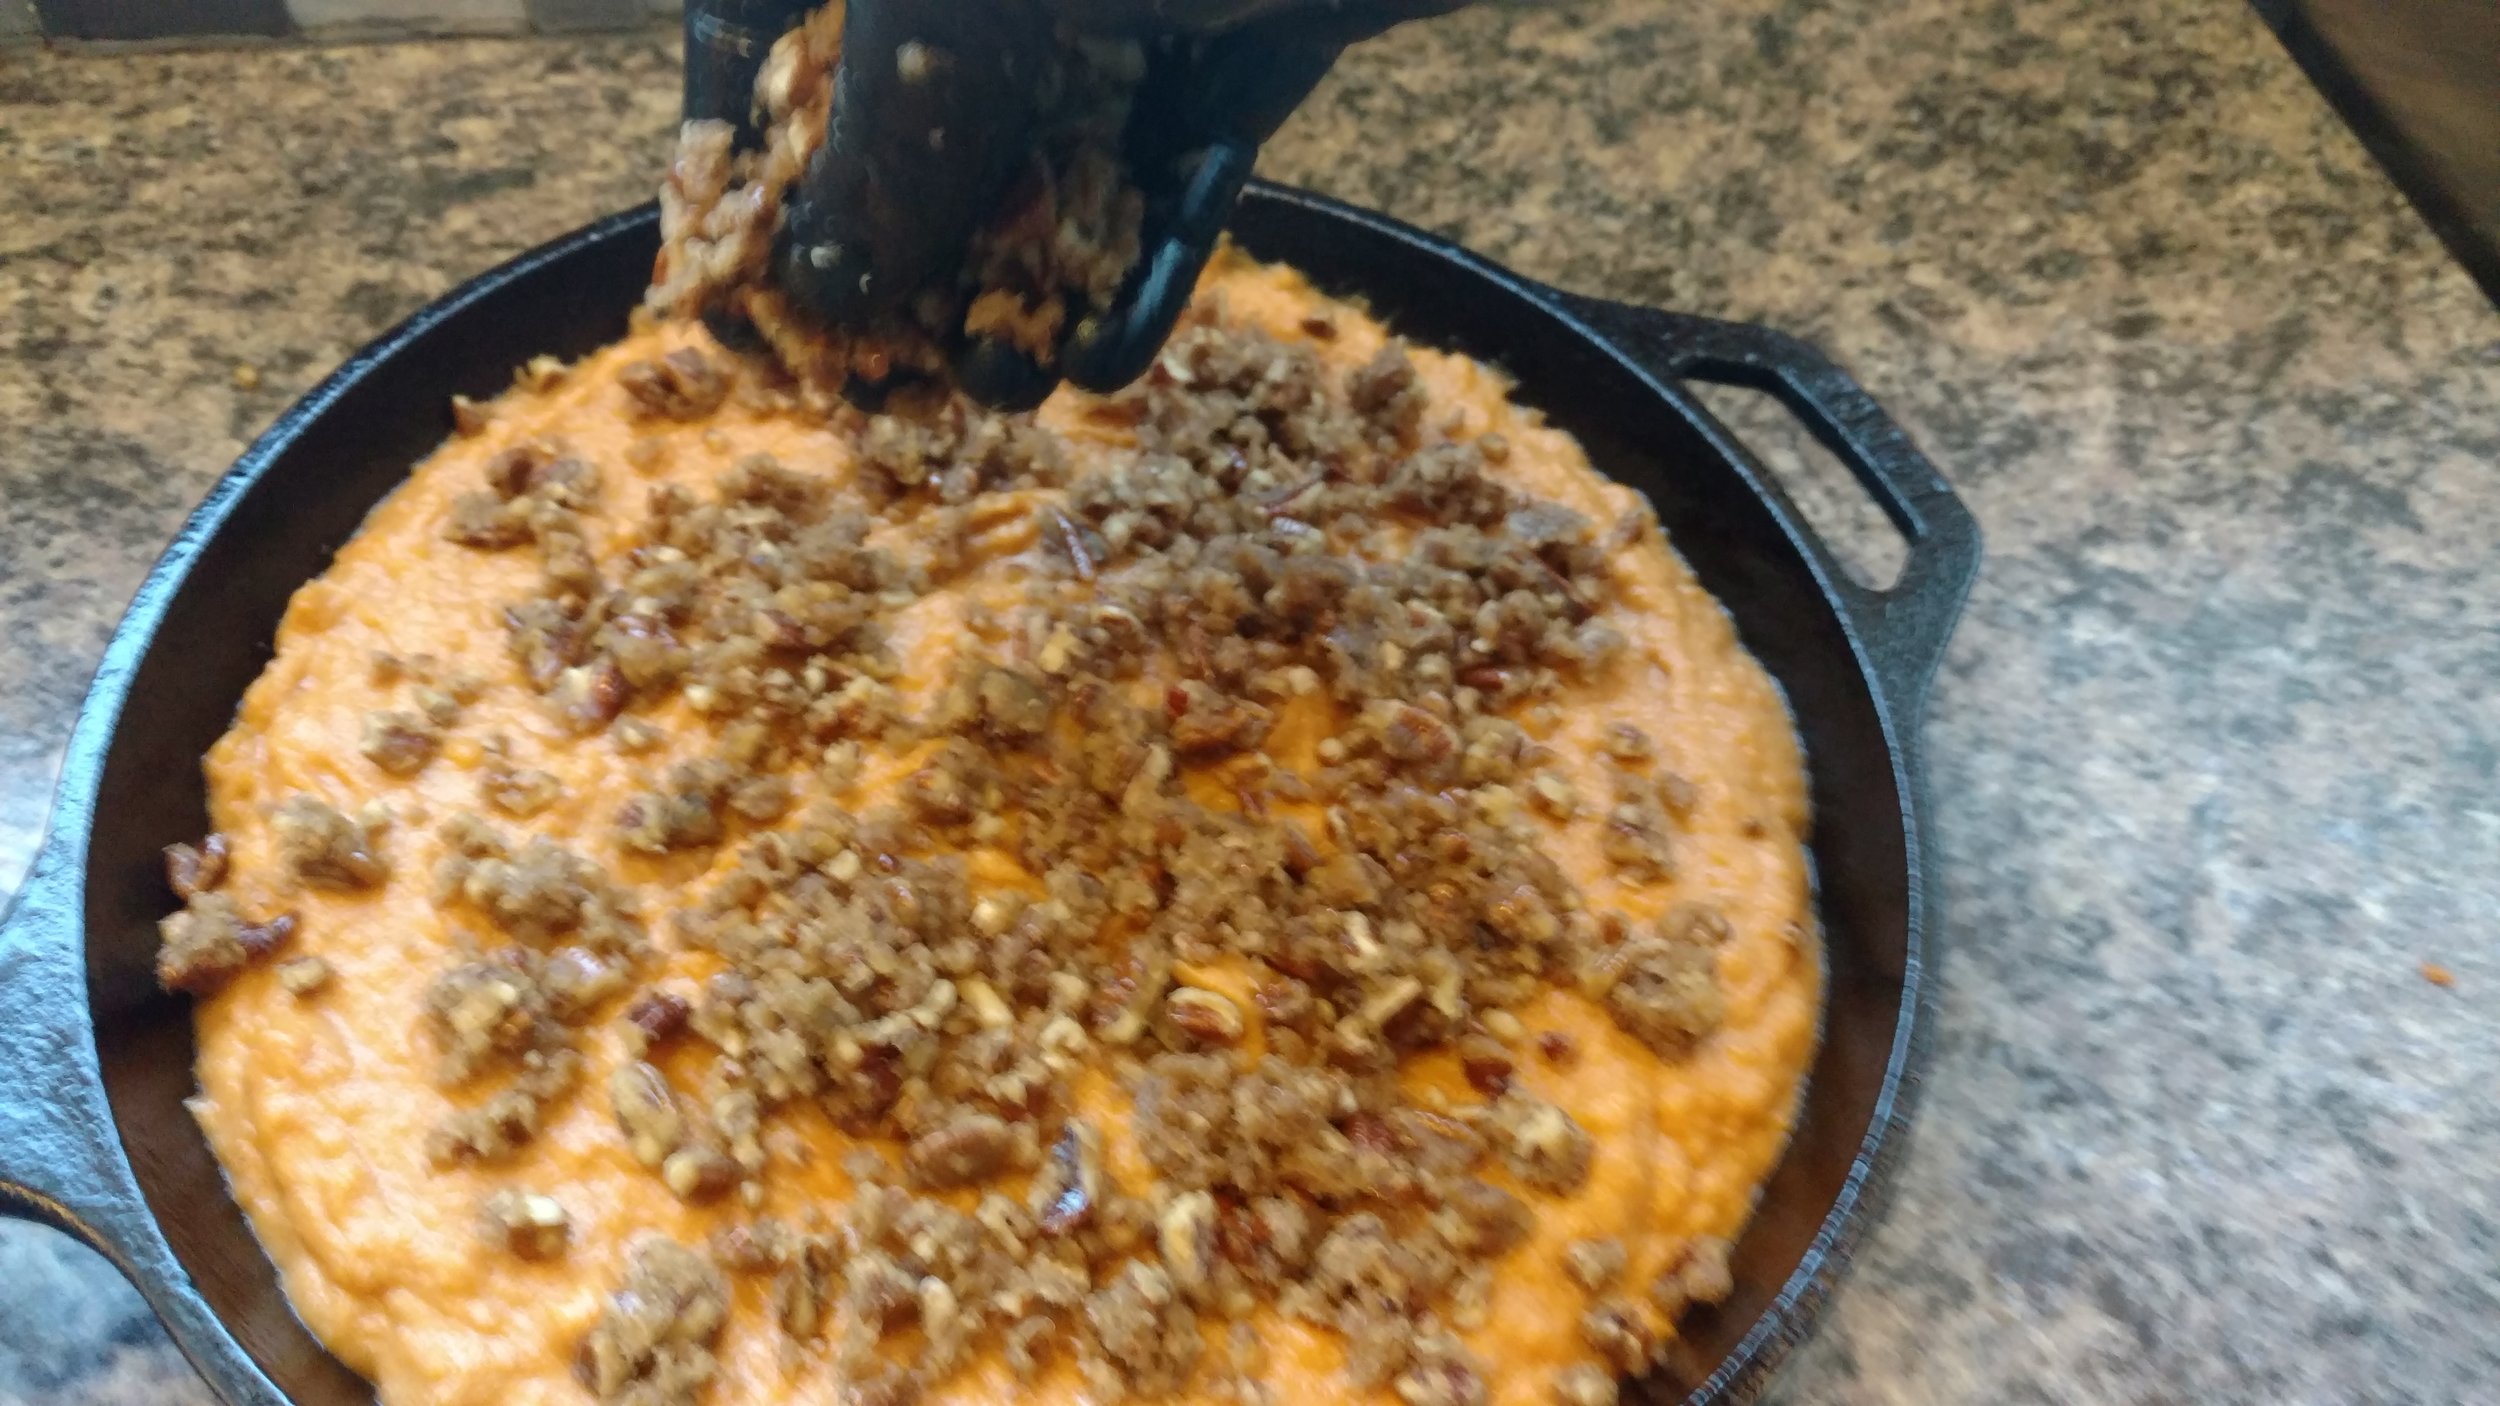
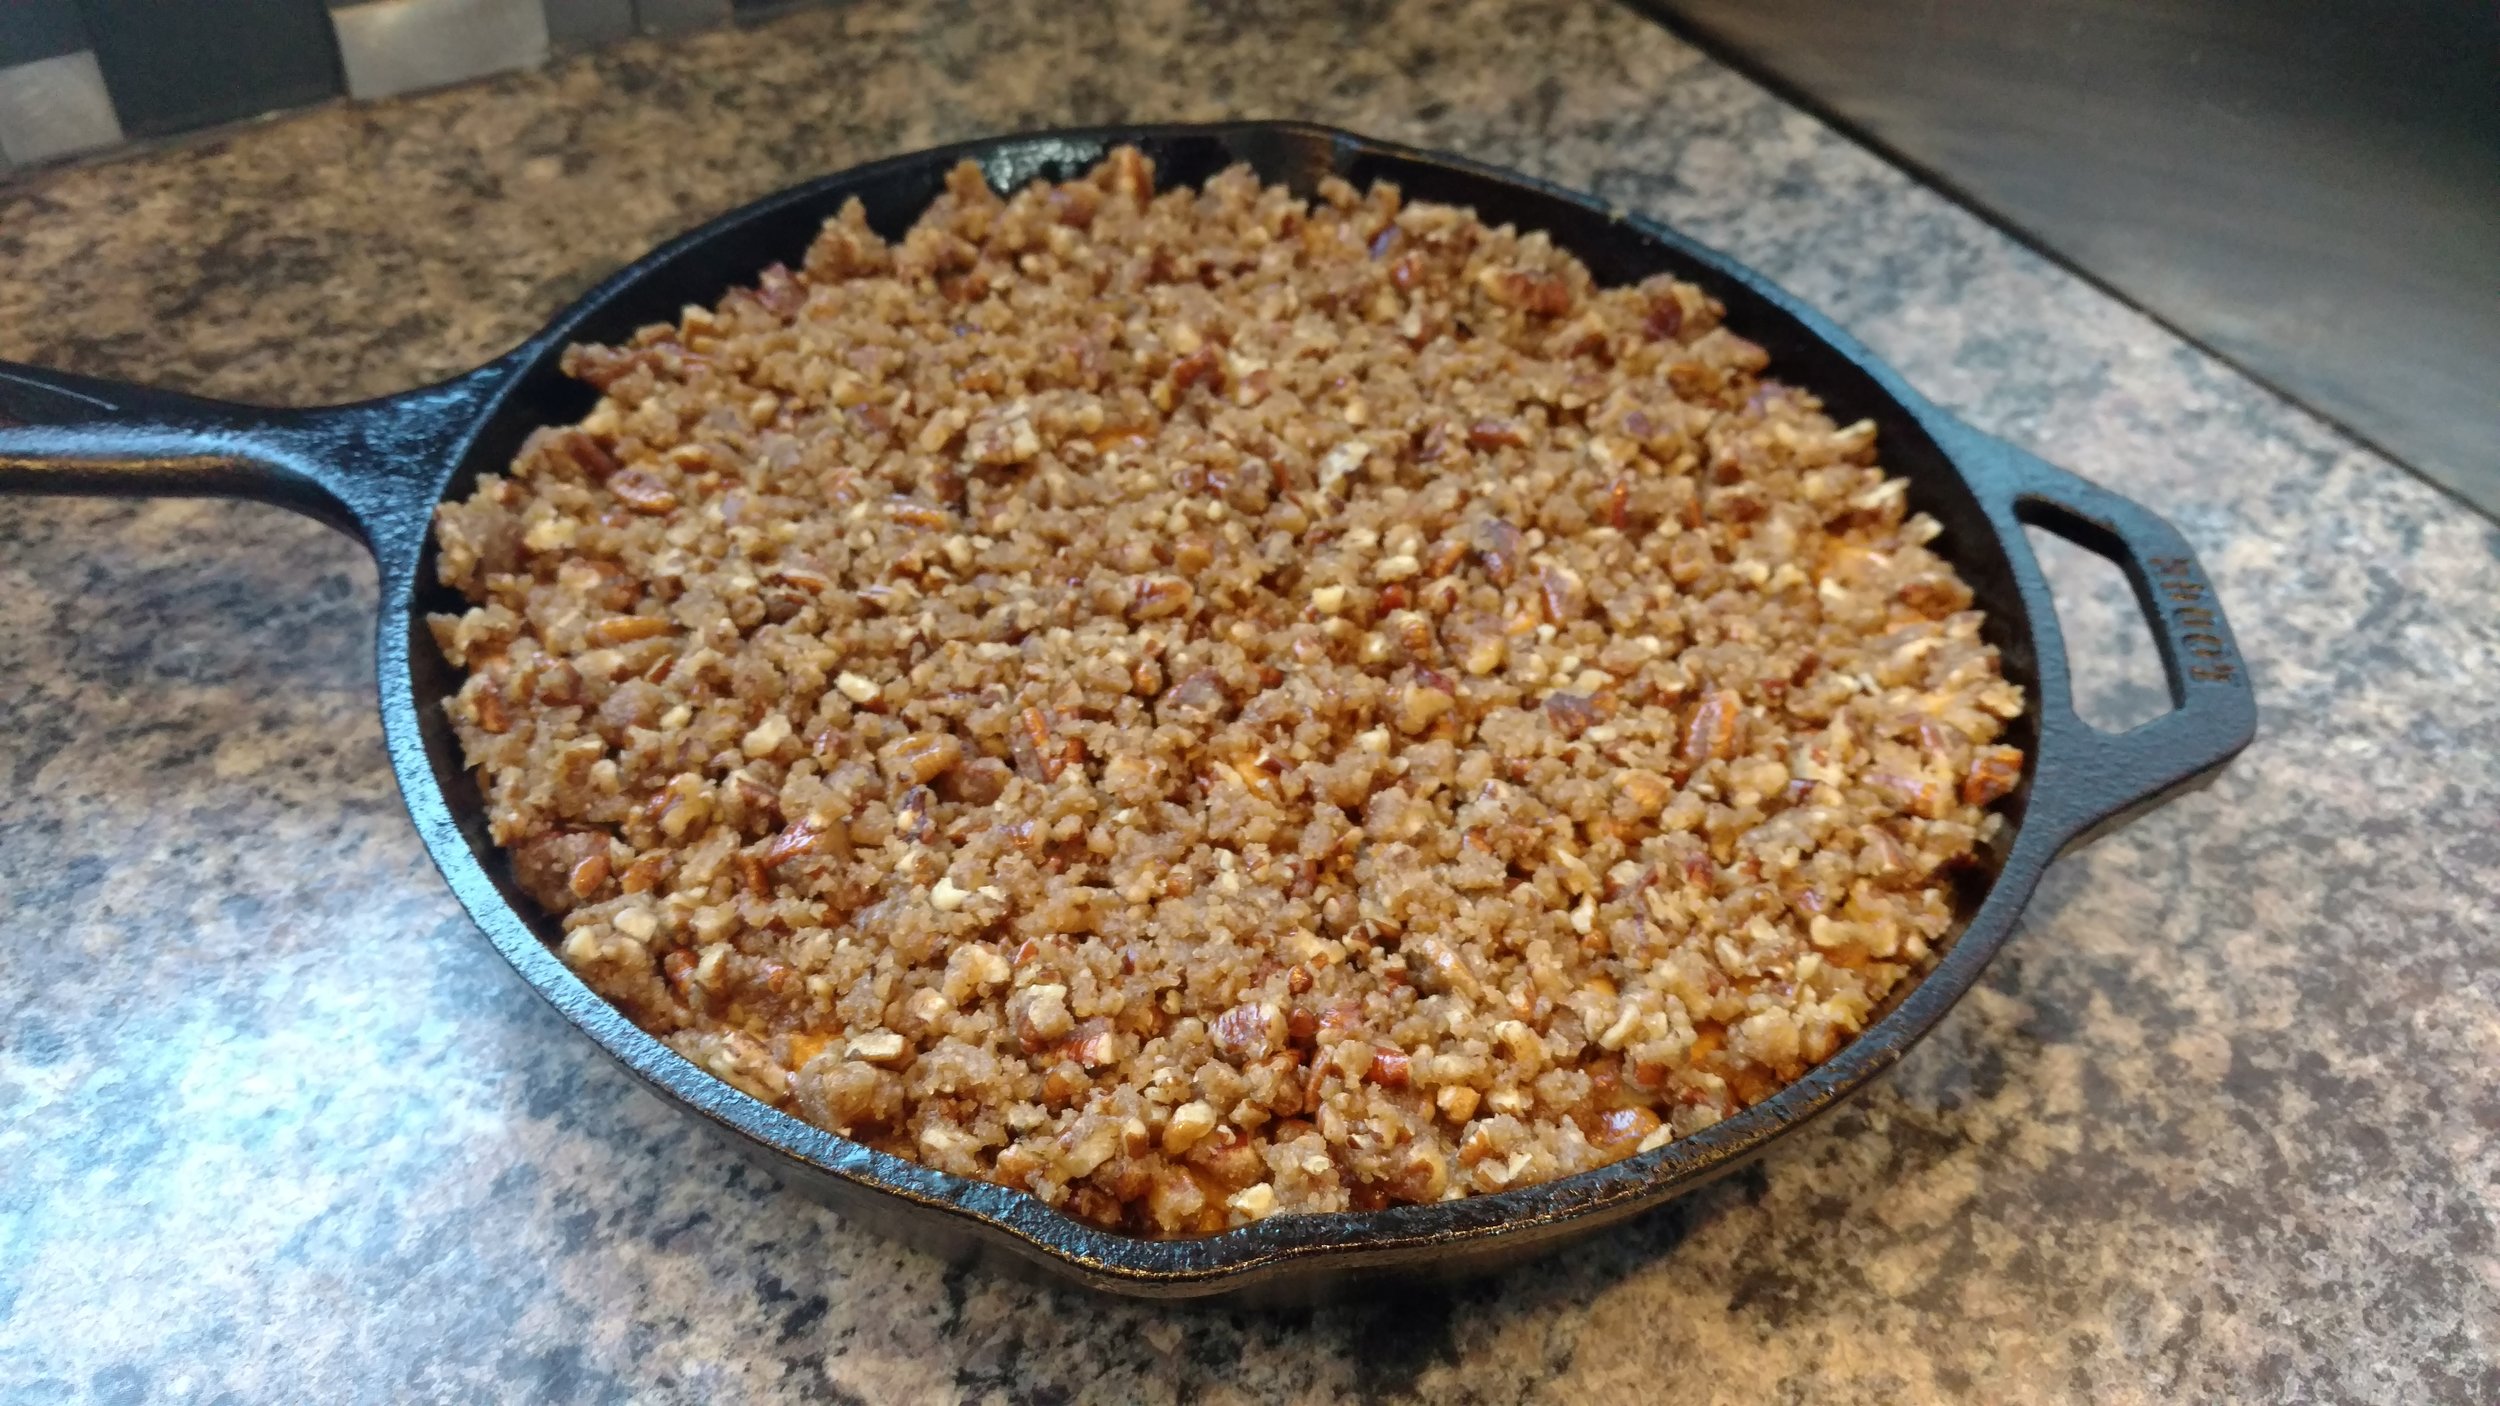
Crushed pecans, more brown sugar, and some butter to hold it together. It was simple but perfect. I poured the sweet potatoes into my Lodge cast iron skillet, topped with the Pecans and it was time to set up the kettle for round 2.

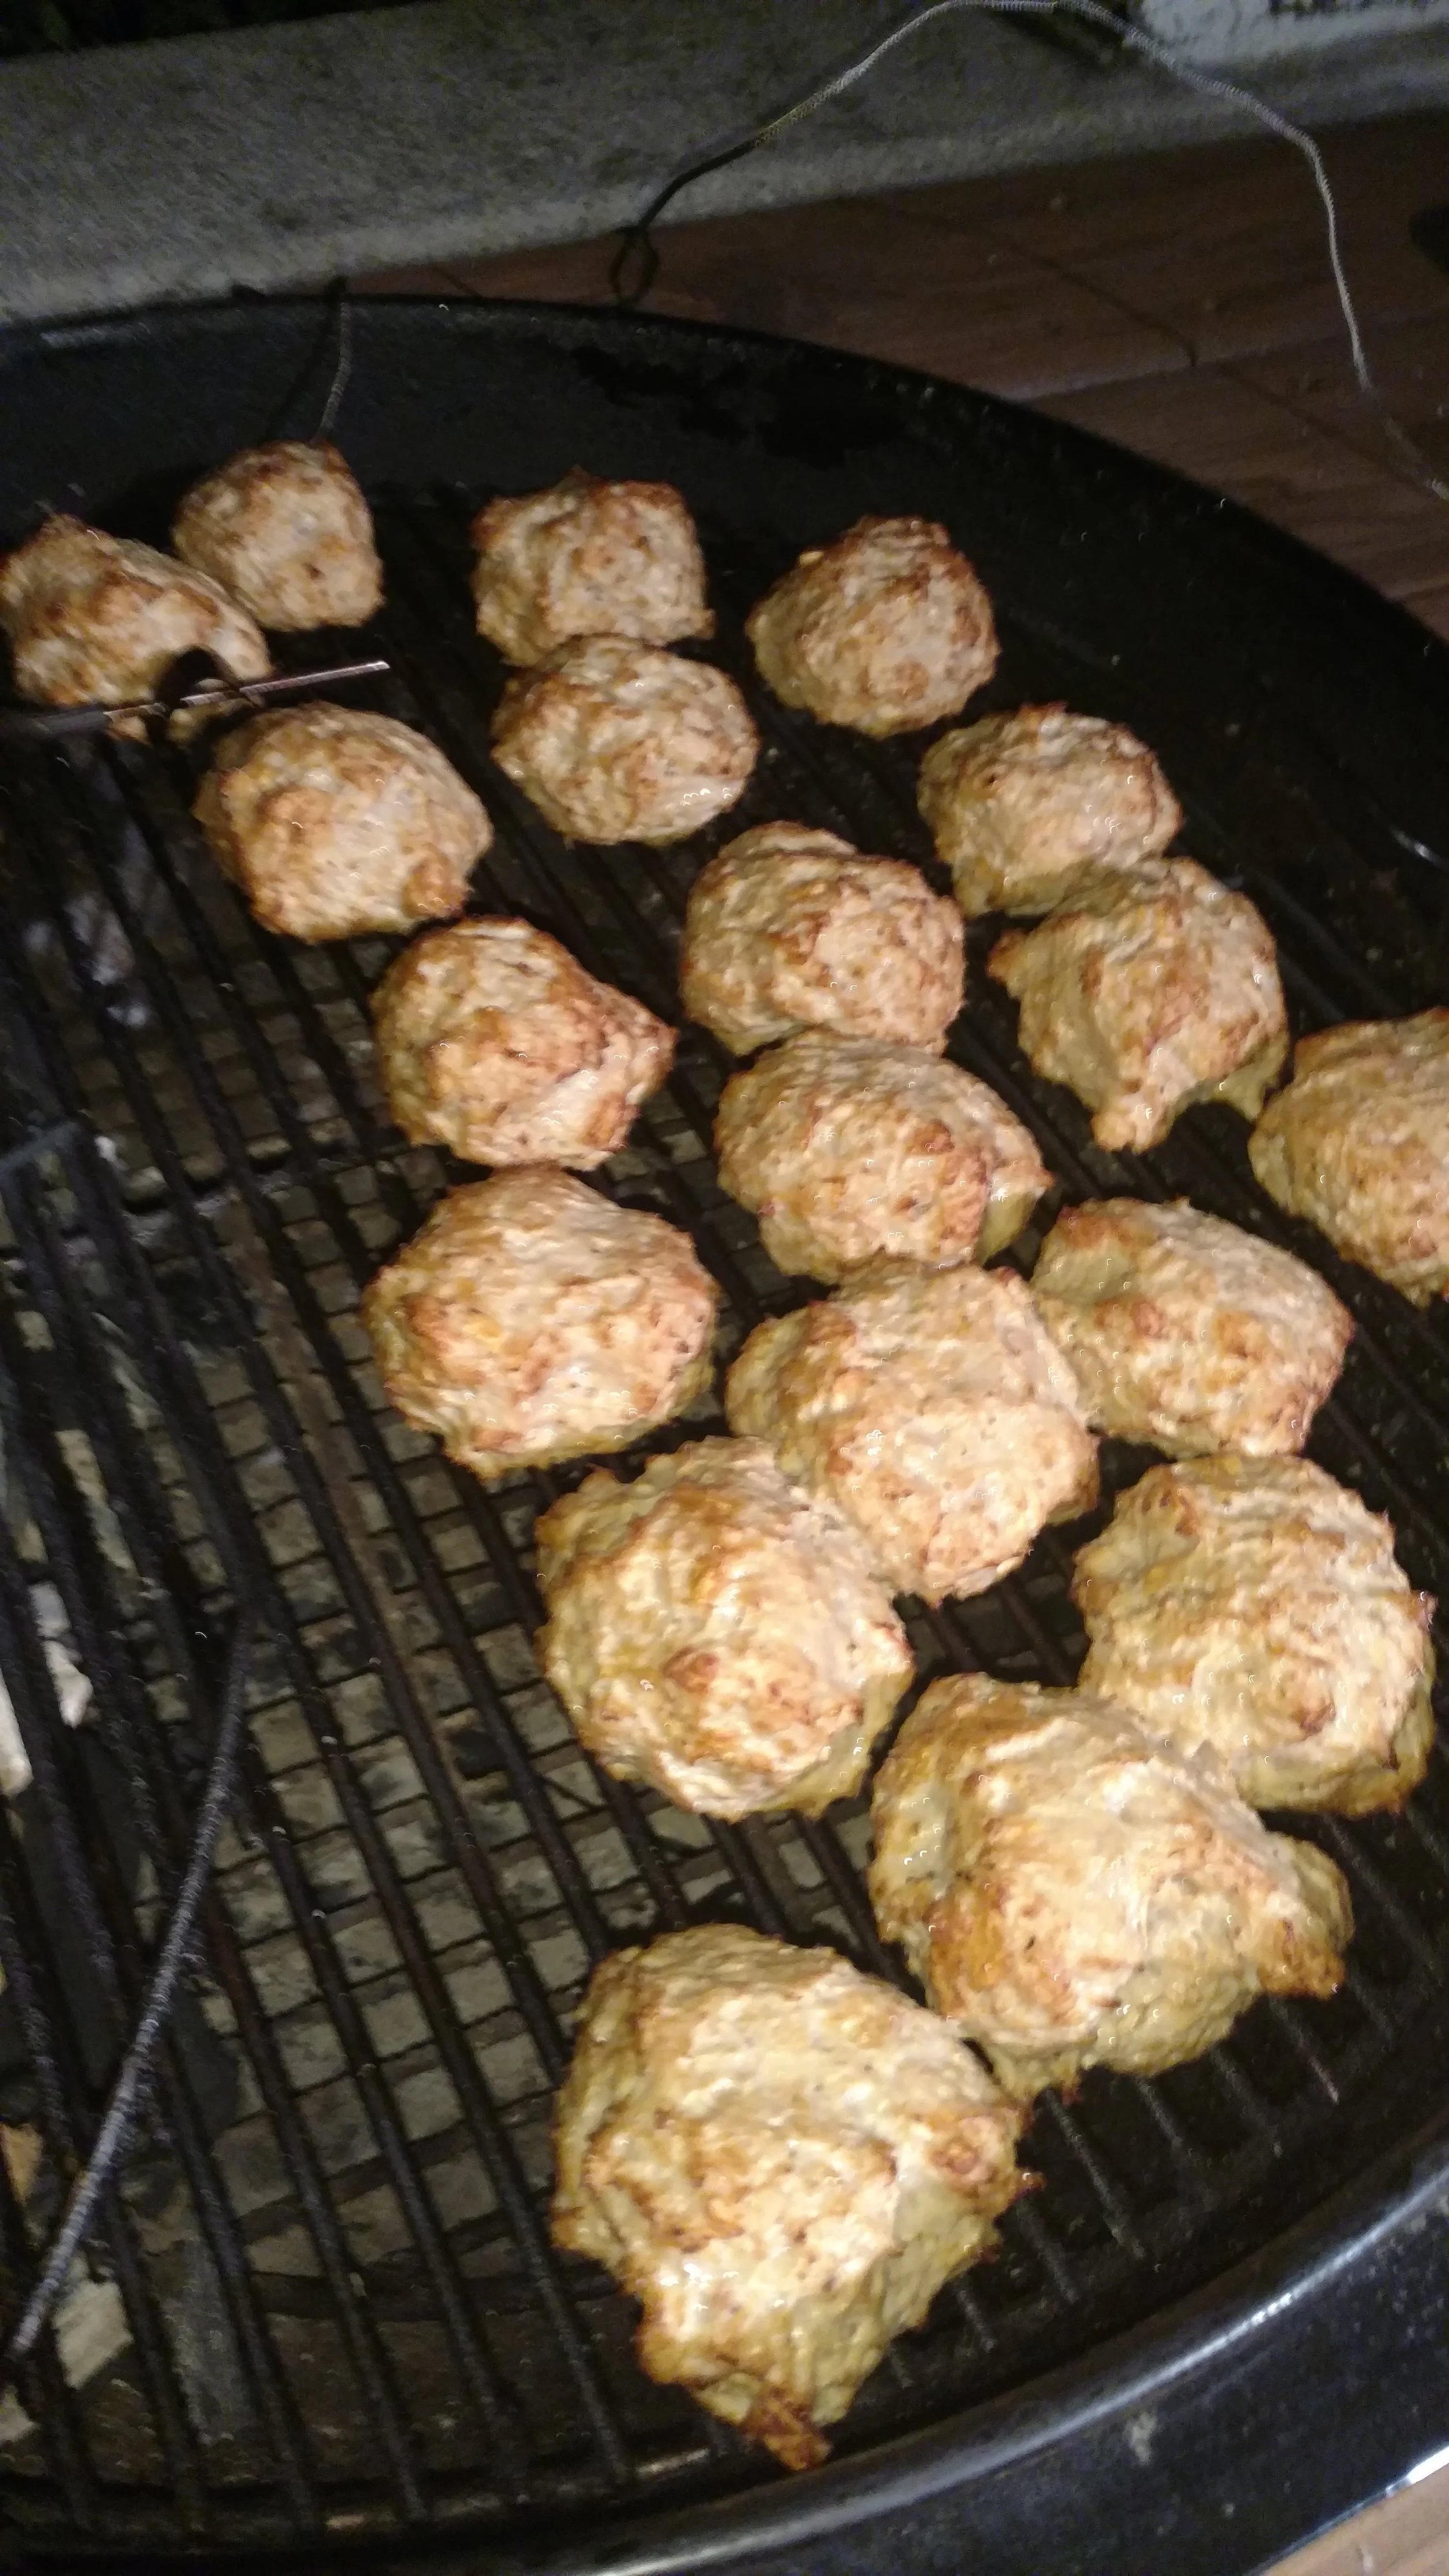
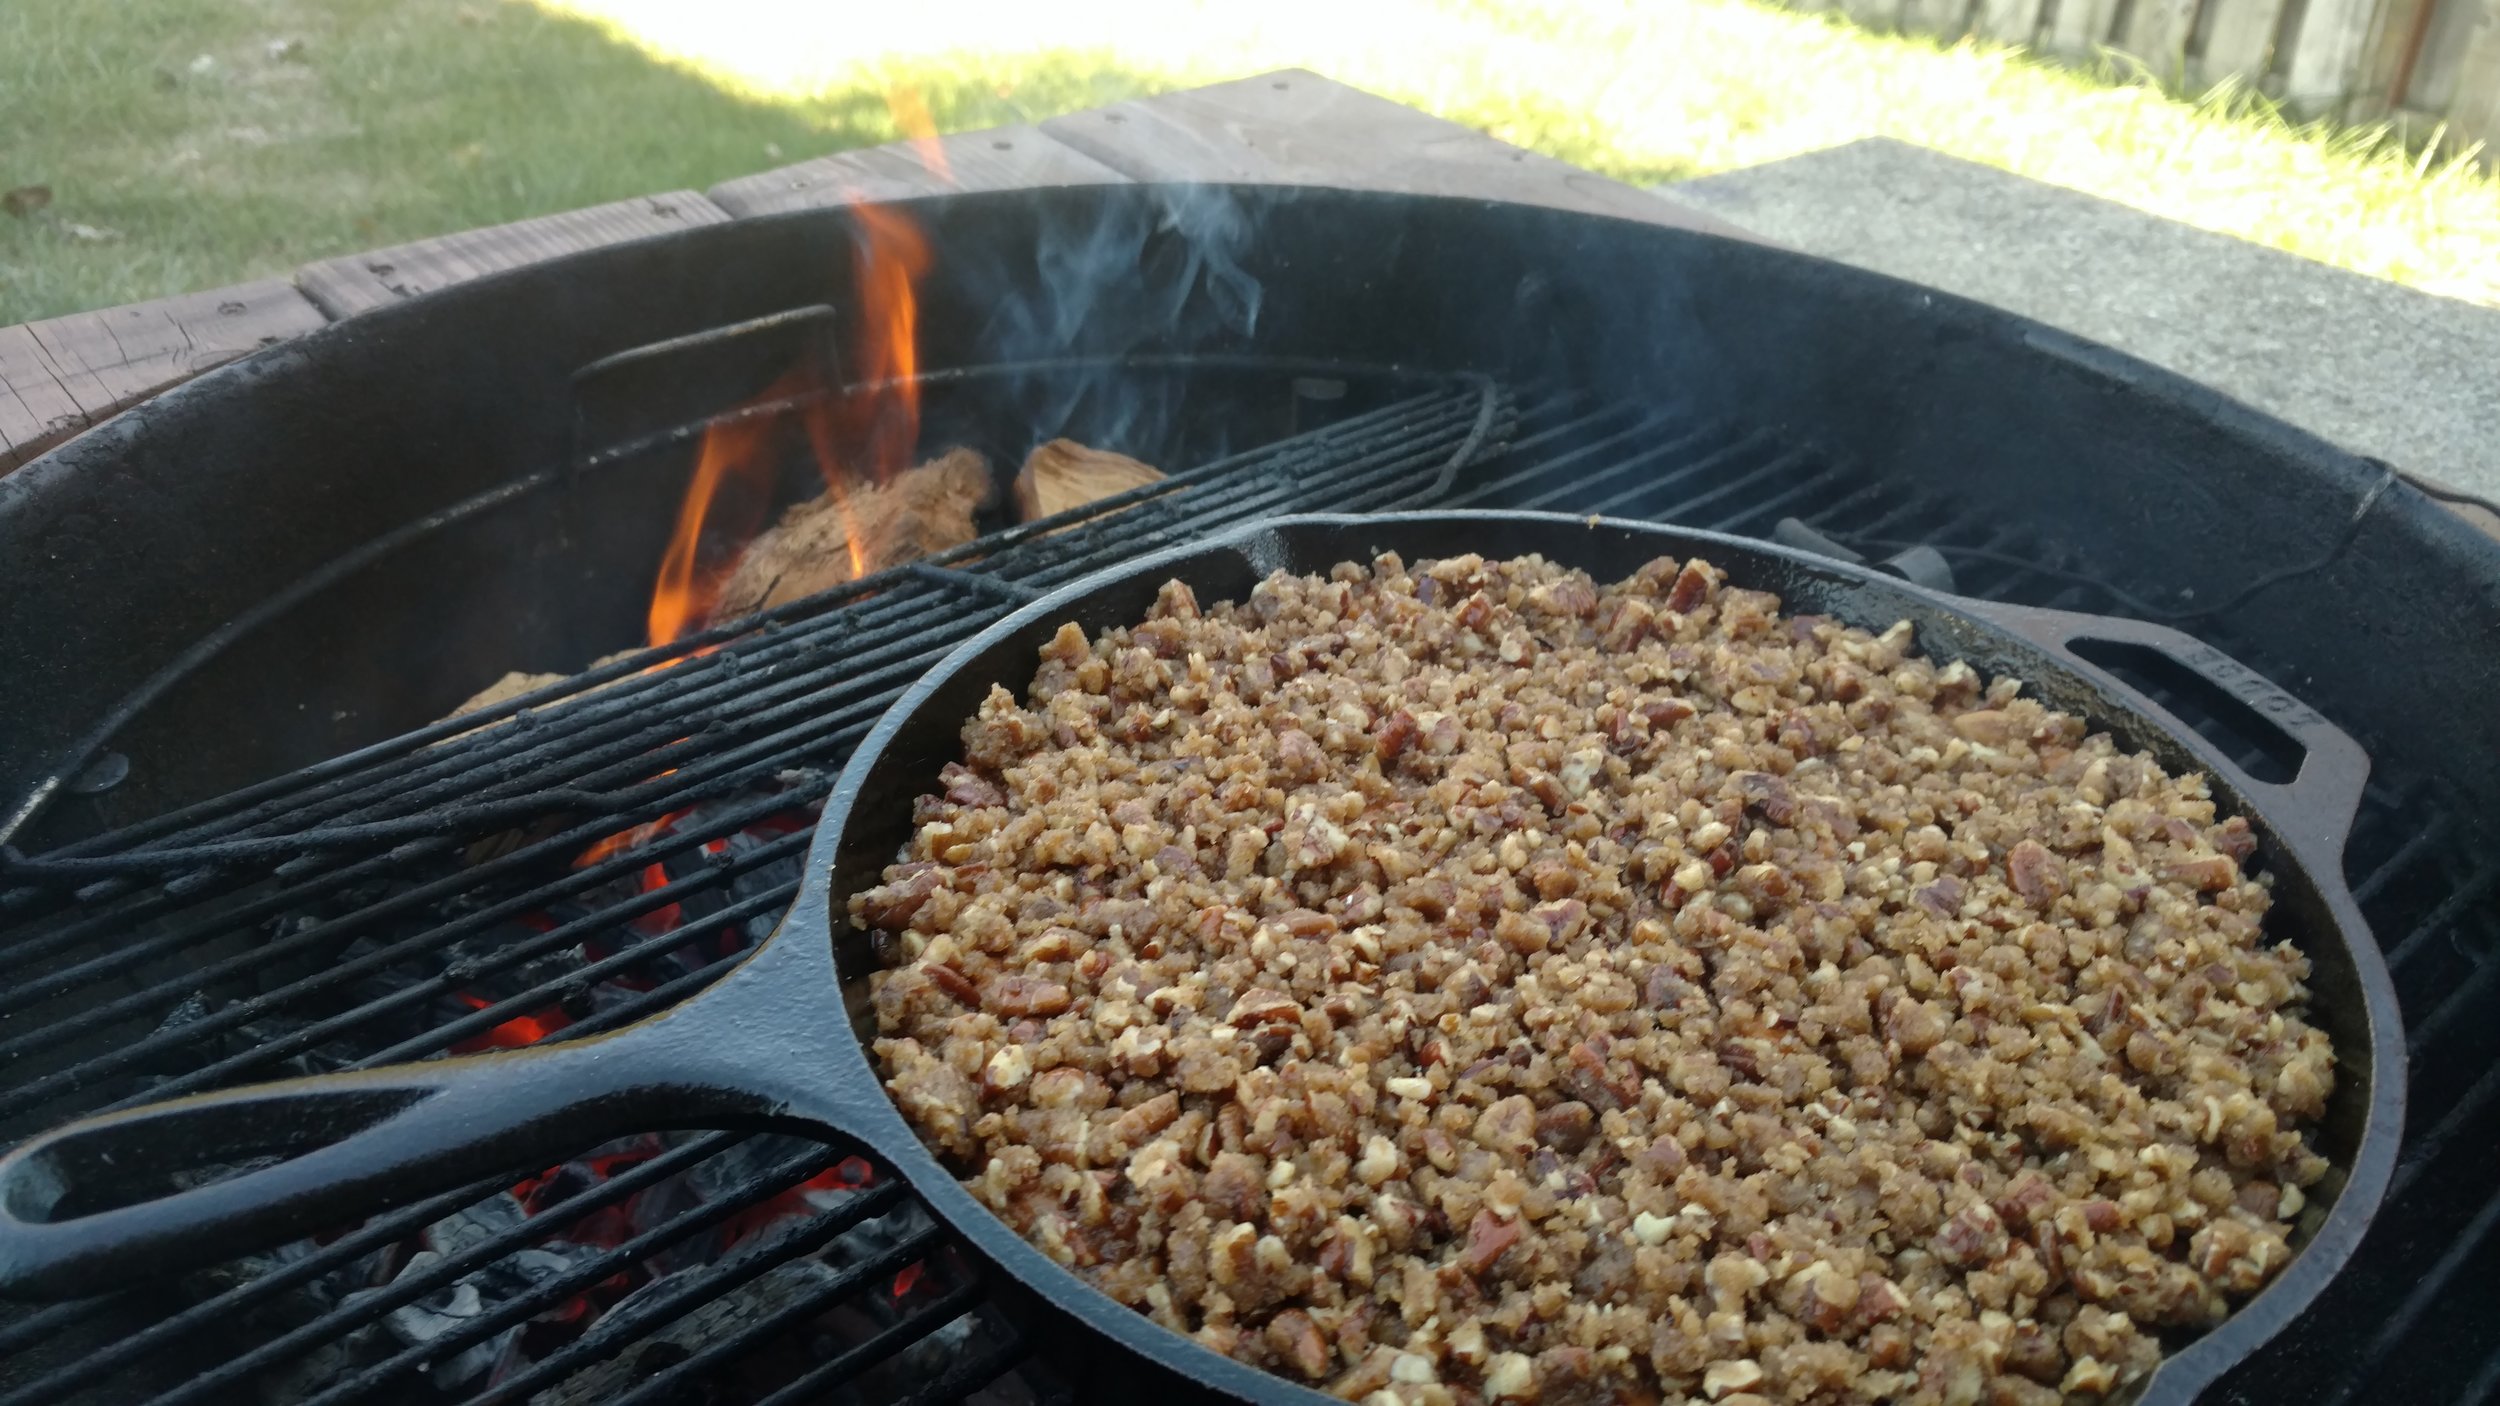
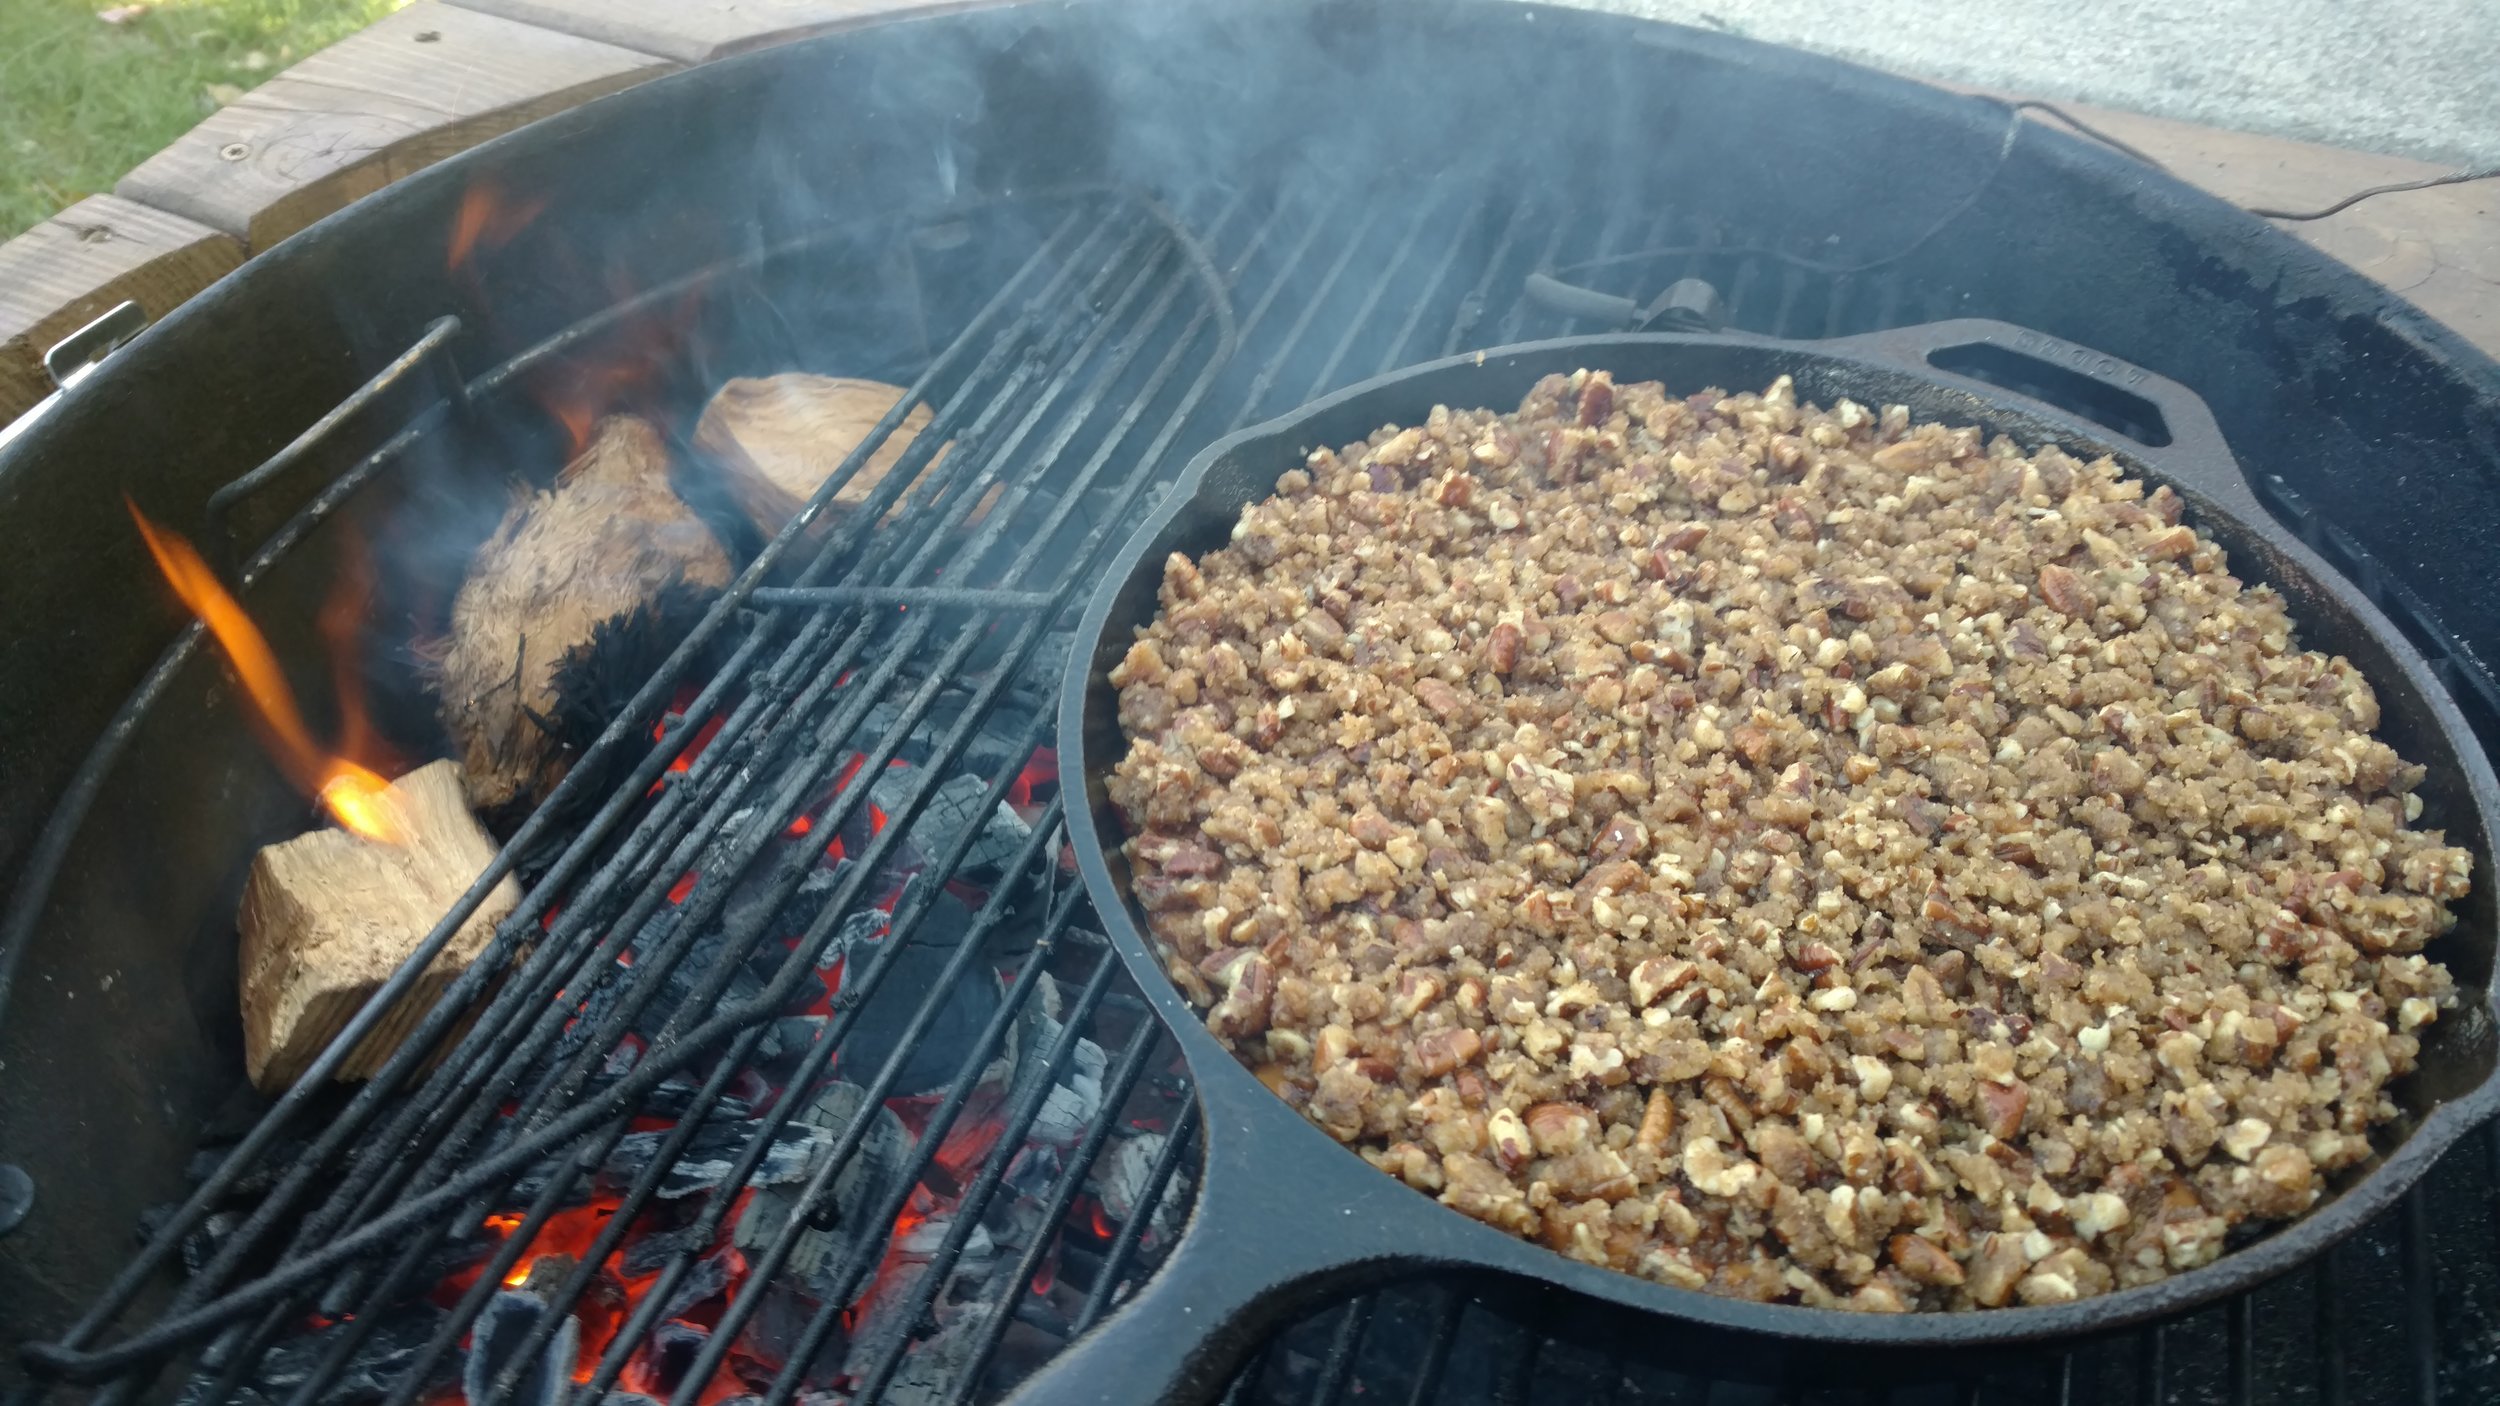
For this round I lowered the heat a bit, down to about 300-350. I again added a couple chunks of pecan wood before putting my skillet on the grill. Once the smoke started going, I let the skillet hit the grill and cook there for another hour until the pecan topping started to brown nicely. When that happened, it was game time.

Now to be fair, in my wife's variant of this, there is less time involved and less work. Ultimately, it is really the type of thing you don't mess with. I mean Everyone loves it as it is, and it is easy. So yeah, I essentially took something that everyone liked and decided to change it...because I know how much everyone loves change at a traditional family party. If that wasn't enough, I am going to make it require far more effort form me to prepare. Admittedly this was probably not the brightest idea I ever had. 

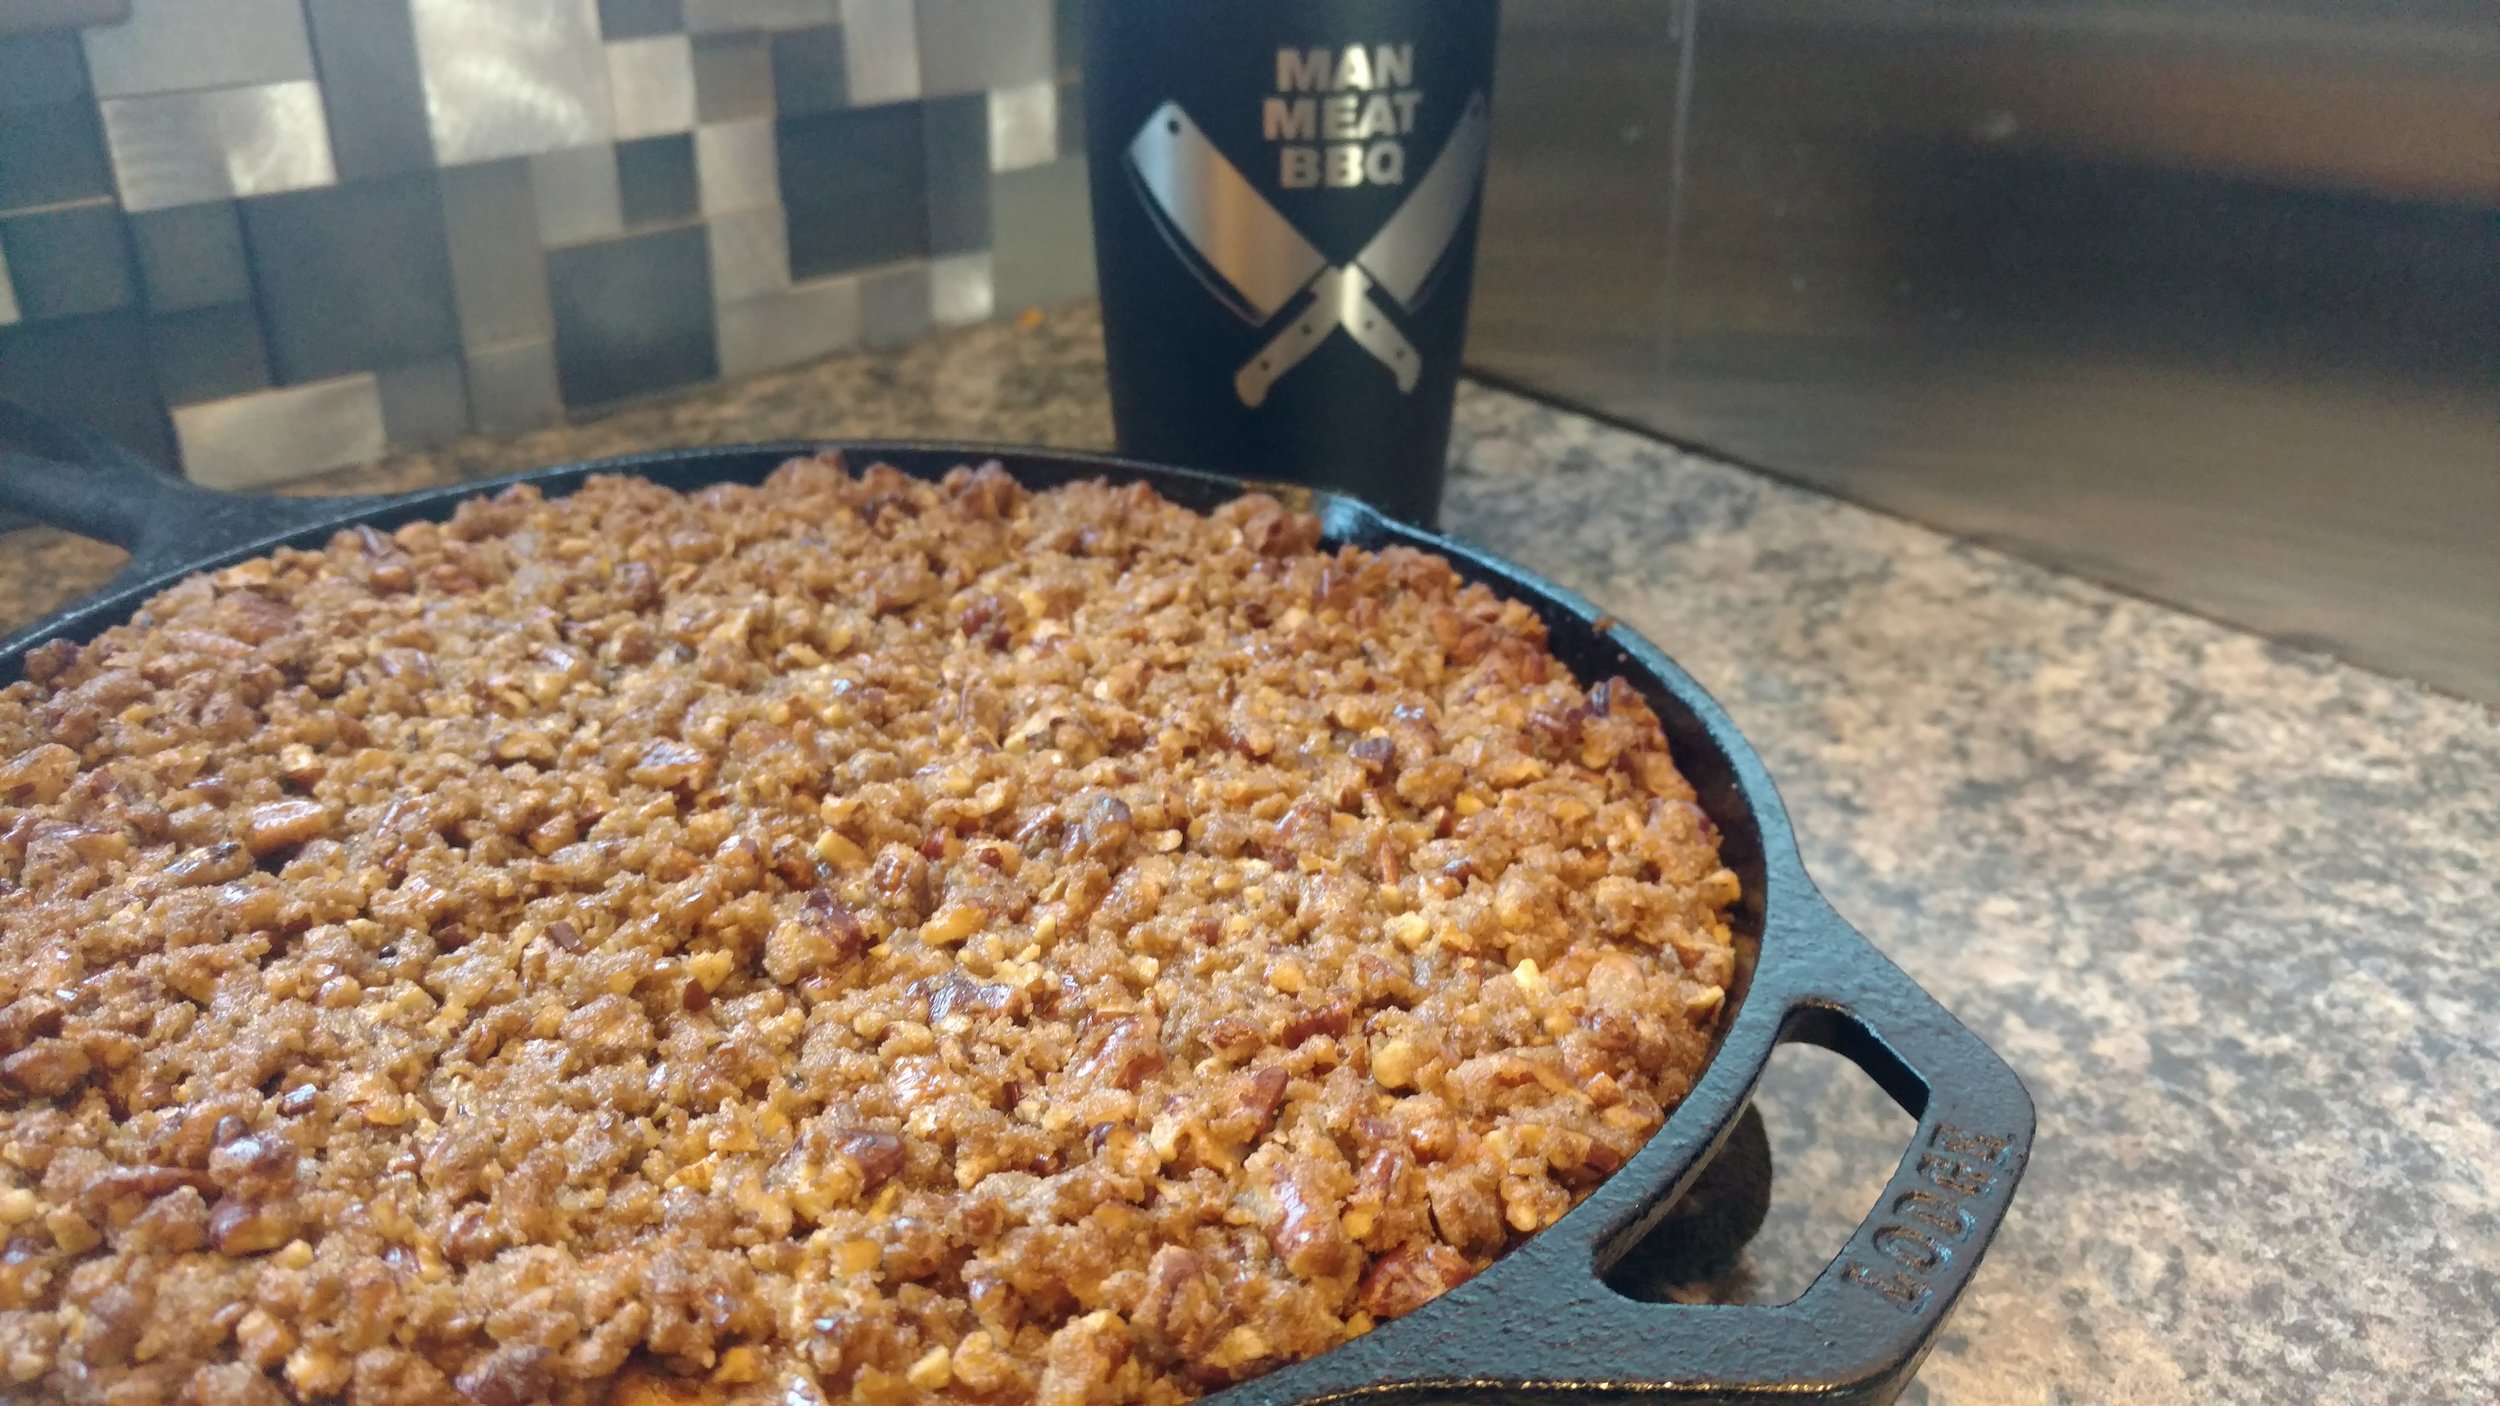
Well, that is what I thought until I got to the party. As I unwrapped the foil on my skillet, the smell of my cooker spread through the kitchen. At the very least this oven turkey now had a smoked scent to it. The first round, my skillet didn't get much attention. It is a side after all and unknown. Then people took a little here and a little there. Then after having a little, everyone was going back for more. 

Sometimes, it seems, tradition is worth breaking. That is if you are breaking it to add BBQ and do things a little better.

Thanksgiving may be just behind us, but the Christmas season is here. Come by the Man Meat BBQ Facebook Group and share your holiday cooks!

https://www.facebook.com/groups/1960615054162384

Until next post, remember kids.....CHUNKS not chips!

Great Balls of Fire!

Between building a table for my kettle and testing a quantifiable shit-ton of thermometers it has been a while since I have shared my experience with cooking. Have no fear despite all that activity, the cooks have continued. I continue to wow the family with great BBQ. So today I want to share one of those stories with you.

Now keep in mind, I come to BBQ differently then, at least I think, most do. For most I tend to believe that BBQ is a craft they were raised with, for others, they come to BBQ because they have an undying love with the end result and therefore learn to cook to satisfy this need. But, as I said, I'm a little different. 

My journey with meat as a whole has not been one of obsession or even love. A few years ago, I didn't eat much out of the realm of burgers. Things like steak, pulled pork, or anything considered a roast of any kind were simply not a part of my diet. They were a bit unknown. In this past year, yes there has been a lot of learning the art of BBQ, but for me, I have learned just as much about the actual meat I enjoy.

About half of the cooks I have done have been dishes which not only I have never cooked, but I have never even eaten. My only point in bringing this up is to convey the fact that much of the BBQ world is uncharted territory for me. With that, when I am left to my own devices, I have a pretty small window of cooks to do. 

Such was the case this past week. Yes, Mikey assigned me a cook, but I had not procured the needed cut in time. Still wanting to cook I was all ready to smoke some chicken breasts. Something which would stay in the fridge throughout the week and provide a decent quick meal for the kids after practice and such. Then something happened. No, not something....Then Mikey happened.

He simply asked if I had started my cook yet. Upon discovering I hadn't he simply said: "how about chicken meatballs?"

I spent the next 15 minutes doing two things. On one hand, I was trying to wrap my head around how I would do that. The other thing I was doing was crafting an excuse as to why I was going to just do my chicken breasts as planned. I didn't really feel up to jumping into the unknown territory. But, the more I thought about it, the more it sounded feasible and fun. 

The next thing I knew I was breaking out the meat grinder. With a few short directions from Mikey, soon I was grinding a combination of 4 pounds of chicken breasts and a pound of bacon. As I texted a photo of the grind beginning to Mikey, he responded with one of his own. See this was not just a suggestion, he too was grinding his own chicken meatballs and now the was the Battle of the Balls.

So logistically I quickly learned a couple things in this trial by fire. First when ground, chicken is a hell of a lot different than beef. It doesn't stay together the same, it is just looser. Second, I don't think there is a need for a double grind. That second grind almost felt like I was putting chicken slime into the grinder only to try and restore the shape of the ground meat. 

Next, I had my near-fatal flaw of the cook. At some point, I rapidly searched making chicken meatballs to get a feel for how much bread crumbs to mix in. I found something that was based on a pound of meat and it called for one egg. Well, here I had 5 pounds of meat so I needed more egg. Sounded logical. Besides my son loves cracking eggs so I ended up putting 3 into the grind. After adding the 3 eggs, I dumped in what felt like a good amount of breadcrumbs and finally a healthy amount of Lane's Sweet Heat rub.

Upon mixing it I realized the flaw. The added liquid of the eggs had created a chicken soup. This was not ground meat this was almost straight up liquid. Of course, it did take Mikey to point that out. Desperate I dumped in the remainder of the breadcrumbs I had on hand. It thickened it a bit, but not enough at all. There was no way these could be formed into balls. It looked like Mikey would win this Battle of the Balls.

Then inspiration hit me. As I looked for some bread to break up and toss in a white plastic wrapper caught my eye. It was a sleave of saltines! I quickly broke them up and tossed them in. The result? Well, it was not as thick as I would have liked, but it was workable. 

I realized I couldn't really see the seasoning I put in, so I added another healthy dump of the Sweet Heat. Now came the task of forming meatballs. It was still too soupy to make nice small meatballs, so I went Italian style and was able to make a bunch of big meatballs. They were soft and sticky, but it seemed like they were holding together.

You see I don't like to waste meat. Secondly, I don't like to fail in the competition so the combination of it all meant I was gonna fight like hell to cook something that looked like a meatball. Even if Mikey beat me, I would have something. 

Meanwhile, maybe as a backup plan, I also took a bunch of chicken breasts and seasoned them with Historic BBQ Black rub. If all else failed, I would still have the intended chicken in the fridge at the end. I mean hell, by this point even my typically very supportive wife had lost hope of seeing an edible meatball.

I set up my cooked and gently set the meatballs on the grate. Soon they started looking like real meatballs. By the time they were done, they actually looked fantastic. I get them all off the grill and added some more charcoal and cherry wood to begin the chicken breast cook.

Honestly, I think I was scared to try a meatball. They rested and sat there as I tended to the chicken breasts. Finally, after a long while, I decided to give one a try. Okay, as I stated before I am not a huge fan of chicken. It is a great meal, don't get me wrong, but it is not something I long for by any means. But this meatball, it was absolutely incredible. 

I married into an Italian family. With that, there are certain meals you just don't even try to stand up against as you will always lose. The meatball is one of them. But not only can my meatball hang with my Mother-In-Laws, I think it beats it...and it is made from chicken!

To me, these were simply the best meatballs I have ever had. And here is the fun part. See, I never looked to make a chicken meatball. Even if I were to get creative I wouldn't have ever stopped to say 'Hey I could make a meatball out of chicken, I'll try that out.' See this came from Mikey. And while yes I am fortunate to have my Mikey, we all need a little BBQ friend to give inspiration, ideas, and maybe even a little competition. Every one of you out there has, without a doubt, been cooking something I haven't. Maybe I have even cooked something you haven't. Instead of just doing our own things, I think we can all accomplish some pretty awesome cooks with that shared inspiration and comradery.

Even the MMB Facebook group as an example. It is a great way to share stories, ideas, and cooks. I know you all cook some incredible meals. I do not in anyway want to take anything away from that, but with a little help we can share that, and inspire others with it. Maybe a chicken meatball isn't the cook you would ever dream of. It certainly wasn't for me. But in the end, had I not done it I would be the real loser as this meal was simply awesome!

If you haven't joined in the conversation jump on in and get inspired. Or at the very least inspire your BBQ brothers.

https://www.facebook.com/groups/1960615054162384

As for the Battle of the Balls, Mikey is an amazing cook. That being said, I kinda feel like I passed him at the finish line on this one...but I'll let you be the judge!

20416.jpeg

Mikey's Chicken Meatballs

IMG_20171105_182011014.jpg

My Chicken Meatballs

Until next post, remember kids.....CHUNKS not chips!

Got the Temp? - MMB Reviews the Best and the Worst BBQ Thermometers - Part 2

Okay friends, in my last post, I gave you all the raw data behind my thermometer test. If you haven't read that, go get there now and come back when you are done!

http://www.manmeatbbq.com/mmb-blog/2017/10/13/its-gettin-hot-in-here-mmb-reviews-the-best-and-the-worst-bbq-thermometers

Now I get to add my perspective and choose my picks. First off, I wanted to mention a couple things related to all of the thermometers. 

Your weakest link is your probes. Here is the deal. With every thermometer I have seen, if you look at the reviews there are tons of bad reviews because a probe failed. Let's face it, probes do fail and they will continue to. However, most of the time this is a human error. Despite the sealed plastic container of the thermometer designed to withstand a hurricane, the probes are not in anyway waterproof. Don't go soaking them in water after a cook to make them shiny again. They might shine, but chances are they won't work. So do yourself a favor and handle the probes appropriately. On a side note, in talking with The Clever Life Company, they are currently sourcing waterproof probes for a model to be released soon. That is kinda a game-changer there and I am anxious to see it.

While we are on the topic of probes... Yes, there are differences in probes and you need to do your due diligence. Can a probe withstand 500 degrees or not? Do you need an ambient probe or not?  Etc. The answers vary for each model. Now the iGrill is one thermometer that while a meat probe will work marginally for ambient temp, they have a specific ambient probe designed just for this. That is not the case for every model. On many models, the meat can be used equally for internal temp, or ambient.

Long story short, if you are going to be reliant on a thermometer, do yourself a favor and get a backup probe or two. They are cheap and they will save a cook if things go south cause you put a probe in the dishwasher. 

Enough about that though. As we saw last week no thermometer failed so how do I pick? For me, this comes to a couple different categories. 

First, how many probes? I most commonly cook with 2 probes. However, when I need 4, I simply need them and don't really want to use 2 thermometers. That is me. For many though, 2 probes will do everything you need it to.

Second, connectivity. This is purely a personal choice. If all your cooks are 2 hours then yeah, it probably isn't a big deal. But you might want to take a nap when you have a 12-hour cook. If that is the case, you probably want to consider something that will have the needed range.

Third, everything else... Like I said from the beginning, most of this is personal to how you cook and what is important to you. Maybe you own a pellet cooker :( If you do, you are going to be far less concerned with an ambient temp read then someone who cooks on a kettle. You get the idea. 

In the words of Mikey...Without further ado, now I'll give you my take on them all.... one by one:

iTronics ThermoPro - TP-03 - Digital Instant-Read Thermometer

It is an "Instant Read" and will run you about $10. Here is the thing, save your 10 bucks. Sure it reads temp fine, but it is slow. Given the fact that the speed of it, in reality, is so far from "instant" I just cannot see myself rely on this for anything.  

ThermoWorks Thermapen MK4

If you have any reason to get an instant-read thermometer, there is really no other one to get. Yes, it will run you $100, but you get something you can rely on time and time again. There is a reason this is the thermometer you see every pro use, simply put, it works. Additionally, it comes with a factory certified calibration which was done on that actual thermometer. These guys know thermometers and even at the price, this will not disappoint.

The Clever Life Company - Great Digital Meat Thermometer

This is a great thermometer for the price. It is what it is, there is no remote read, it accepts one probe (even though it provides 3) but it works with accuracy and precision as well as every other thermometer on the market. It comes in at a price of about $30 and it gets you an accurate temp. My biggest complaint of it actually was that it included 3 probes while only accepting one. If you buy based on the photo and don't read, it could be a bit misleading. On the flip side with this, I can have 3 probes in my cooker in different pieces of meat and just plug each one in to get the read without opening the cooker. It is basic but it claims to be nothing but and in the end, it delivers. One note, the probes are only rated to 482, so you should at least know that first.

Weber - iGrill 2

The iGrill kinda built the world of app-based thermometers. A lot of people love them, a lot of people don't. But here is the deal. The design makes them the apple of meat thermometers, it looks great, it is thought out, and it works. Even down to the simple elements like the brightness of the display. Of all the thermometers I tested, this is the only one I could read from 5 feet away. Test for test this one does exactly what you need it to and it does it with ease and style. Even the little plastic pieces to wrap your probes into are well thought out. At $100 it is definitely a keeper. The only negative I have on this is BlueTooth. I would love to be able to get the temps at a longer range. But if you can live with the short range, this is your best bet.

Bottom line is, every complaint I have heard about the iGrill comes to 2 things: the range or probe failure. Yup, it's BlueTooth, you know that going in so don't expect to get a beer at you're neighbors house without it dropping. Probe failure, it's gonna happen on em all. Take those complaints out of the mix and you have a damn good thermometer.

GrillEye - Smart Device

This one I am a bit torn on. I love the fact that it takes up to 6 probes. I love the design in concept and I love the probes (look at them if there is such a thing as a sexy probe, these are it). But it almost acts like a wannabe iGrill. It is still BlueTooth. The design doesn't completely translate to reality as it does in concept. The display is dim and has a ton of glare in the sun. The plastic is cheap looking. If it wasn't for those sexy probes it would kinda be like the discount store iGrill. But it works! If you have a need to possibly use more than 4 probes, I would not hesitate to buy in a heartbeat. If you don't, at $89 I would probably save up another ten bucks and go iGrill. Don't get me wrong, this is a great product and it works and if I tested this alone by itself I would have given it a great review. But in comparison, for the money, there is more out there.

InkBird - IBT-2X

I will be honest, I kinda expected this little guy to fail. I mean seriously, it is BlueTooth, has an app, and 2 probes all for $30. Truth is, this is about the best $30 you can spend. There is nothing fancy here. Directions could be better, design could be better a little. But it works really well. For $30 even as a backup, you really can't go wrong. For someone who is a bit more casual on the BBQ side, this is an absolutely great choice. No, you don't have more probes, no you don't have this really cool looking thing on your cooker, and yes you have the damn probes that self-destruct at 482 degrees. But it does work and it works well. Again, it is $30, C'mon.

iTronics ThermoPro - TP-08 - Digital Wireless Thermometer

iTronics ThermoPro - TP-20 - Digital Wireless Thermometer

These thermometers, in general, are great. They are consistent, they work, and they are not handcuffed by the short range of BlueTooth. They don't necessarily have the polish you would find with something like an iGrill, the readout on the transmitter is really only useful if you are looking directly at it. But from a function side, they both work very well. 

There are subtle differences between the TP-08 and its big brother, the TP-20. Performance-wise the two are really inseparable. While the TP-20 will cost you just over $55, the TP-08 comes in at $45. The big difference between them comes in the temperature probes and the inclusion of preset temp ranges for different cooks. The TP-08 is streamlined without the presets, which honestly, I like better. I know and research my cooks and the temps I want, I'm not going to be reliant on a preset. If you are like me, the absence of the presets on this model makes it much simpler to set up a cook the way you want it. On the downside, the TP-08 includes one ambient probe and one meat probe. While this fits most roles it begged the question since the TP-20 doesn't have an ambient specific probe can the meat probe be used for ambient? To answer this I reached out to ThermoPro. 

Per ThermoPro the meat probe can be used accurately for both internal temps as well as ambient. So on that front alone, I am more apt to buy the TP-20 simply from the versatility factor. 

Personally, I feel this is too little of a difference between models. I would love to see something like the ability to handle 4 probes instead of two on the TP-20. But I am not a product designer so I will stick with using. If I had to choose between the two, honestly I would probably buy the TP-08 and use the money I saved on buying a backup meat probe for it.

Maverick - ET-732 - Wireless Barbecue Thermometer

For RF-based thermometers, this is definitely my choice. Coming in at the same price point as the ThermoPro TP-20 there is definitely a better feel with this one. Yes, they are both consistent, both accurate. Yet the Maverick feels like the one I can accidentally leave outside by my grill, not realize it until 3 rain storms later and have total confidence that it will just work. It is simple, it is small, and it is well designed for life. If you are fine with 2-probes, but you want something that will be loyal cook after cook, Maverick is your choice.

Tappecue - V2.0 4 Probe Wifi BBQ Thermometer

Of all the thermometers I got to use for this test, the Tappecue I was most excited about. Now let me set the stage, this is less of an accessory as it is a tool. If you cook twice a month and just need something to back you up, this isn't your choice. But if you cook and I mean really cook Tappecue has got your back. First, it is wifi, so range? If you have a cell phone with internet access you are in range. Yes, you could theoretically check your cook from halfway around the world. 

But that is only part of the story here. Similar to the app-based BlueTooth models you get charts which track your temp throughout the cook. The BlueTooth app's kill off that data once you start a new cook. Tappecue, you get to save it. Wanna go back through your last 10 cooks and see when your heat is dropping, now you can.

Being a wifi only device you are probably saying: But it needs to connect to my wifi network, so what happens if I am cooking somewhere offsite where there is no wifi network to connect it to? They have you covered. The offline mode actually lets the unit create its own wifi network that you can connect to and check temps with a range similar to the BlueTooth models. 

With the Tappecue, you lose a lot of the polish you see on many models, but what you gain definitely outweighs those losses. I only have two complaints of the Tappecue. First, it is not easy to set-up. I know my way around a firewall or two and I found it confusing. Second, it needs to be plugged in. Yup, no batteries here so if you don't have an outlet near your cooker it could pose a challenge. On the upside, it is powered by a USB, so you can use a power bank like you'd use to charge your phone to keep it going, but it isn't an ideal set-up. Like I said, this is the power tool. Features which make sense for people who BBQ all the time.

Summary

So there you have it. The bottom line is you don't have an excuse to not monitor your temp. Whether you are an occasional griller or a seasoned pitmaster, there is a thermometer for you. 

Oh yeah, we forgot about our old friend the dome thermometer on the kettle. Look at it like it's a hood ornament cause that is all you can rely on it for. Sure there are times when it is spot on accurate. But there are times when it is also useless. If I am cooking, I want tools I can rely on and every thermometer on this list can be relied on to varying degrees. 

This is not all available thermometers by any means, it is a wide range of the types, styles, and brands on the market. Keep this conversation going in the MMB facebook group and share your personal experience.

https://www.facebook.com/groups/1960615054162384

Finally, I want to thank each and every thermometer manufacturer for making this review possible. Now go cook something already!

Until next post, remember kids.....CHUNKS not chips!

It's Gettin' Hot In Here - MMB Reviews the Best and the Worst BBQ Thermometers

When I started this blog and barbecue for the first time, there was one tool which was imperative to my success superseded by only my cooker itself, the thermometer. Yes, BBQ is first and foremost about passion and food, but, the thermometer is indispensable when it comes to cooking things right. Sure, you can all say one needs to cook by feel, but that comes only with time and practice. The thermometer is your safety net. It lets you know when your heat is right, or when it is wrong. It gives you a direct view to what is taking place in the cooker. 

With that being said, there are countless options available when it comes to taking the temperature. The thermometer is an investment which you shouldn't have to make over and over. You should be able to buy the right one for you and forget about worrying. So which thermometer is best? This is the very question I wanted to answer.

In theory, this sounded simple. Take a sampling of thermometers, and subject them to several real-world tests. See which one performs best. While I did this, I found that for the most part, there is no clear victor. To say one was undoubtedly the best would be no different than me saying cooking on a Weber kettle is best. For some, it really is, for others though there are plenty of different cookers which are best for them.

Let's start off with the logistics here. I tested 10 thermometers of different brands and styles. Everything from the instant-read probes, to Bluetooth enabled, to Wifi. Each one I tested for accuracy with both a boil test and an ice water plunge. All leave-in thermometers were tested on a 3-hr. cook with varying temperatures for consistency. Finally, all remote read thermometers were tested for range and lag.

Now, let's introduce the players:

IMG_20171007_145346106.jpg

INSTANT READ

  • iTronics ThermoPro - TP-03 - Digital Instant-Read Thermometer
  • ThermoWorks Thermapen MK4

DIGITAL MEAT THERMOMETERS

  • The Clever Life Company - Great Digital Meat Thermometer

WIRELESS THERMOMETERS

BLUETOOTH

  • Weber - iGrill 2
  • GrillEye - Smart Device
  • InkBird - IBT-2X

RF

  • iTronics ThermoPro - TP-08 - Digital Wireless Thermometer
  • iTronics ThermoPro - TP-20 - Digital Wireless Thermometer
  • Maverick - ET-732 - Wireless Barbecue Thermometer

Wifi

  • Tappecue - V2.0 4 Probe Wifi BBQ Thermometer

Now for the testing. Overall, every thermometer did its job. At the end of the day there were no failures and if this was simply a task of ensuring that each would indeed take a respectively accurate temperature, they all passed. But there is more to the story. So let's talk about accuracy for a minute.

For accuracy, I am leaning specifically on the boil test and the ice plunge. These are simple tests where we know exactly what the result should be. For the boil, the temp will be 212 no matter what the thermometer says and for the ice plunge, it will be 32. I tested this using 2 metrics, first accuracy of temperature, second the time it took to get to temp. 

For the instant reads, this was interesting. Here, I had a $100 gold standard thermometer relied on by everyone, the Thermopen MK4 and compared it to a $10 model by ThermoPro. The results were telling. While both ended with an accurate temperature, the MK4 delivered that temp in 8 seconds, while the ThermoPro took over 30 seconds to get the correct read. Again both take an accurate temp, but 30 seconds for a read is using the term "instant read" very liberally.

For the remote read thermometers, I was far more concerned with accuracy than speed as these are not used in an instant-read method. I did, however, use the one-minute mark as a cut-off. If they can't get temp by that point, I am not going to wait for it.

With this test, there were some variances. All were within a degree or two of accuracy which I vote as a win. The only outlier was the GrillEye, which in the boil took 48 seconds to hit 208. This was still within 5 degrees, and maybe if I waited longer I could have hit 212. Either way, for most backyard grillers it works. Again, these are designed not to take an instant-read but monitor over a long period of time, so there is certainly some leniency when looking at how quickly they react to a massive temp change.

Now let's see how the remote reads do when it comes to providing a consistent and accurate read. For this, I set up my cooker for a 3-hour cook with each thermometer set up on the indirect heat side. I monitored every temp at each 15-minute interval. I also included some temp changes on the cooker to see if they would react consistently. Finally, for a bit of fun, I also took the reading from the dome thermometer built into my Weber.

This test is tricky, to say the least. First off, unlike the boil test, we don't know exactly what the temp is. Secondly, while all of the probes were in close proximity and all on the indirect side of the grill, they are in fact in different positions meaning the temp where the first probe is could, in fact, be different than the temp where the last probe is. So how do we judge it?

Well, we break out our college statistics book. The cliff notes on this test are simply this: we took an average of each temp retrieved at each time interval. Then we calculated the standard deviation. Ultimately the standard deviation acts as a threshold of how far an individual temp should vary from the average. From there we see how many stayed within that deviation and how much varied beyond that threshold.

So let's first look at the temps on the chart. As you can see, while there are variances, every thermometer stayed within range (except for the dome thermometer which I will talk about later). This is good. At the very least if you buy any of these, you are getting something which does the job you expect it to. 

TempOverTime.png

Now let's get to those variances. If you look at the chart below, it will show each thermometer and when it stayed within the acceptable variance, and when it didn't. Furthermore, you can see just how far it dipped out. While this data is certainly compelling, again there is not a black and white pass or fail on this. This is just another piece to the puzzle. 

TempDeviation.png

Now for the last piece, I want to address the range of the remote read thermometers. This is less based on the individual unit, as it is the technology it uses. So rather than call out any particular model I will just address the technology. 

Let's start with Bluetooth. It is cool, it is trendy and it seamlessly integrates with your phone. Every Bluetooth model I tested responded very alike. Next, to your cooker, it is a beautiful thing. Hanging out in your backyard, it is great. Now put a wall between your cooker and you and we start falling apart. Personally, I love the Bluetooth, but for me the signal cuts in my kitchen. That is a problem. I don't want to step away from food prep to reconnect and get my temps. Then I might as well walk over to the cooker.

Now we get to the RF models. These have an awesome range. To that point, I was actually able to walk 3 houses down from mine and still get a signal. Even better, I could start a cook, set the temp alerts and go to sleep in my bedroom. The downfall of these models is they require a receiver unit. So rather than just carrying my phone, I also need to carry the receiver.

Finally, we have WiFi. Now, this is really the best of both worlds plus. You connect it to your WiFi network. You go back to using an app on your phone to monitor. But being that you are using your phone, as long as you have a connection to the internet in any way, you can get your temps. You can pick up an ingredient from the store you forgot, and check your temps. It just simply works.

Okay now let's try to pull all of this information together. Again, nothing outright failed. So I cannot just say this one thermometer is the one YOU need to buy. It really comes down to what do YOU expect from a thermometer, beyond a temperature reading. So let me help you figure that out by giving you the questions you should be asking yourself....

How many probes do I need? 
Do I need ambient cooker temp or just meat temp?
Do you cook by feel and just need something to give an accurate read to back you up?
Do you want to monitor temps remotely, or are you fine with walking up to the cooker?

There are a hundred more questions you could ask and they are all about how you cook. 

One last thing you need to consider in making a purchase like this is the features. Beyond taking temp and range, not every thermometer is created equal. Read the fine print. For example, some thermometer probes are only good to 487 degrees. Sure you are not smoking meat at that temp, but let's be honest...you can screw up and get the temp higher than that. Another feature is temperature presets. A lot of thermometers give you temp ranges for all sorts of cooks preset. These are great but can also be a hindrance if you just know what temps you want regardless of the presets. Finally, what type of alerts do you want? If you are using this only to take the temperature of your meat you only need an alert for temp hitting your range. However, if you plan on using it for monitoring cooker temp, you might want something that alerts you when the temp rises to your threshold or falls below a separate threshold.  For these elements, you have to read the fine print.

Well friends, there you have the hard data for this review. That itself is some great information. But, while I am going to leave you with that now, it is certainly not the end of this review. I know, I know...everyone hates a cliffhanger. But do not worry because in the next installment of the blog I will take this data, along with my personal experience with each of these thermometers and give you my honest take on them. 

But, while we're gone here, take a minute to share your story. What thermometer have you used? What have you looked at and why? Man Meat BBQ has an awesome new Facebook Group which gives us the perfect spot to share our stories and experiences. Drop by and let me know what you think!

Time for Some Smokin' Tacos

So far in my short BBQ lifetime, I have made some incredible meals. Now, one thing they have all had in common is that they were pretty significant meals which I wouldn't have without BBQ. In a way BBQ for me has been a turn off on the dinner highway. Simply meals that didn't happen otherwise. This week though, that is all changing.

For this cook, I am making tacos. So a year ago, that meant throwing some ground beef in a skillet with some seasoning. The ease of this made it a staple in my household. So I was a little taken back when Mikey assigned me tacos. It sounded kinda like he was taking my simple household meal and making it far too much of a process for a weeknight.

I quickly realized though, what he was actually doing was allowing me to enjoy the art of BBQ and still cook something simple. It was kinda genius really. The meat for these new tacos was set to be slow smoked chuck roast pulled. See this was new too. I have pulled chicken. I have certainly pulled pork, but never beef. 

Like most cooks, I assumed this would be smoke slow at 250 until the beef gets to about 190. And like most cooks, Mikey quickly corrected me. He instructed me to smoke the beef until about 165 internal. At that point put the roast in an aluminum pan along with a sliced pepper, a sliced onion, a bit of butter and a can or two of beer. Different for sure...but I was cooking with beer so I certainly would not complain.

Alright, so I love me some High Life. But considering I was cooking with beer, I switched over to Coors Banquet for that extra class. I picked up a beautiful USDA choice chuck roast. I carefully picked out Southern Links Steak and Brisket Seasoning for my rub. With the roast rubbed and the beautiful white smoke pouring out of my kettle it was time to get this cook going. 

In all honesty, this cook went pretty flawlessly. While the roast was smoking, I cut up my peppers and onions. Soon the internal temp hit 165 and I sealed the roast up in its bath of Banquet and started working on everything else that goes with tacos. Just after that point is when I realized that the adage of BBQ being ready when it is ready doesn't quite make everyone happy. The temp was going up slowly and I had a very hungry family on my hands. 

Finally, it hit temp. I pulled it off the grill and began to shred it. Soon there was a bowl of the most incredible pulled beef I had ever seen. It was time to eat. After only a couple bites, I realized that this was like unlike any taco Tuesday we have ever had in the family. The difference between a typical skillet ground beef taco and a smoked pulled chuck roast is unbelievable. The family certainly agreed as it was all eaten almost instantly.

IMG_20170903_163036801.jpg

Like I said, I can hardly see me pulling off this smoke on a weeknight for a quick taco dinner. At the same time, I would certainly be able to cook this on the weekend and save it for a mid-week meal. It was a very enjoyable BBQ twist to a pretty standard meal in my house.

Ironically the next night I was at Mikey's house to eat pulled chicken and pulled pork tacos which he made. Obviously, there is a difference between them...But at the very least I feel my pulled beef tacos certainly were in the same category.

Until next post, remember kids.....CHUNKS not chips!

Chicken Done Right!

So in this post, I decided to take on my arch nemesis, the chicken. I figured if I fail at cooking the whole bird, maybe if I only cook parts of the bird I can succeed. 

Chicken and I have a torrid past. It is odd because in a lot of ways this bird is a staple of life. Chicken is on everything and served everywhere. Chicken is in salads and on pasta. The reality is, it is a versatile meat...and one which apparently everyone can cook but me. And this is where chicken and I part ways. 

See, I don't have anything against chicken when it comes to eating, only cooking. Sure I think the bird has probably gotten a bit used up. I mean it would be great to go to a wedding with a real meal and not this plain old chicken breast sitting there. But whatever, I still enjoy it.

Now in kitchens and on grills across the country, every novice is serving up the bird flawlessly. I mean really, it is a chicken breast, not a brisket, right? Yet every time I have tried to make it, I fail. So I figured now I have more skill, let me do the simple and take on the plain chicken breast. 

Don't think my reasoning for this cook was purely grudge based. The reality is I want to enjoy BBQ more than the weekends, while not having the time to cook. So I figured, if I could grill up a set of fantastic chicken breasts, I could be eating those all week long. Hell, I could put it on salad or pasta of my own. 

So I did it, I bought a pack of chicken breasts and I was committed to making this work. Despite this being an exceedingly simple cook to most, I needed to consult the great Oracle of Mikey for guidance. His guidance was also exceedingly simple. Not that I expected it to not be, but still, there had to be some secret. If it was this simple I should be able to do it. Somewhere along my many battles with chicken I had gone done some wormhole believing that I failed because the breasts were too thick and thus impossible to cook unless I beat the shit out of them with a hammer first.

So like I said, I was still a little surprised at the simple advice. 250, rub them, cook until they get to 145, then finish on the coals. For the rub, I decided to go with Historic BBQ's Red. For smoke, I went with just a kiss of cherry. So now I had a plan.

I rubbed all the breasts with a little olive oil and then the Historic Red Rub. I fired up the kettle got her to a steady 250 and it was time for this epic battle to begin. Even though this was chicken, I tried to pretend this was just like every other cook I have done. I stayed on task and watched the temp hit 145. I finished them up on the coals and brought them inside. 

I will admit I was super nervous biting into this chicken, far more nervous than anything else I cooked. It looked great, but I could not help but think that despite its looks the chicken had bested me again. To my surprise, it tasted great. It was cooked perfectly!

More than just cooking another BBQ meal, this was my first attempt at letting my weekend cook feed me throughout the week. It worked great. All week long I had a base in which I could easily throw together a great lunch. There is something very enjoyable about taking out a lunch based in great BBQ, even if it is a left over.

So while I have not conquered the chicken completely, successfully cooking chicken breasts is a huge step in the right direction. One day soon I will face off against the bird and I will be victorious!  

Until next post, remember kids.....CHUNKS not chips!